The world of consumer 3D printing has shifted dramatically in the last few years. Machines that once crawled at 50 mm/s are now racing past 500. With companies like Bambu Lab pushing the boundaries of high-speed, multi-material printing, Creality has answered with its own flagship model: the Creality K1 Max.
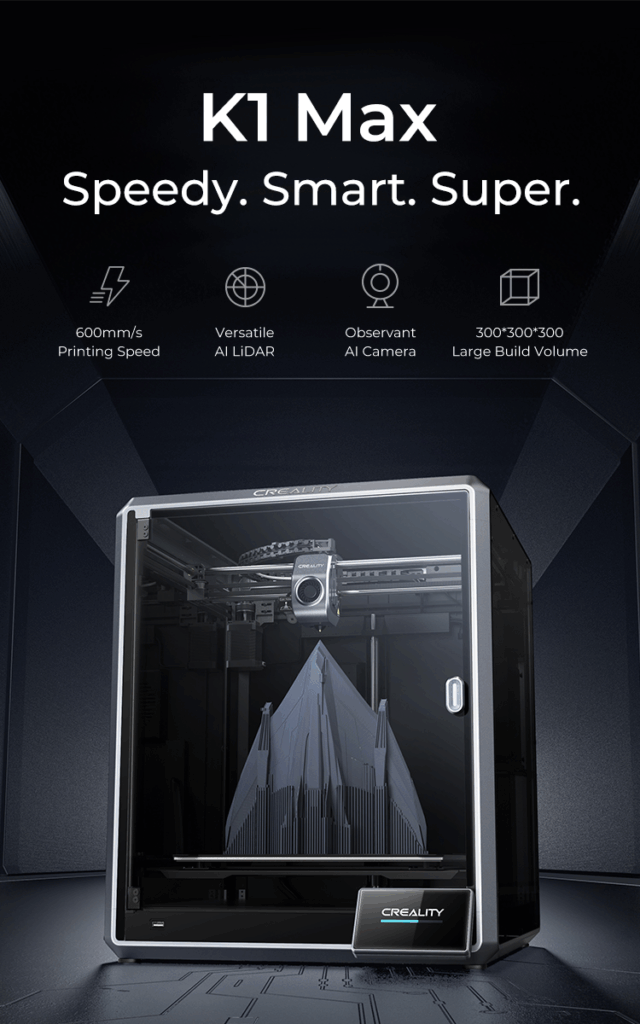
This CoreXY 3D printer isn’t subtle about its ambitions. It’s big, it’s fast, and it’s packed with smart tech — including AI-powered bed leveling, onboard print monitoring, and a 300 x 300 x 300 mm build volume that rivals industrial-class machines. But as with many ambitious tools, the real story of the K1 Max is one of complexity: outstanding potential, shadowed by flaws that can make or break the experience depending on your technical comfort level.
The First Impression: Big, Bold, and Nearly Ready
Unboxing the K1 Max is an exciting experience. Unlike many DIY-style printers, it arrives nearly assembled. The sleek glass panels and die-cast aluminum frame give it a professional look that suggests this isn’t just a hobbyist’s toy — it’s a machine made for rapid prototyping, prop building, and small-batch production.
But that polish doesn’t always carry through to the internals. While the outer frame is solid, user reports and personal experience often point to minor imperfections: slightly warped beds, misaligned components, or inconsistent finishes on internal parts. These aren’t always dealbreakers, but they do signal a trade-off. For Creality to offer this many machines at this price point, corners may have been cut in quality control.
Speed Isn’t Just Marketing — But Quality Needs Work
The standout feature of the K1 Max is its speed. Creality claims a maximum print speed of 600 mm/s and acceleration up to 20,000 mm/s², enabled by a CoreXY motion system and a lightweight printhead that glides along dual belts. These specs aren’t just for show: real-world print tests confirm that, under optimized conditions, this machine flies. Benchmark models like the classic 3DBenchy have been completed in under 17 minutes, putting the K1 Max firmly in competition with Bambu Lab’s fastest systems.
But speed alone doesn’t print beautiful parts. While the K1 Max can reach these breakneck speeds, quality often demands compromise. For functional parts and large prototypes, its rapid pace is a serious advantage. Yet for detailed models, especially those with tight curves, small fonts, or intricate supports, dialing back the speed to 250–350 mm/s is usually necessary to avoid ringing artifacts or surface banding.
This balancing act between speed and fidelity is not unique to the K1 Max, but it’s particularly noticeable here because the machine encourages you to push the limits. If you’re printing for looks — say, a cosplay helmet with clean surfaces — you’ll need to test and tune. But if you’re printing functional prototypes where form follows function, that extra throughput is a game-changer.

Print Quality Potential — With Some Tuning Required
When properly configured, the K1 Max delivers excellent print quality. Its hardened steel nozzle, all-metal hotend, and robust cooling system allow for crisp bridges, strong overhangs, and decent detail even at higher speeds. The CoreXY motion system contributes to stability during fast moves, and the dual-gear direct drive extruder provides strong grip on filament, helping prevent skips or under-extrusion.
That said, out-of-the-box performance can be inconsistent. Some users report vertical fine artifacts (VFAs), first-layer irregularities, or occasional Z-banding. While these defects aren’t universally experienced, they often stem from factory misalignment, inconsistent firmware calibration, or warped beds that even the automatic leveling system can’t fully compensate for.
The key takeaway is this: the K1 Max has serious hardware potential, but print quality depends on your willingness to tweak. For many users, success comes after re-running mesh calibrations, manually leveling the Z-axis, or even physically shimming the bed with foil tape. That might sound daunting, but in the hands of an experienced user, these are solvable problems — and the results are worth it.
A Closer Look at the AI Features: Vision vs. Reality
Creality has leaned heavily into “smart printing” with the K1 Max, and its two most ambitious features — an AI LiDAR sensor and AI camera — are intended to automate bed leveling, first-layer inspection, and failure detection.
In concept, this is a huge step forward. The LiDAR system scans the bed tilt and first-layer thickness with micrometer resolution. The camera monitors the print in real time, pausing the process if it detects issues like filament spaghetti, layer detachment, or missing features.
But in execution, these features often fall short. Users have reported the LiDAR failing to detect obvious bed inconsistencies or misreading the first layer entirely, particularly on anything other than Creality’s stock smooth PEI build surface. The AI camera is similarly inconsistent. It might miss an actual failure, or worse, trigger a false positive that pauses your print mid-layer, leading to visible seams or layer shifts.
In many cases, users choose to disable these features entirely — either to reduce risk or simply to avoid frustration. This doesn’t mean they’re useless, but their current reliability doesn’t live up to the hype. For now, they feel more like experiments than essential tools.
The Filament Path Problem and the Noise Factor
Beyond AI, there are two major pain points that surface repeatedly in user communities: filament loading and noise.
The K1 Max’s rear-mounted spool holder feeds filament through a long PTFE tube that loops around to the top of the printer before reaching the extruder. This path introduces friction and awkwardness, making filament swaps a hassle, especially with flexible materials like TPU. Users frequently report having to manually disconnect the tube, cut a new angle on the filament tip, or physically push the filament past snags.
As for noise, the K1 Max is loud. Its multiple high-speed fans and rapid CoreXY movements generate a constant, high-pitched whirr, especially during long prints. Removing the top lid for PLA prints — a common tip to prevent heat creep — only makes this more audible. If you work in a shared space, prepare for complaints.
While both of these issues are solvable (community mods for spool relocation and quieter fans abound), they are notable shortcomings in a machine otherwise billed as premium.
Material Versatility Without Multi-Color Magic
Despite its flaws, the K1 Max deserves credit for one major strength: it prints a wide range of materials. Thanks to its 300°C hotend, enclosed build chamber, and hardened nozzle, it can handle not only standard filaments like PLA and PETG but also engineering-grade options like ABS, ASA, Nylon, PC, and carbon-fiber-reinforced blends.
However, one thing it doesn’t do — at least not natively — is multi-material or multi-color printing. There’s no equivalent to Bambu Lab’s AMS system. You can manually change filaments mid-print with pause commands, or install third-party add-ons like the 3D Chameleon or Mosaic Palette, but these require custom configuration and technical confidence.
For users who care more about material performance than color variety, this won’t matter. But for designers or educators who want multi-color visuals, this is a clear gap in Creality’s offering.
Software: Usable but Restricted
The K1 Max runs Creality OS, a custom fork of Klipper firmware. The interface is clean, responsive, and beginner-friendly. Print previews, network setup, and camera access are all intuitive. But under the surface, it’s locked down.
Unlike open Klipper installations, you can’t easily create custom macros, modify config files, or use advanced tuning tools without rooting the printer. This frustrates experienced users who expect full control over motion parameters, pressure advance, or slicer integration.
Thankfully, rooting the printer is possible, and once done, you can run interfaces like Fluidd or Mainsail, gaining access to everything Klipper offers. But again, this is not for the faint of heart. Creality’s firmware simplifies the experience for beginners, but at the cost of limiting the printer’s full potential.
K1 Max vs. Bambu Lab P1S: Which Is Right for You?
The most obvious competitor to the K1 Max is Bambu Lab’s P1S. Both printers are fast, enclosed, and marketed to similar audiences. The P1S offers a smaller build volume (256 mm³ vs. Creality’s 300 mm³), but its out-of-the-box experience is widely regarded as superior. Bambu’s ecosystem — from its slicer to its AMS system — is highly polished, tightly integrated, and just works.
The K1 Max, by contrast, offers more build space and slightly faster peak speeds. It also supports Ethernet, which Bambu charges extra for. But Creality’s software is rougher, and the overall experience is less refined.
In short, if you want volume, speed, and hardware flexibility, the K1 Max is a better value. If you want plug-and-play reliability and multi-color automation, the Bambu P1S is the stronger choice, even at a slightly higher price.
Final Thoughts: A Beast for the Bold
The Creality K1 Max is not the perfect 3D printer, but it’s an exciting one. It’s fast. It’s big. It’s capable of serious output across a range of materials. And for its price, it’s hard to beat in raw specs alone.
However, to get the most out of it, you’ll need to be hands-on. You’ll need to tweak, test, and possibly root the firmware. This printer rewards skill and patience more than it offers convenience. It’s a machine with big potential — but only if you’re willing to meet it halfway.
If you’re the type who loves to mod, optimize, and push your hardware to its limits, the K1 Max offers a lot of value and a solid platform to grow on. But if you’re looking for a seamless user experience, minimal maintenance, and reliable performance from day one, you might want to look elsewhere — or wait for a second-generation model that smooths out the rough edges.
Have questions, thoughts, or experience with the K1 Max? Leave a comment below or share your prints on social media with the hashtag #K1MaxMods. Let’s help each other get the most out of this bold machine.
| Feature | Creality K1 | Creality K1 Max | Creality K1C |
|---|---|---|---|
| Build Volume | 220 x 220 x 250 mm | 300 x 300 x 300 mm | 220 x 220 x 250 mm |
| Max Speed (Claimed) | 600 mm/s | 600 mm/s | 600 mm/s |
| Enclosure Material | Polycarbonate | Glass + Aluminum Frame | Glass + Carbon Panels |
| Bed Heating | 350W (DC) | 800W (AC) | 350W (DC) |
| AI LiDAR | Optional Add-on | Included | Not Included |
| AI Camera | Optional | Included | Included |
| Carbon Fiber Compatibility | No | Yes (with hardened nozzle) | Yes (primary focus) |
| Ethernet Port | No | Yes | No |
| Firmware Base | Creality OS (Klipper-lite) | Same | Same (with improvements) |
| Approximate MSRP (USD) | $400–$599 | $750–$899 | $540–$599 |
Check out the CREALITY Series Here


