One of the most common questions when starting with 3D printing is whether to use a raft or brim on your prints. Both have advantages and disadvantages, so it’s essential to understand the difference between them before deciding which one to use.
Rafts vs. brims on 3D prints: what’s the difference?
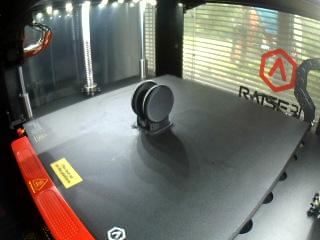 Rafts and brims are popular choices for 3D printing, but what’s the difference? Rafts support your print by creating a dense material grid underneath your object. It can be helpful for prints with large overhangs or delicate features. Brims make a flat, broad base that helps prevent warping and provides extra adhesion to the build plate. Both options will use additional material, so it’s essential to consider which suits your project.
Advantages and disadvantages of each
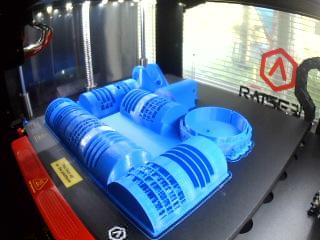
A raft is a solid base that extends beyond the edge of your print, while a brim is simply an extension of your first layer around the entire circumference of your part. The choice between using a raft or brim depends on several factors,
 Such as the size and detail of your print,
- The material you are printing with,
- And how well Your printer adheres to its build platform.
- Rafts are generally recommended for larger prints or prints with intricate features because they provide a more stable foundation that prevents warping and curling during longer builds.
Which one should you use?
 If you’re new to 3D printing, you might wonder what the difference is between a raft and a brim. Both are used to improve the adhesion of your print to the build plate, but they work in different ways. Here’s a quick rundown of the differences between rafts and brims: Rafts are like benches that go around your object on all sides. They offer extra support so your thing doesn’t warp or detach from the build plate during printing. Rafts are typically used for larger prints or those with complex geometries.
Advantages of 3D Printing Raft
- It furnishes the best bed adhesion for prints and lowers the chance of warping compared to the brim.
- It confirms that the print bed is level, the extruder is working correctly, and the nozzle is clear.
Disadvantages of 3D Printing Raft
- Compared to other adhesion aids, most material consumption and waste.
- the most prolonged additional print time compared to other adhesion aids
- Print removal from the raft design is complex. It may show inexact bottoms.
Advantages of 3D Printing Brim
- Reasonable material use and waste production
- Slightly extended print time (less than a raft)
- Facilitates fantastic bed adhesion for the initial layer of prints
- It shows that the print bed is level, the extruder is working accurately, and the nozzle is clear.
Disadvantages of 3D Printing Brim
- Sanding or cutting might be needed.
- Brims yield a relatively minimal amount of waste.
- It is recommended to remove the brim carefully because it is likely to damage delicate geometries.
 Knowing a few additional bed adhesion tips and tricks is helpful if you’re looking for a way to keep the first layer of your prints firmly attached to the print bed.
Other techniques for keeping your 3D prints grounded are listed below:
- Use glue or another adhesive: The filament flowing out of your printer’s nozzle will stick to the bed more readily, thanks to these sticky materials, producing a better first layer.
- Increase bed temperature: Bed temperature is another element that affects how well the first layer adheres to the print surface. Increasing it is a great way to make your first layer adhere better, but raise it only a little.
- Level the bed: Before beginning a print, leveling the bed should be done because an uneven bed will almost certainly cause problems with the first layer and the rest of the 3D image.
- To ensure that the nozzle remains at a constant height above the print surface throughout, we recommend that you level your bed before every few prints.
- To properly lay out the filament, also be sure to set the appropriate Z-offset.
- Change the build plate: Bed adhesion problems may continue even after trying everything. If you have an outdated or heavily-used build plate, replacing it might be the best course of action, though it shouldn’t be your first choice.
- Consider getting a glass or PEI-coated build plate if you plan to replace it because these offer excellent first-layer adhesion.
- Dry your filament: Last but not least, drying your filament can aid in bed adhesion, albeit in a different way than the other suggestions we’ve offered. Furthermore, drying out your filament makes it easier to adhere the 3Dprint to the surface in contrast to our other tips, which focus on getting the printer’s parts to provide bed adhesion. It can be accomplished by either using a filament dryer or gently heating it.
Can You Help?
We would love to know what you think. Please do us a favor and comment if you have a moment.
It enables us to improve upon everything we do.
We’ve made leaving a comment or question easy! Just go below.
Some of the links in this article are affiliate links. If you were to buy something after clicking on one of these links, I would get a small commission that might help me get a new printer for the shop!
Thanks for being part of the community!
Bulwinkle


