
Updated August 2026: This review has been refreshed with current 3DMakerpro specifications, current model comparisons, clearer scan-to-print guidance, and practical buying advice.
Can an affordable handheld scanner actually capture enough usable geometry for 3D printing, design work, props, and replacement-part projects? The 3DMakerPro Moose makes a strong case with AI visual tracking, full-color capture, and a stated single-frame accuracy of 0.03 mm—but it is not automatically the right scanner for everyone.
This updated review looks beyond the headline specifications to answer the question that matters: Does the Moose fit the objects and workflow you actually want to scan?
Affiliate Disclosure: Some links in this article are affiliate links. If you purchase through one of them, I may earn a commission at no additional cost to you. That does not change which scanner I believe best fits a particular job.
Quick Answer
Is the 3DMakerPro Moose one of the best affordable 3D scanners? For someone who wants medium-format scanning, full-color textures, AI-assisted tracking, and fine geometry without moving into industrial-scanner pricing, it remains a compelling choice.
However, Moose Lite can be the better value if you only need geometry, while the Seal is better suited to very small objects where maximum fine-detail capture matters more than scanning range.
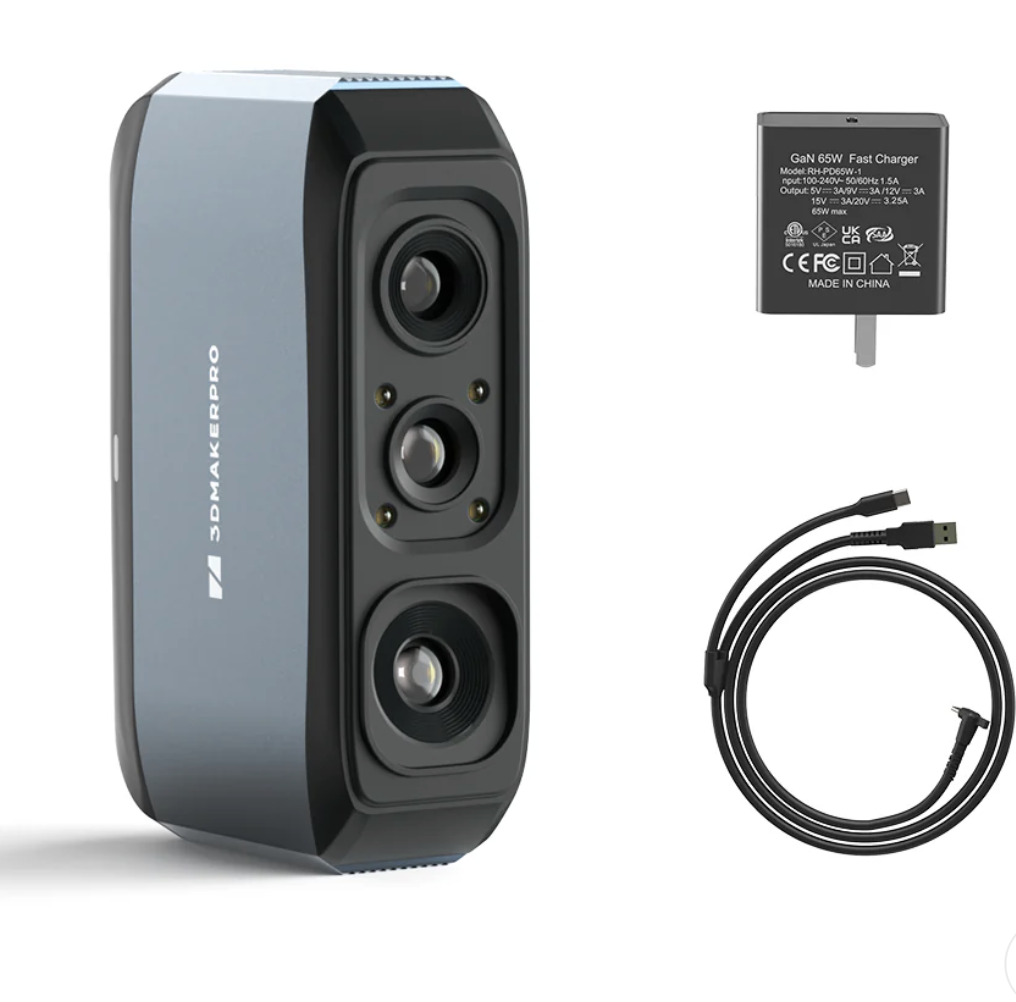
3DMakerPro Moose at a Glance
The Moose sits in an interesting part of the scanner market. It is significantly more capable than the cheapest entry-level devices, yet it is still aimed at makers, designers, educators, content creators, and small shops rather than metrology labs.
According to 3DMakerpro’s current specifications, the Moose uses a blue LED light source, AI visual tracking, a 200 × 100 mm single-capture area, and a recommended working distance of 150–400 mm. The manufacturer lists typical object sizes from roughly 15 mm to 1500 mm.
| Moose specification | Current stated figure | Why it matters |
|---|---|---|
| Accuracy | 0.03 mm | Useful for capturing relatively precise surface geometry. |
| Resolution | 0.07 mm | Helps preserve smaller surface features. |
| Tracking | AI visual tracking | Reduces dependence on markers for many objects. |
| Texture | 24-bit color | Useful for digital assets, preservation, reference models, and visualization. |
| Frame rate | 10 fps | Supports handheld capture without requiring an elaborate stationary rig. |
| Typical object range | 15–1500 mm | Makes Moose more versatile than scanners designed strictly for miniatures. |
| Output formats | STL, OBJ, PLY, ASC | Covers common mesh, printing, and point-cloud workflows. |
Specifications should always be checked before purchasing because software, bundles, availability, and product listings can change. See the current 3DMakerpro Moose specifications.
What I Like About the Moose
The strongest argument for the Moose is not one specification. It is the combination of medium-format scanning, color capture, relatively fine resolution, and marker-free visual tracking in one compact scanner.
1. The Object-Size Range Is Practical
A scanner can have impressive accuracy and still be frustrating if its field of view does not match what you scan. The Moose is designed for a useful middle ground: larger than miniature-only scanning but still detailed enough for many parts, props, sculptures, footwear, household items, and maker projects.
If most of your work involves very large furniture, vehicles, rooms, or architecture, look at a large-format or LiDAR solution instead. My 3DMakerpro 3D Scanner Buyer’s Guide explains how the company’s scanner families separate by object size and workflow.
2. Full-Color Capture Expands What You Can Do
Color is unnecessary when your only objective is to recreate geometry for a functional 3D print. But it becomes valuable when scanning collectibles, art objects, educational models, digital assets, props, historical objects, or anything where surface appearance matters.
That distinction is one reason I would not automatically tell every buyer to spend more for the Moose. If your workflow ends in CAD reconstruction and a gray STL file, Moose Lite deserves a serious look.
3. AI Visual Tracking Reduces Setup Friction
One of the biggest frustrations in handheld scanning is losing tracking. A scanner needs enough recognizable surface geometry or texture to understand where it is as you move around an object.
The Moose’s AI visual tracking is designed to make that process more forgiving. It does not mean tracking can never be lost, but it reduces the marker-heavy setup that made earlier affordable scanning workflows feel far more technical than they needed to be.
Moose vs Moose Lite vs Seal: Which One Makes More Sense?
This comparison is more useful than simply asking which scanner has the best specifications because these machines are intended for different jobs.
| Scanner | Best fit | Accuracy | Resolution | Texture | Typical size range |
|---|---|---|---|---|---|
| Moose | Medium objects + color | 0.03 mm | 0.07 mm | 24-bit color | 15–1500 mm |
| Moose Lite | Lower-cost geometry capture | 0.05 mm | 0.10 mm | Monochrome | 15–1500 mm |
| Seal | Small, highly detailed objects | 0.01 mm | 0.05 mm | 24-bit color | 10–300 mm |
Choose Moose if: you regularly scan medium-size parts or objects and value both color and finer geometry.
Choose Moose Lite if: budget matters more than color and 0.05 mm stated accuracy is adequate.
Choose Seal if: most of your objects are small and maximum fine-detail capture is more important than scanning larger subjects.
The Most Important Reality: A Scan Is Not Automatically a Printable Part
This is where scanner marketing and real-world 3D printing sometimes part company.
A beautiful mesh may still need holes repaired, unwanted surfaces removed, smoothing, alignment, scaling, dimensional verification, or partial reconstruction before it becomes useful.
And if you are reproducing a functional component, I would not trust a scanner alone for critical interfaces such as screw holes, bearing seats, snap fits, shafts, tabs, mating surfaces, or alignment features.
Kevin’s practical scan-to-part rule
Use the scan to capture the hard-to-measure shape. Use calipers, gauges, known dimensions, CAD constraints, and test prints to control the features that actually have to fit.
That same thinking applies to replacement-part work. A scan can dramatically reduce the amount of geometry you create from scratch, but a test fit still matters before committing to the final print.
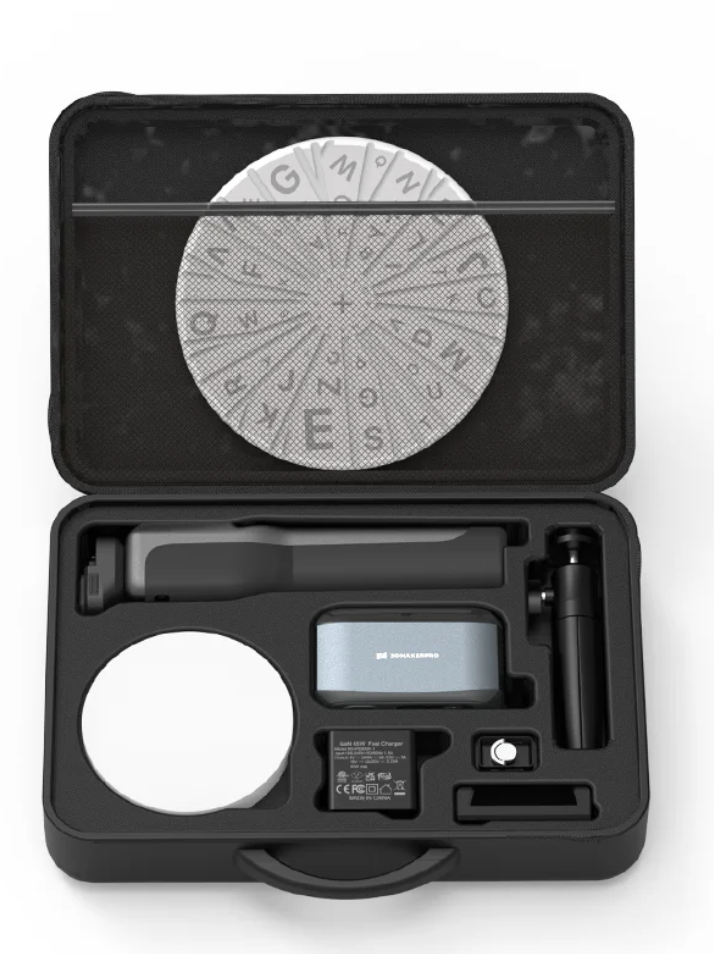
Moose Scan-to-Print Planner
Before buying any scanner, run your project through these four questions. They will tell you more than comparing specification sheets for another hour.
How large is the object?
Medium-size objects are a strong Moose fit. Tiny detailed subjects may favor Seal; very large subjects may need another scanner class.
Do you need color?
If you only need geometry for CAD or printing, paying for full-color capture may not add much value.
What surfaces are involved?
Reflective, transparent, very dark, or difficult surfaces may need preparation or scanning spray.
What happens after scanning?
Know whether you need an STL, textured digital model, cleaned mesh, or dimensionally controlled CAD part.
Can the Moose Scan Black, Shiny, or Transparent Objects?
Sometimes—but these surfaces remain challenging for optical 3D scanners in general.
Polished metal can reflect projected light. Transparent objects can transmit it instead of returning usable surface information. Very dark surfaces may absorb too much of the projected light.
For difficult subjects, surface preparation can make a major difference. A removable scanning spray can create a temporary matte surface that gives the scanner something easier to capture.
Important: Always check whether a scanning spray is safe for the object being scanned. Do not coat valuable, porous, historic, delicate, food-contact, or sensitive surfaces without confirming compatibility.
JMStudio and the Software Side of the Workflow
Hardware gets most of the attention, but scanner software can determine whether you enjoy owning the machine.
3DMakerpro uses its JMStudio software for capture and processing. The current workflow supports real-time scanning, optimization, alignment, and export to formats including STL, OBJ, PLY, and ASC.
STL is useful when you mainly need printable geometry. OBJ can preserve texture-related information for workflows where appearance matters. PLY and point-cloud-oriented formats can be useful when the scan is moving into other reconstruction or processing tools.
For a broader look at how this ecosystem compares with another major scanner brand, see my 3DMakerpro vs Creality 3D Scanner comparison.
Where the Moose Makes the Most Sense
Replacement Parts and Reverse-Engineering References
Irregular housings, handles, trim pieces, curved covers, sculptures, and other organic shapes can be tedious to recreate with measurements alone. A scan gives you a geometric reference from which to begin rebuilding the part.
For functional components, I would still rebuild critical mating features parametrically in CAD rather than assuming every polygon in the mesh represents a finished engineering dimension.
Props, Cosplay, and Sculpture
This is one of the Moose’s strongest applications. Organic shapes are exactly where scanning can save substantial modeling time, and full-color textures add value when the model will also be used digitally.
Education and Demonstration
Scanning a physical object and turning it into a digital model gives students a direct bridge between measurement, geometry, CAD, mesh processing, and additive manufacturing.
Digital Archiving and Content Creation
Because Moose supports color capture, it can be more useful than geometry-only scanners for virtual displays, references, digital collections, visualization, and other projects where the object needs to look recognizable as well as maintain its shape.
Where I Would Choose Something Else
The Moose is versatile, but versatility should not be confused with being ideal for every job.
- Only scanning small jewelry-size or miniature subjects? A small-format high-detail scanner such as Seal may be the more logical tool.
- Only need basic geometry? Moose Lite may deliver the better price-to-purpose ratio.
- Scanning rooms, buildings, or very large spaces? Look toward LiDAR or a dedicated large-area workflow.
- Need certified dimensional inspection? An affordable maker scanner is not a substitute for appropriate metrology equipment and processes.
- Need a fully editable mechanical CAD model? Remember that scanning creates geometry data, not automatically a clean parametric design history.
Is the 0.03 mm Accuracy Claim the Same as Guaranteed Part Accuracy?
No—and this distinction matters.
Manufacturer scanner accuracy specifications describe the scanner under defined testing conditions. Your finished result also depends on object surface, calibration, lighting, scanning technique, alignment, point-cloud processing, mesh cleanup, scaling, CAD reconstruction, and ultimately your 3D printer.
That is why I treat scanning as one step in a dimensional workflow rather than as a magic replacement for measurement.
The practical workflow
The scanner can shorten the first half of the job. Good judgment still finishes the second half.
My Verdict: Is the 3DMakerPro Moose Worth It?
Yes—for the right buyer.
The Moose remains an attractive middle ground for someone who wants more than an entry-level scanner but does not need an industrial system. Its combination of 0.03 mm stated accuracy, 0.07 mm resolution, medium-format object coverage, 24-bit color textures, and AI visual tracking gives it a useful range of applications.
But the best reason to buy it is not the specification sheet. It is that your actual projects require what Moose does particularly well.
My buying recommendation
Buy Moose: when you want a versatile medium-format scanner and color capture matters.
Buy Moose Lite: when geometry and affordability matter more than color or maximum precision.
Look elsewhere: when your work is dominated by tiny precision objects, very large environments, or inspection-grade dimensional requirements.
Before You Buy: Use the P.R.I.N.T. Method™
A scanner is most useful when it solves a clearly defined problem. My P.R.I.N.T. Method™ works just as well before purchasing scanning equipment as it does before starting a print.
- P — Problem: What physical object or geometry are you trying to capture?
- R — Requirements: What size, detail, color, dimensional accuracy, and output format do you need?
- I — Interfaces: Which dimensions or mating surfaces still need direct measurement?
- N — Next-Best Materials & Methods: Is scanning actually better than measuring, photographing, or modeling from scratch?
- T — Test & Tune: Scan a manageable object first, process it, print a test, and learn where the complete workflow needs adjustment.
If you’re building your overall 3D printing workflow as well as learning scanning, my Practical Guide to 3D Printing: 2026 Expanded Edition covers the planning, measurement, material, calibration, troubleshooting, and test-first habits behind reliable projects.
Quick Knowledge Check
Open each question after you choose your answer. The answers stay hidden until you want them.
1. Is Moose automatically the best choice simply because it has better specifications than Moose Lite?
Answer: No. Moose Lite can be the better value when you do not need full-color textures or the Moose’s tighter stated accuracy and resolution.
2. Does a finished scan automatically become an accurate replacement part?
Answer: No. Functional interfaces may still require measurement, CAD reconstruction, dimensional verification, cleanup, and test fitting.
3. Which surfaces are most likely to require additional preparation?
Answer: Transparent, reflective, polished, and some very dark surfaces can be difficult for optical scanning and may benefit from appropriate surface preparation.
4. When does the Moose make the strongest buying case?
Answer: When you regularly scan small-to-medium or medium-size objects and want a combination of relatively fine geometry, AI visual tracking, and full-color texture capture.
Frequently Asked Questions
Is the 3DMakerPro Moose good for beginners?
It is designed to reduce some of the friction traditionally associated with handheld 3D scanning, particularly through AI visual tracking and guided software. There is still a learning curve involving lighting, movement, surface preparation, alignment, cleanup, and mesh processing.
Can the Moose create STL files?
Yes. JMStudio supports STL export along with OBJ, PLY, and ASC. Keep in mind that exporting an STL does not guarantee that every scan is immediately ready for functional 3D printing.
Can the Moose capture color?
Yes. The current Moose specification lists 24-bit color textures. Moose Lite is the lower-cost alternative but uses monochrome texture capture.
Is Moose better than Moose Lite?
Technically, Moose offers tighter stated accuracy and resolution plus full-color capture. But Moose Lite can represent better value when those advantages are unnecessary for your projects.
Is Moose better than Seal?
They serve different jobs. Seal emphasizes very small, detailed objects and has tighter stated accuracy and resolution. Moose covers a much broader medium-format object range.
Can I scan a broken part and immediately print another one?
Sometimes a scan gets you close, but functional replacement parts frequently need mesh cleanup or CAD reconstruction. Critical dimensions should be measured and the replacement should be test-fitted before being trusted in service.
Does a 0.03 mm scanner specification mean my printed part will be accurate to 0.03 mm?
No. Final dimensional accuracy depends on the entire workflow, including the scan, alignment, processing, modeling, slicing, material behavior, printer calibration, orientation, and post-processing.
Does the Moose require scanning markers?
Its AI visual tracking is intended to support marker-free scanning in many ordinary situations. Feature-poor or particularly difficult objects may still require changes to the scanning approach.
Final Take
The 3DMakerPro Moose is not interesting because it eliminates modeling, measurement, or judgment. It is interesting because it can make one of the hardest parts of reverse-engineering and digital creation—capturing complex physical geometry—considerably faster.
For makers who understand where scanning ends and CAD or mesh work begins, that can be an extremely useful capability.
If your projects involve medium-size objects, complex curves, props, reference geometry, digital assets, or scan-to-print experimentation, the Moose remains one of the more compelling affordable full-color options in the 3DMakerpro lineup.
What would you scan first? A discontinued replacement part? A sculpture? A prop? Something nearly impossible to measure with calipers? Share your project in the comments—I’m especially interested in the shapes that have made you consider buying a scanner in the first place.

Hey Kevin, Good write up there!
Thanks a lot! I appreciate you saying that. I’m glad you found it to be a good write-up.