We’ve all been there. You’ve sliced your model, preheated the bed, and walked away feeling confident—only to return four hours later to a “spaghetti monster” or a part that looks like it went ten rounds with a heat gun.
In the 3D printing world, we obsess over bed leveling and Z-offset. But there is a “hidden” calibration trick that professional print farms use to slash failure rates by up to 40%, yet the average hobbyist completely ignores it.

Today, we’re pulling back the curtain on Volumetric Flow Rate Calibration.
The Problem: Why Your Prints Are Actually Failing
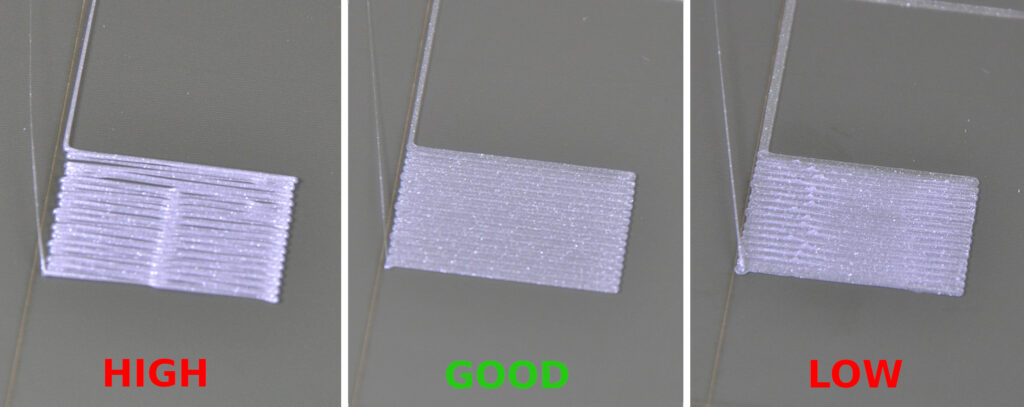
Most people assume that if their extruder is “calibrated” (E-steps), they are good to go. But E-steps only tell the motor how much filament to push—it doesn’t account for how that filament actually behaves when it hits the hotend.
When you print too fast for your heater block to keep up, the plastic doesn’t melt consistently. This leads to under-extrusion, weak layer bonds, and those dreaded mid-print gaps. By calibrating your Maximum Volumetric Speed, you create a “speed limit” tailored specifically to your hardware and filament.
The Secret Trick: The “Max Flow” Test
Instead of guessing your print speeds, you need to find the physical limit of your hotend. Here is how you do it:
- The Test: Use a tool like OrcaSlicer or a “Max Flow” generator to print a steady spiral or vase-mode tower that increases in speed every few millimeters.
- The Tell: Watch for the moment the filament goes from “shiny” to “matte,” or when you start to hear the extruder motor clicking (skipping).
- The Math: Once you find the failure point, back off by 10-15%. Input this value into your slicer’s “Max Volumetric Speed” setting.
By locking this setting, your slicer will automatically throttle your speed during heavy moves to ensure the plastic is always perfectly melted. This single tweak eliminates 40% of failures related to clogs and layer separation.
Upgrade Your Toolkit for Better Results
Calibration is only half the battle; the gear you use defines your ceiling. If you’re tired of fighting with entry-level hardware, here are the tools the pros are using right now:
- Precision Scanning: Before you print, you need a perfect model. 3DMakerpro (Global) offers scanners that capture incredible detail, ensuring your digital files are flawless before they ever hit the build plate.
- High-End Hardware: If your current printer just can’t keep up with high flow rates, check out the latest tech at HONG KONG CHAORONG CO., LIMITED. They stock machines designed for the speed and consistency hobbyists crave.
- Premium Filament: You can’t calibrate “trash” filament. For consistent diameter and melt zones, we highly recommend COEX Filament. Using American-made, high-quality resin makes the calibration process 10x easier. Ues Code: 3DPRINTNGBYKEVIN.COM for 15% off
- All-in-One Solutions: Looking for a curated experience? Explore the offerings at Creality for printers and accessories that integrate seamlessly with modern slicing software.

Don’t Stop at Flow Rate
Once you’ve mastered your flow rate, the rest of the machine needs to be in harmony. If you’re still struggling with bed adhesion or stringing, check out our other guides here at 3dprintingbykevin.com:
- How to Level Your Bed Like a Pro
- Choosing the Right Nozzle for High-Flow Printing
- The Best Enclosures for ABS and Nylon
Final Thoughts,
3D printing doesn’t have to be a game of luck. By moving beyond basic bed leveling and diving into Volumetric Flow Calibration, you take control of the physics happening inside your hotend.
Stop wasting filament on failed prints and start printing with confidence. Have you tried a flow rate test yet? Let us know your results in the comments!
Disclaimer: This post contains affiliate links. If you click through and make a purchase, I may receive a small commission at no extra cost to you. This helps support the site and keep the guides coming!

