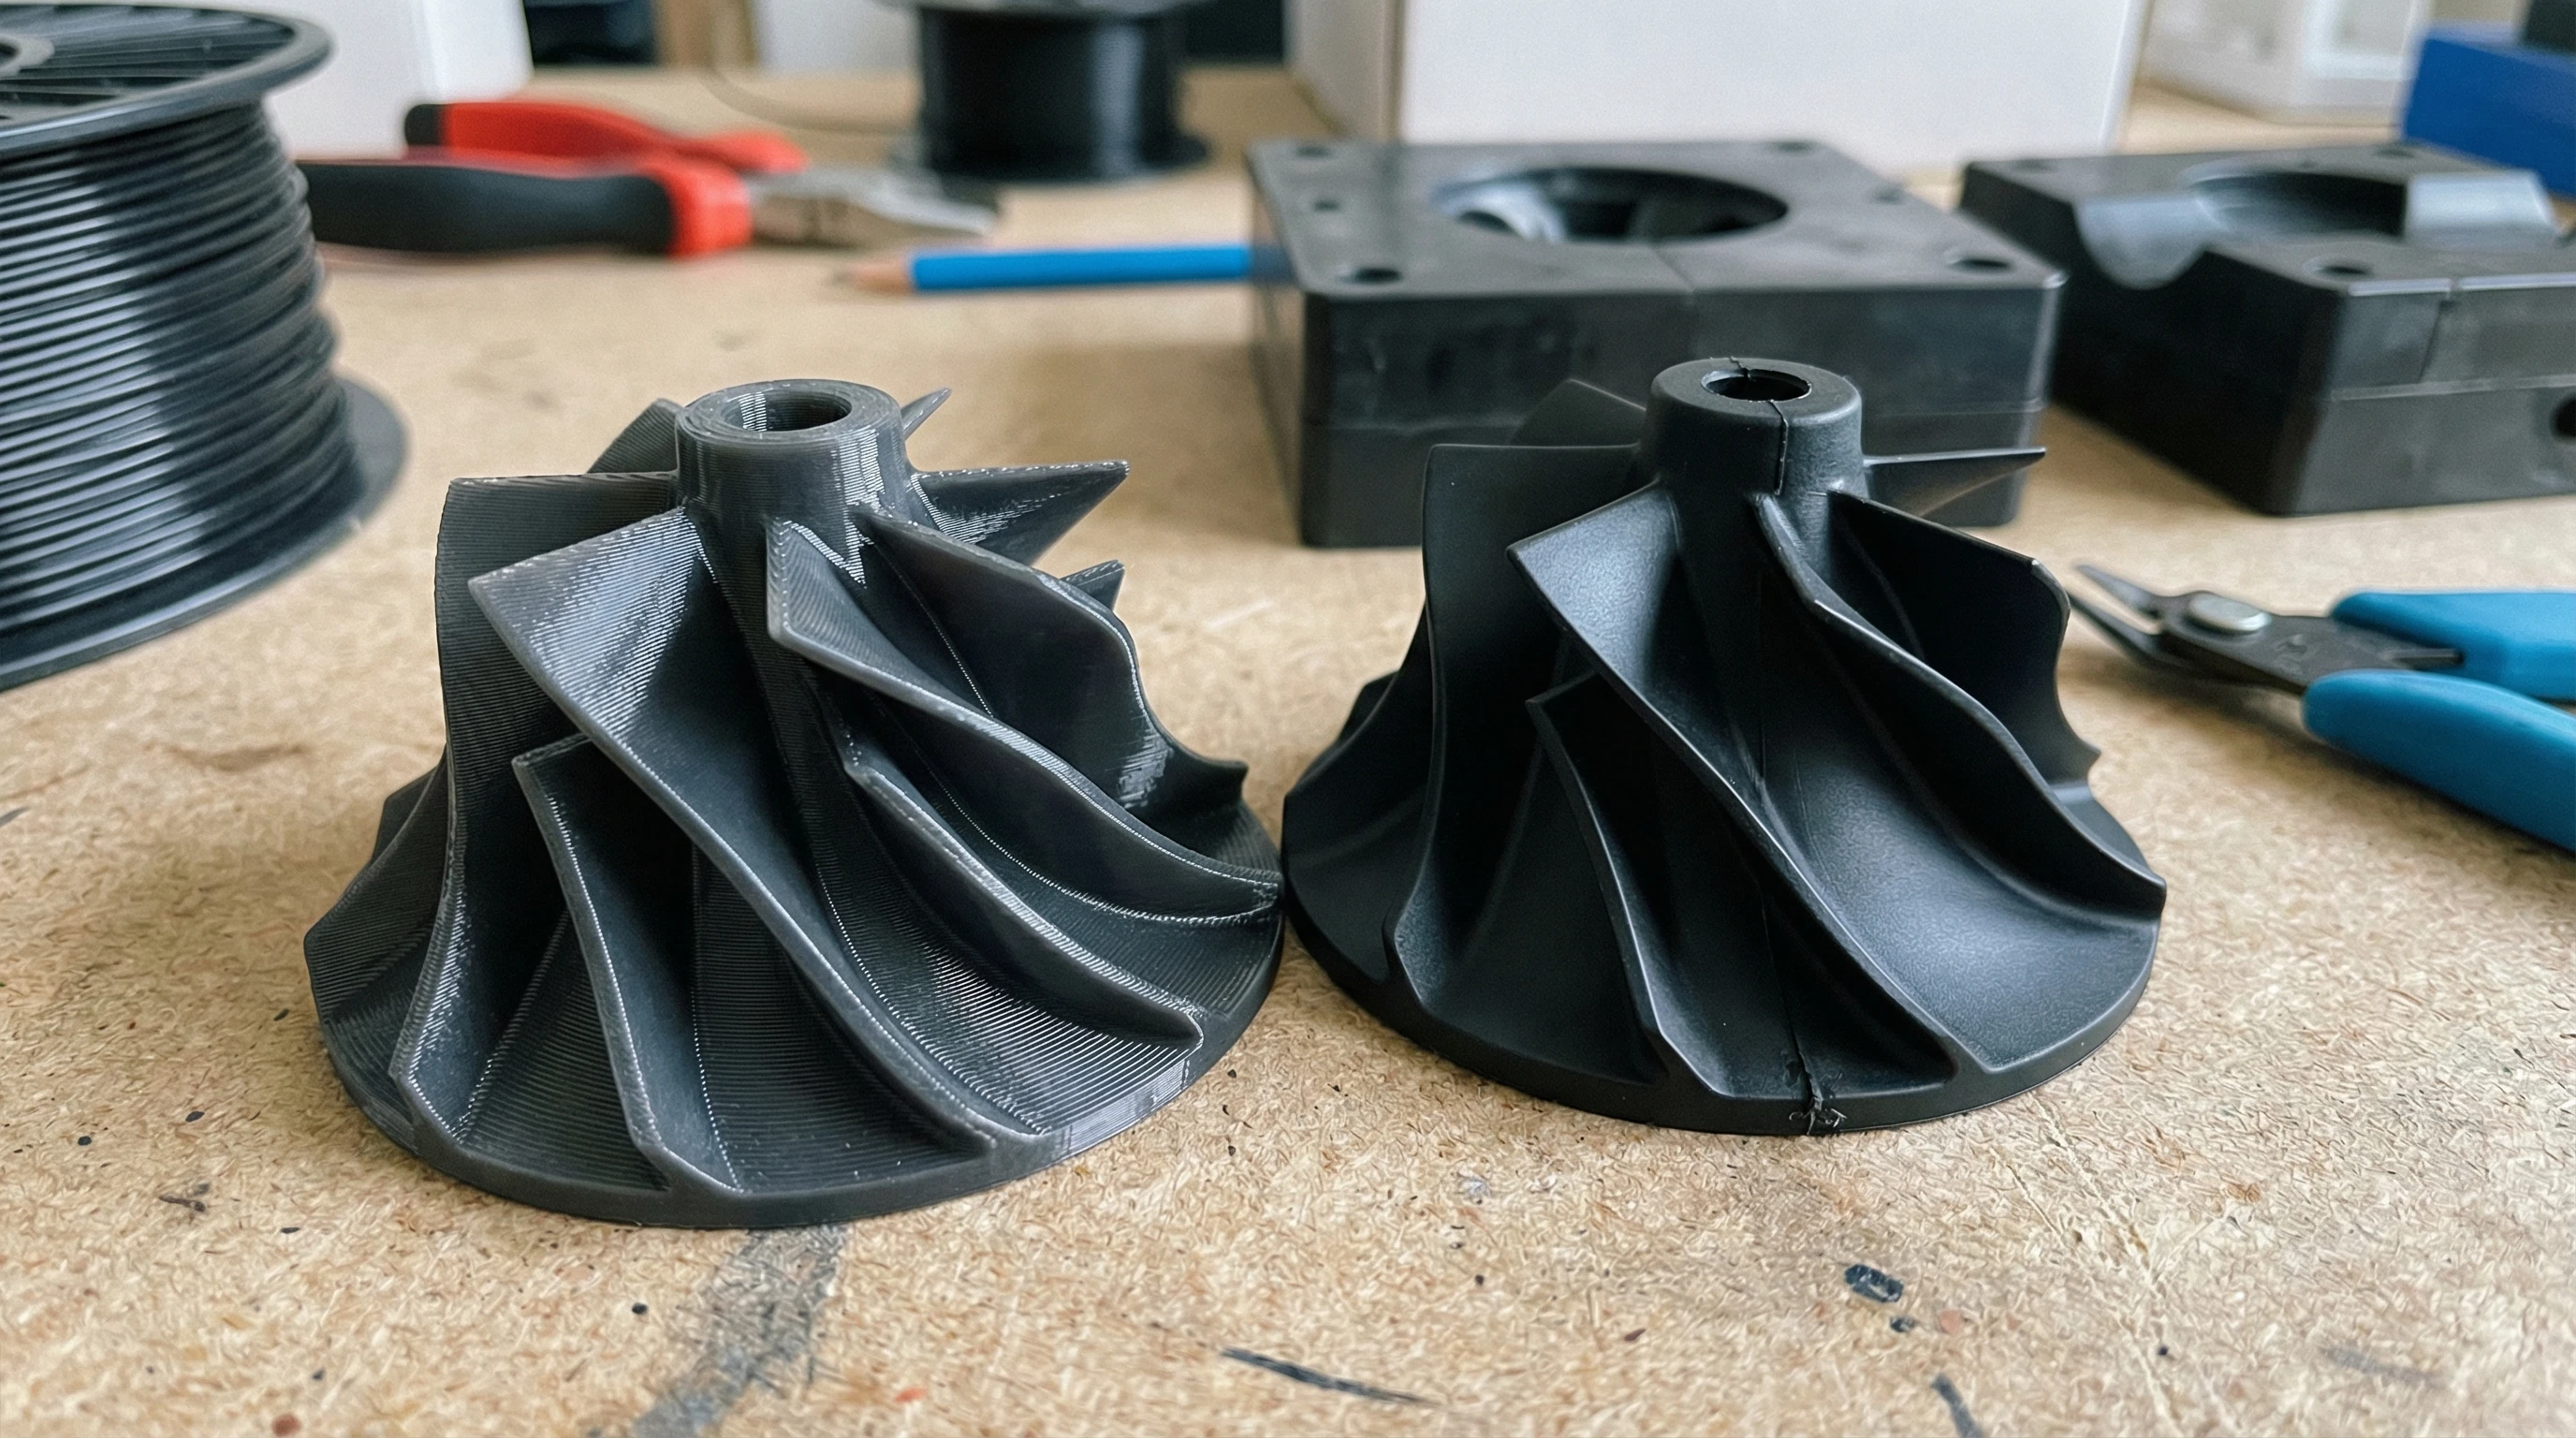
If you have ever held an FDM-printed object and compared it to an actual injection-molded part, the difference can be pretty clear. Getting that smooth, professional look from your 3D prints, especially without spending hours sanding, feels tough. However, with the right approach and a few smart upgrades, you can get finishes that come surprisingly close to injection-molded quality. You don’t need any sandpaper for most projects!
If you have ever held an FDM-printed object and compared it to a true injection-molded part, you know the difference can be pretty clear. Getting that smooth, professional look from your 3D prints, especially without spending hours sanding, feels tough. However, with the right approach and a few smart upgrades, you can get finishes that come surprisingly close to injection-molded quality. You don’t need any sandpaper for most projects!
I’ve worked through this challenge repeatedly with my own printers, and over time, I’ve figured out how to get sharp surfaces, vibrant color, and a finish that feels smooth right off the bed. Whether you’re a hobbyist aiming for a display-ready look or you want your prototypes looking like industrial samples, I’ll share the tricks and settings that really worked for me.
This all-in-one guide covers everything from choosing the right hardware, tuning slicer settings, to post-processing approaches that don’t involve sanding at all. There’s nothing too technical here—just clear, effective steps for common printers and materials like those from Creality and brands found at AWIN Creality, 3DMakerpro, and HONG KONG CHAORONG CO., LIMITED.
Understanding Injection-Molded Quality and the FDM Challenge
Injection-molded parts stand out for their smooth, even surfaces and consistent accuracy. That’s because the mold forms the plastic under pressure, removing layer lines and visible marks. FDM, however, builds each part layer by layer, which often results in subtle ridges or small gaps. Usually, the “default” look of an FDM print features visible lines, as well as the occasional blob or imperfection, depending on your settings and printer.
Sanding and painting can get prints looking perfect, but these techniques are time-consuming and sometimes blur fine details. Instead, focusing on process, materials, and clever settings allows you to skip sanding, save hours, and retain sharp edges and features.
Step 1: Start With the Right Printer and Upgrades
Some FDM printers do a better job delivering that smooth, pro quality print right out of the box. Over the years, I’ve learned that machines with allmetal hotends and direct drive extruders really stand out for sharp, clean details. A flat glass bed or solid build plate makes a noticeable difference for the first layer’s quality, which sets the stage for the entire print.
- Allmetal hotend: Handles higher temperatures for smooth extrusion and gives a boost when working with specialty filaments.
- Direct drive or highquality Bowden extruder: Reduces slack and provides more consistent filament feeding, leading to fewer blobs and clearer surfaces.
- Automatic bed leveling (ABL): Helps you get a perfectly even first layer every time, avoiding warping or rough patches.
- High-resolution stepper motors and solid frames: Provide reliable movement for crisp details.
Affordable printers from Creality or HONG KONG CHAORONG CO., LIMITED can be upgraded with these simple parts if you want sharper results. For those who prefer plug-and-play, 3DMakerpro’s ready-to-go 3D scanners help you capture complex objects at a next-level cool quality. These tweaks may sound subtle, but each one adds up and brings you closer to that factory-fresh look.
Step 2: Choose the Best Filament for a Smooth Finish
The filament you work with can make all the difference. Lower-quality brands or old, moisture-soaked spools can produce uneven lines and visible seams, which mess up the finish. Consistency is key—I’ve found that using well-known, quality brands, especially those designed for a silkier or glossy look, is a real game changer.
- PETG and PLA+: Both extrude smoothly and fill the space between layers better than standard PLA. PETG, when dialed in, has a striking glossy surface.
- Silk PLA: With special additives, this filament gives an almost glassy finish. It’s great for display models and makes colors pop in a way that basic PLA just can’t rival.
- ABS and ASA (with an enclosure): Print a bit tougher, but the finished parts look smoother—especially after chemical smoothing, even before adding paint or other finishes.
- Layer Height: Go with 0.12mm or less for models needing extra smoothness. Smaller steps between layers make lines nearly invisible.
- Line Width: Match the nozzle diameter, or even slightly over-extrude by a percent or two for denser lines and fewer gaps.
- Wall Count: Three or four perimeters build a tougher, smoother shell. For large, flat sections, 15-20% infill prevents sagging.
- Seam Positioning: Use “random” or “hide seam” options to avoid long vertical lines. If your model has a back side, try aligning seams along an edge.
- Top Layer Settings: Turn on “ironing” in your slicer; this setting moves the hot nozzle lightly across the finished top layer, flattening out ridges for a glassy result.
- Print Speed: Going slower (under 35 mm/s) gives visible surfaces more time to smooth out. Faster speeds make parts quicker, but leave rougher skin.
- Cooling: For PLA and Silk PLA, keep fans at full speed. With PETG or ABS, try a lower fan speed for a richer shine and better layer bonding.
- Bed Cleaning: Always wipe your build plate with isopropyl alcohol before starting a major project. Even small smudges or fingerprints can ruin base-layer smoothness.
- Bed Temperature: Try raising the bed temperature a touch within recommended limits. This flatten out the filament and reduces curl or blobs.
- Initial Layer Height: Using a thicker first layer (such as 0.2mm) often fills tiny plate dips and flattens the base for smooth attachment.
- Build Plate Choice: Both glass and PEI work, but glass is my favorite for that mirror polish on the bottom. PEI plates offer better release and a nice matte finish for functional parts.
- Nozzle Upgrades: Use a fresh, high-quality brass or hardened steel nozzle if your prints start looking uneven. Old, worn nozzles or those with buildup leave random imperfections.
- Flow Rate Calibration: Bump up the flow rate by a percent or two when changing filaments. This fills tiny gaps better and creates a sleeker finish.
- Linear Advance: If your firmware supports Advanced or Pressure Advance, test out this feature. It smooths sharp corners and evens up extrusion, making detail areas crisp.
- Print Orientation: Rotate your part in the slicer so the show side is face-down or up, away from support marks and any possible rough handling.
- Ironing Feature: Even if you aren’t changing your model design, enabling the slicer’s ironing option can work wonders for flat top surfaces—pass the nozzle lightly to flatten and polish the area without new material.
- Chemical Smoothing (for certain plastics): Acetone vapor is popular for ABS, but for PLA or PETG, you can try isopropyl alcohol, limonene, or special plastic smoothing solutions. Always follow safety instructions and check with a test piece first.
- Clear Coatings: Applying a thin layer of glossy acrylic or brush-on resin fills micro-layer lines and adds a “wet” look, making the part almost eye-catching. UV-resins, carefully brushed and cured, work well on both small parts and display projects.
- Heat Gun Touch-Up: Quickly passing a heat gun over PLA or PETG relaxes surface ridges and boosts shine—just keep your distance to avoid melting or discoloring.
- Keep vertical faces to a minimum to reduce stair-step effects under direct light.
- Add small fillets or round edges instead of sharp corners—this hides stray lines and catches the light more gently.
- Avoid long, unsupported bridges; try to use arches or natural curves for any visible, structural features.
- Adjust your printer and slicer for ultra-fine layers and clean filament flow.
- Choose a filament that looks and feels right for your goals.
- Jump into ironing, resin coating, or other light finishing to seal and shine top surfaces.
Shop Creality Deals (Trusted Source)
If you’re looking to upgrade your FDM results (cleaner walls, better extrusion consistency, stronger parts), Creality’s current lineup is a solid place to start. I only recommend options I believe offer real value for makers.
Affiliate disclosure: This link is an affiliate link. If you purchase through it, I may earn a commission at no extra cost to you.
Always keep your filament in dry conditions. One big rookie mistake I made was trying to print a trophy model using a half-used spool that had soaked up humidity; it left the layers stringy and rough, no matter how much I tweaked my settings.
If you want more help picking the best filament, check out my material reviews at 3dprintingbykevin.com, where I share print samples and specific brands I trust.

Step 3: Use Smart Slicer Settings to Get a Polished Look
Your slicer settings have a giant impact on your finished print’s appearance. Whether you use Cura (which is free and popular), PrusaSlicer, or OrcaSlicer, every slicer lets you control layer height, wall count, cooling, and other critical factors. Here’s how I set things up for the smoothest surface possible:
Settings to Boost Visual Quality:
I’ve posted practical, step-by-step guides with screen captures for Cura, PrusaSlicer, and OrcaSlicer on 3dprintingbykevin.com if you want to experiment and compare specific settings.
Want Cleaner Fits? Start With Better Scans
When you’re matching parts, making enclosures, or reverse-engineering a component, the fastest path to “manufactured” results is accurate geometry. 3DMakerpro scanners can save hours of redesign time.
Affiliate disclosure: This link is an affiliate link. If you purchase through it, I may earn a commission at no extra cost to you.
Step 4: Maximize Your First Layer Appearance
The first layer is make-or-break for that clean, molded look. If your base layer goes down rough, it will show on the completed part, while a glassy start lets you use that face as the display side.
Step 5: Advanced Tricks to Minimize Lines and Artifacts (No Sanding Needed)
Once you have reliable settings and a good base, you can still squeeze out extra smoothness with a few smart tricks collected from the FDM community over the years:
I like testing these smart tweaks with a calibration cube or a flat test plate. I keep a small stack of these print samples to compare changes with each new filament or slicer update.
Upgrade Your Print Quality With the Right Add-Ons
Sometimes the “injection-molded” look comes from the small upgrades: better extrusion hardware, smarter accessories, and parts that reduce print inconsistency. If you’re hunting for practical improvements, start here.
Affiliate disclosure: This link is an affiliate link. If you purchase through it, I may earn a commission at no extra cost to you.
Step 6: Fast Post-Processing That Isn’t Sandpaper
If you want ultra-smooth results without sanding, try these alternative finishing methods—these save time and keep intricate details sharp:
For more details and safety advice on these finishes, see my guides over at 3dprintingbykevin.com.
Step 7: Design and Model With a Smooth Finish in Mind
Injection-molded models tend to avoid awkward overhangs, use gentle curves, and keep surfaces clean and continuous. I’ve adapted similar strategies when designing for FDM, and they make a real impact:
Stumbling upon a model from Printables or Cults3D? Look for ones labeled as optimized for FDM, with clean, broad surfaces. Don’t hesitate to ask the designer for different versions; premium models often include both injection and FDM versions for the best printability.
(FAQ)
Which filaments look closest to injection-molded plastics?
Based on my experience, Silk PLA and PETG offer the smoothest finishes with a subtle gloss, coming close to the molded look. ASA and ABS, tough materials for functional parts, look their best with an enclosure and, occasionally, a touch of vapor smoothing.
Can I really skip sanding and still get a smooth finish?
Definitely! With the correct settings, top-quality filament, and a light touch in post-processing, such as a resin coating, I’ve made plenty of display-ready parts that require nothing more than a soft cloth wipe-down before painting or assembly.
Is it possible to erase all layer lines?
Layer lines can be nearly eliminated with thinner layers, slower print speeds, and tuned cooling. If you look up close, you might see faint lines—yet for most uses, the steps above will get you remarkably close to that perfect finish seen in factory parts.
What’s the best printer upgrade to boost print smoothness?
Adding a direct drive extruder is my top suggestion. After that, swap in a clean nozzle and set up auto-leveling. Affordable upgrades are available from Creality, 3DMakerpro, and CHAORONG CO., so you don’t have to overspend.
Key Tips and Next Steps for Perfect FDM Prints Without Sanding
Creating that professional, polished look with your FDM printer isn’t magic. By making smart decisions—hardware, filament, slicer adjustments, and simple post-processing—you’ll produce parts that look and feel like true injection-molded products straight off your bed.
Your Action Plan:
What’s the first model you’re going to try with these tips? Share your results and photos at 3dprintingbykevin.com. I love seeing how others take their 3D printing skills to the next level, and your project might help the next person step up their own game!

