
Practical workshop guide · Updated September 15, 2026
The print finishes, but the top feels rough. Or the corners look swollen. Or a fine web of filament stretches between features that should be clean.
It is tempting to change temperature, speed, flow, and retraction together. The next print might improve—but you will not know which adjustment helped.
Better 3D print quality starts with naming the defect, then choosing a test that can explain it. This guide gives you a practical sequence for filament-based FDM printing.
Quick answer: What should you fix first?
Confirm the correct printer, nozzle, plate, and filament profile. Inspect the machine and material, then establish a reliable first layer. After that, adjust the setting most closely connected to the visible problem.
Use a small representative test, change one variable, and compare it with your baseline. A smoother surface, a better fit, and a stronger part are different goals—decide which one matters before tuning.
Affiliate disclosure: This article includes a COEX partner link. I may earn a commission from a qualifying purchase at no extra cost to you.
Start with the defect you can actually see
These checks narrow the investigation; they are not diagnoses from appearance alone. If the problem began suddenly on a previously successful profile, inspect the physical setup before rebuilding that profile.
| What you see | Check first | A useful small test |
|---|---|---|
| First-layer gaps or dragging | Plate preparation, selected profile, and nozzle-to-bed relationship | A first-layer patch using the manufacturer’s procedure |
| Strings between separate features | Material condition, nozzle residue, temperature, and retraction profile | A two-feature stringing sample |
| Raised ridges on a solid top | Flow calibration and whether the top has enough support | A small flat-topped sample |
| Missing extrusion on fast sections | Filament path, nozzle restriction, and melt-throughput demand | The same feature at a lower requested flow demand |
| Repeated ripples after corners | Mechanical condition and motion settings | A sharp-cornered sample under a supported conservative profile |
| An entire layer shifts sideways | Obstructions, collisions, belt condition, and pulley security | Resolve the motion problem before repeating the print |
| Clean-looking part that will not fit | Model dimensions, clearance, orientation, and first-layer expansion | Only the mating feature or a clearance sample |
For a wider range of symptoms, use the 3D printing troubleshooting guide.
1. Restore a known baseline
Save the current project before changing it. Record the printer, installed nozzle, filament, plate, slicer profile, and any overrides. A correct-looking material name is not enough if the nozzle size or machine profile is wrong.
Inspect the filament path for a snag or unusually heavy resistance. Check accessible hardware for looseness or damage using your printer’s maintenance instructions. Work around moving and heated components only as those instructions permit.
A full layer shift deserves a motion check. Prusa’s layer-shifting guide identifies belt tension and pulley security among the causes to investigate. Follow your model’s procedure rather than tightening everything indiscriminately.
Keep the baseline simple: Use an appropriate manufacturer profile and a small model that reproduces the issue. Leave unrelated settings alone.
2. Make the first layer repeatable
Check that the plate is seated correctly, clean it by its manufacturer’s method, and select the correct surface profile. Follow the printer’s leveling or first-layer calibration routine.
Automatic leveling does not remove contamination. It also does not make every plate and filament combination compatible. Some combinations require a release layer to protect the surface.
A first-layer patch should show joined lines without obvious gaps or heavy ridges. If you see trouble, investigate before sending a tall or lengthy print. Prusa’s first-layer reference explains the importance of surface preparation and setup; apply the details appropriate to your machine.
Do not copy a manual adjustment onto every printer
Some machines use manual nozzle-height adjustments; others use probing routines and model-specific calibration. Use the procedure for your printer. Lowering the nozzle blindly can damage the surface.
3. Check material condition before chasing settings
Moisture can affect extrusion and surface quality. But stringing alone does not prove that a spool needs drying; temperature, travel behavior, and nozzle residue can produce similar symptoms.
If drying is appropriate, use the filament manufacturer’s time and temperature guidance and respect the spool’s heat limit. Compare the same sample before and after, then protect the dried material in suitable storage.
Prusa’s drying guidance distinguishes active drying from protective storage. A low humidity reading inside a container does not, by itself, establish that moisture has left the filament.
4. Separate flow, temperature, and retraction
These settings affect different parts of the process. Flow controls the amount of material delivered. Temperature affects how that material behaves in the hotend. Retraction helps manage oozing during travel.
For ridges and small gaps, investigate flow
Once the filament path and nozzle are working properly, use a supported extrusion multiplier or flow-ratio calibration. Do not raise flow to conceal a blockage or lower it to hide an incorrectly positioned first layer.
Check for overlapping overrides. In Prusa’s documented workflow, firmware flow and slicer extrusion multiplier multiply together. A change in one does not reset the other. See the extrusion multiplier guide and follow the calibration appropriate to your printer.
For stringing, make a controlled comparison
Start with the recommended material profile and inspect the nozzle for residue. Evaluate temperature within the material’s supported range, then investigate retraction if the symptom remains.
A retraction distance suitable for a Bowden setup may be unsuitable for direct drive. Avoid large copied values. Prusa’s stringing guide covers temperature, nozzle cleanliness, and retraction as separate checks.
5. Slow the feature that needs it
Reducing every speed can lengthen the job without explaining the defect. Look at the feature involved: a visible outer wall, bridge, tiny tip, or long fast extrusion.
Long extrusion moves may ask the hotend for more melted plastic than the current material profile can reliably deliver. A rough planning estimate is:
Volumetric flow ≈ line width × layer height × print speed.
For example, 0.45 mm × 0.20 mm × 100 mm/s is about 9 mm³/s. This arithmetic example is not a recommended limit. Actual extrusion geometry and safe throughput depend on the setup.
Prusa’s maximum volumetric speed guide explains how a flow limit can constrain requested speed. Keep the limit appropriate to the hotend, nozzle, temperature, and filament rather than using a printer’s advertised travel speed.
For tiny features or bridges, inspect the material’s cooling and minimum-layer-time settings. More fan is not universally better; bonding and warping requirements differ between materials.
6. Match layer height and orientation to the surface
A finer layer height can reduce visible steps on slopes. It cannot repair missing geometry, remove every seam, or make an inaccessible supported surface look like an untouched outer wall. There is no universal 0.16 mm sweet spot, and 0.10 mm layers do not inherently cause heat creep or clogs.
Inspect the sliced preview before printing. Check which face touches the bed, where supports contact the part, whether small features survive slicing, and where the seam appears.
For a functional component, keep the load direction and critical dimensions in the decision. The orientation with the prettiest face may not be the best orientation for the job.
If the roof is uneven, compare solid top thickness and internal support. The layers and perimeters reference explains why the first top layers must bridge across the interior. More infill is only one possible adjustment.
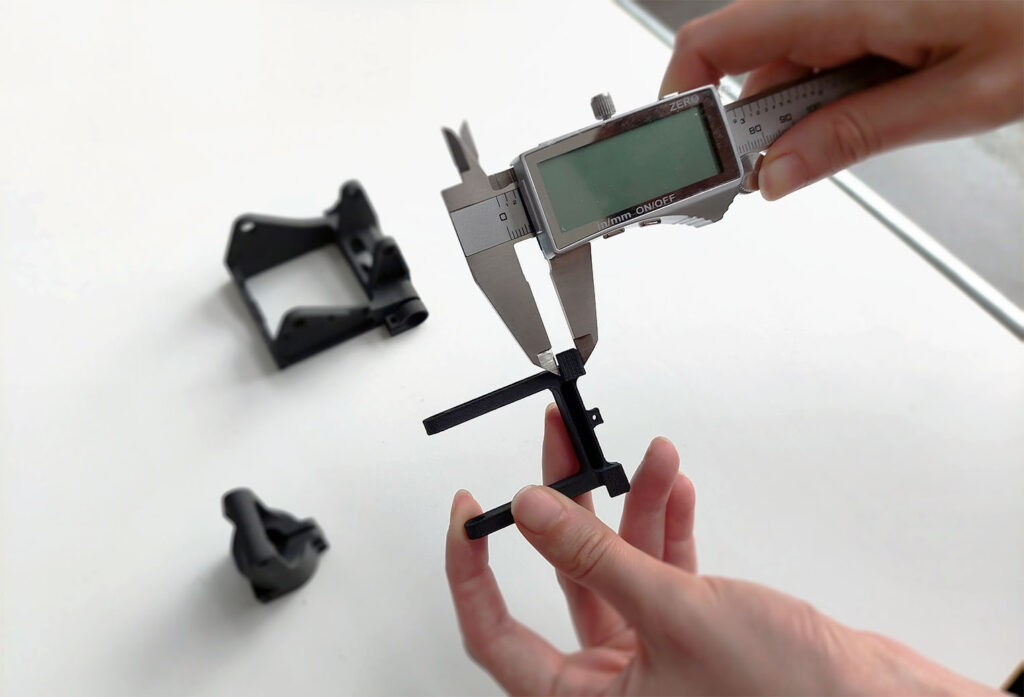
Run a test you can learn from
Use this comparison card when you are tempted to change several settings. It keeps an improvement traceable and gives you a way back if the next test gets worse.
A simple before-and-after record
Photograph the defect.
Save the project and profile.
Use the same model and filament.
Compare the same feature.
Check fit and function too.
Save the proven profile.
For example, when a flat top shows raised ridges, first confirm that the roof is adequately supported and extrusion is consistent. Then run the appropriate flow calibration and compare a small flat sample. Photograph both under the same light.
This is a proposed workflow, not a reported experiment. If the result changes unexpectedly, return to the saved baseline and check what else changed.
Recheck calibration when the setup changes
After a nozzle change, maintenance, or moving the printer, perform the checks your manufacturer specifies for that change. Follow its maintenance schedule and investigate new symptoms. A universal recalibration interval of 50–100 hours is not appropriate for every machine.
Keep mechanical calibration distinct from filament tuning. Do not change factory extruder calibration merely because one material needs a different flow profile.
Know when an upgrade earns its place
Replace worn or unsuitable components when inspection supports it. Consider a dryer for a material that needs controlled drying, a different nozzle for a required capability, or a build surface suited to the material.
Before purchasing, write down the limitation and how you will check that the new tool addressed it. A new accessory still needs a compatible profile and a repeatable test.
If a different filament suits the job, explore COEX filament through my partner link. Choose from the material’s requirements and specifications; a brand change alone is not a diagnosis.
Use the P.R.I.N.T. Method™ to keep the improvement
- P — Problem: Describe one observable defect and where it appears.
- R — Requirements: Decide whether success means appearance, fit, function, or repeatability.
- I — Interfaces: Identify critical holes, contact faces, supported surfaces, and attachment points.
- N — Next-Best Materials & Methods: Select the smallest relevant change in setup, material, orientation, or profile.
- T — Test & Tune: Compare, repeat, and record what worked.
Keep this record: Date · model revision · printer/nozzle · filament · plate · profile · defect · one change · result · next step.
My Print It Practical: 3D Printing for Beginners ebook brings the planner, setup checklists, and troubleshooting process together. Use its worksheet to turn a successful adjustment into a reference you can reuse.
Four-question knowledge check
Choose your answer, then open the explanation.
1. A familiar profile suddenly produces a full layer shift. What comes first?
A. Change filament color.
B. Inspect motion, obstructions, and relevant hardware.
C. Increase infill.
Reveal answer 1
B. A motion fault needs investigation. Surface settings cannot reliably correct a loose pulley, obstruction, or collision.
2. Does stringing prove that filament is wet?
A. Yes.
B. Only with a new spool.
C. No; several causes can create a similar symptom.
Reveal answer 2
C. Inspect the material and nozzle, and evaluate the appropriate temperature and retraction profile.
3. Which is the clearer tuning experiment?
A. Change one relevant variable on the same sample.
B. Change temperature, flow, and speed together.
C. Compare two unrelated models.
Reveal answer 3
A. Keeping the other conditions steady makes the outcome easier to interpret and repeat.
4. A smoother print automatically has adequate strength. True?
A. True.
B. False; appearance and functional performance need separate checks.
Reveal answer 4
B. Inspect dimensions, loading, material behavior, and bonding as appropriate to the intended use.
Frequently asked questions
What is the best temperature for print quality?
There is no universal value. Begin with the filament maker’s recommended range and an appropriate printer profile, then test the feature that needs improvement.
Should I always slow the printer down?
No. Lower speed can help when a feature exceeds the setup’s capability, but it will not clean a plate or remove a filament snag. Diagnose the symptom first.
Will a smaller layer height fix a rough print?
It may improve stepping on slopes. Roughness caused by poor extrusion, unsupported surfaces, or mechanical trouble needs a different investigation.
Should I change E-steps to fix every extrusion problem?
No. Mechanical extruder calibration and filament flow tuning are different tasks. Use your printer manufacturer’s procedure, particularly on machines with factory-calibrated or automated systems.
How do I know the improvement is real?
Repeat it under the same conditions. Compare the same visible feature and measure critical dimensions. For a functional part, include an appropriate functional check.
Which defect keeps showing up on your prints?
Tell me in the comments: What printer, nozzle, and filament are you using, and where does the problem appear? Include the one change you have already tried.
For a custom part or project review, send dimensions, photos, and intended use through the project form.
