
A tiny broken tab can leave an otherwise useful item sitting unused. Before you sweep the pieces into the trash, put them in a bag. That little fragment may hold the shape of the catch, the thickness of a wall, or the position of a mounting hole needed to plan a replacement.
You do not need a finished 3D model to ask about replacing a broken plastic part. Start with what remains, show where it belongs, and explain what it must do.
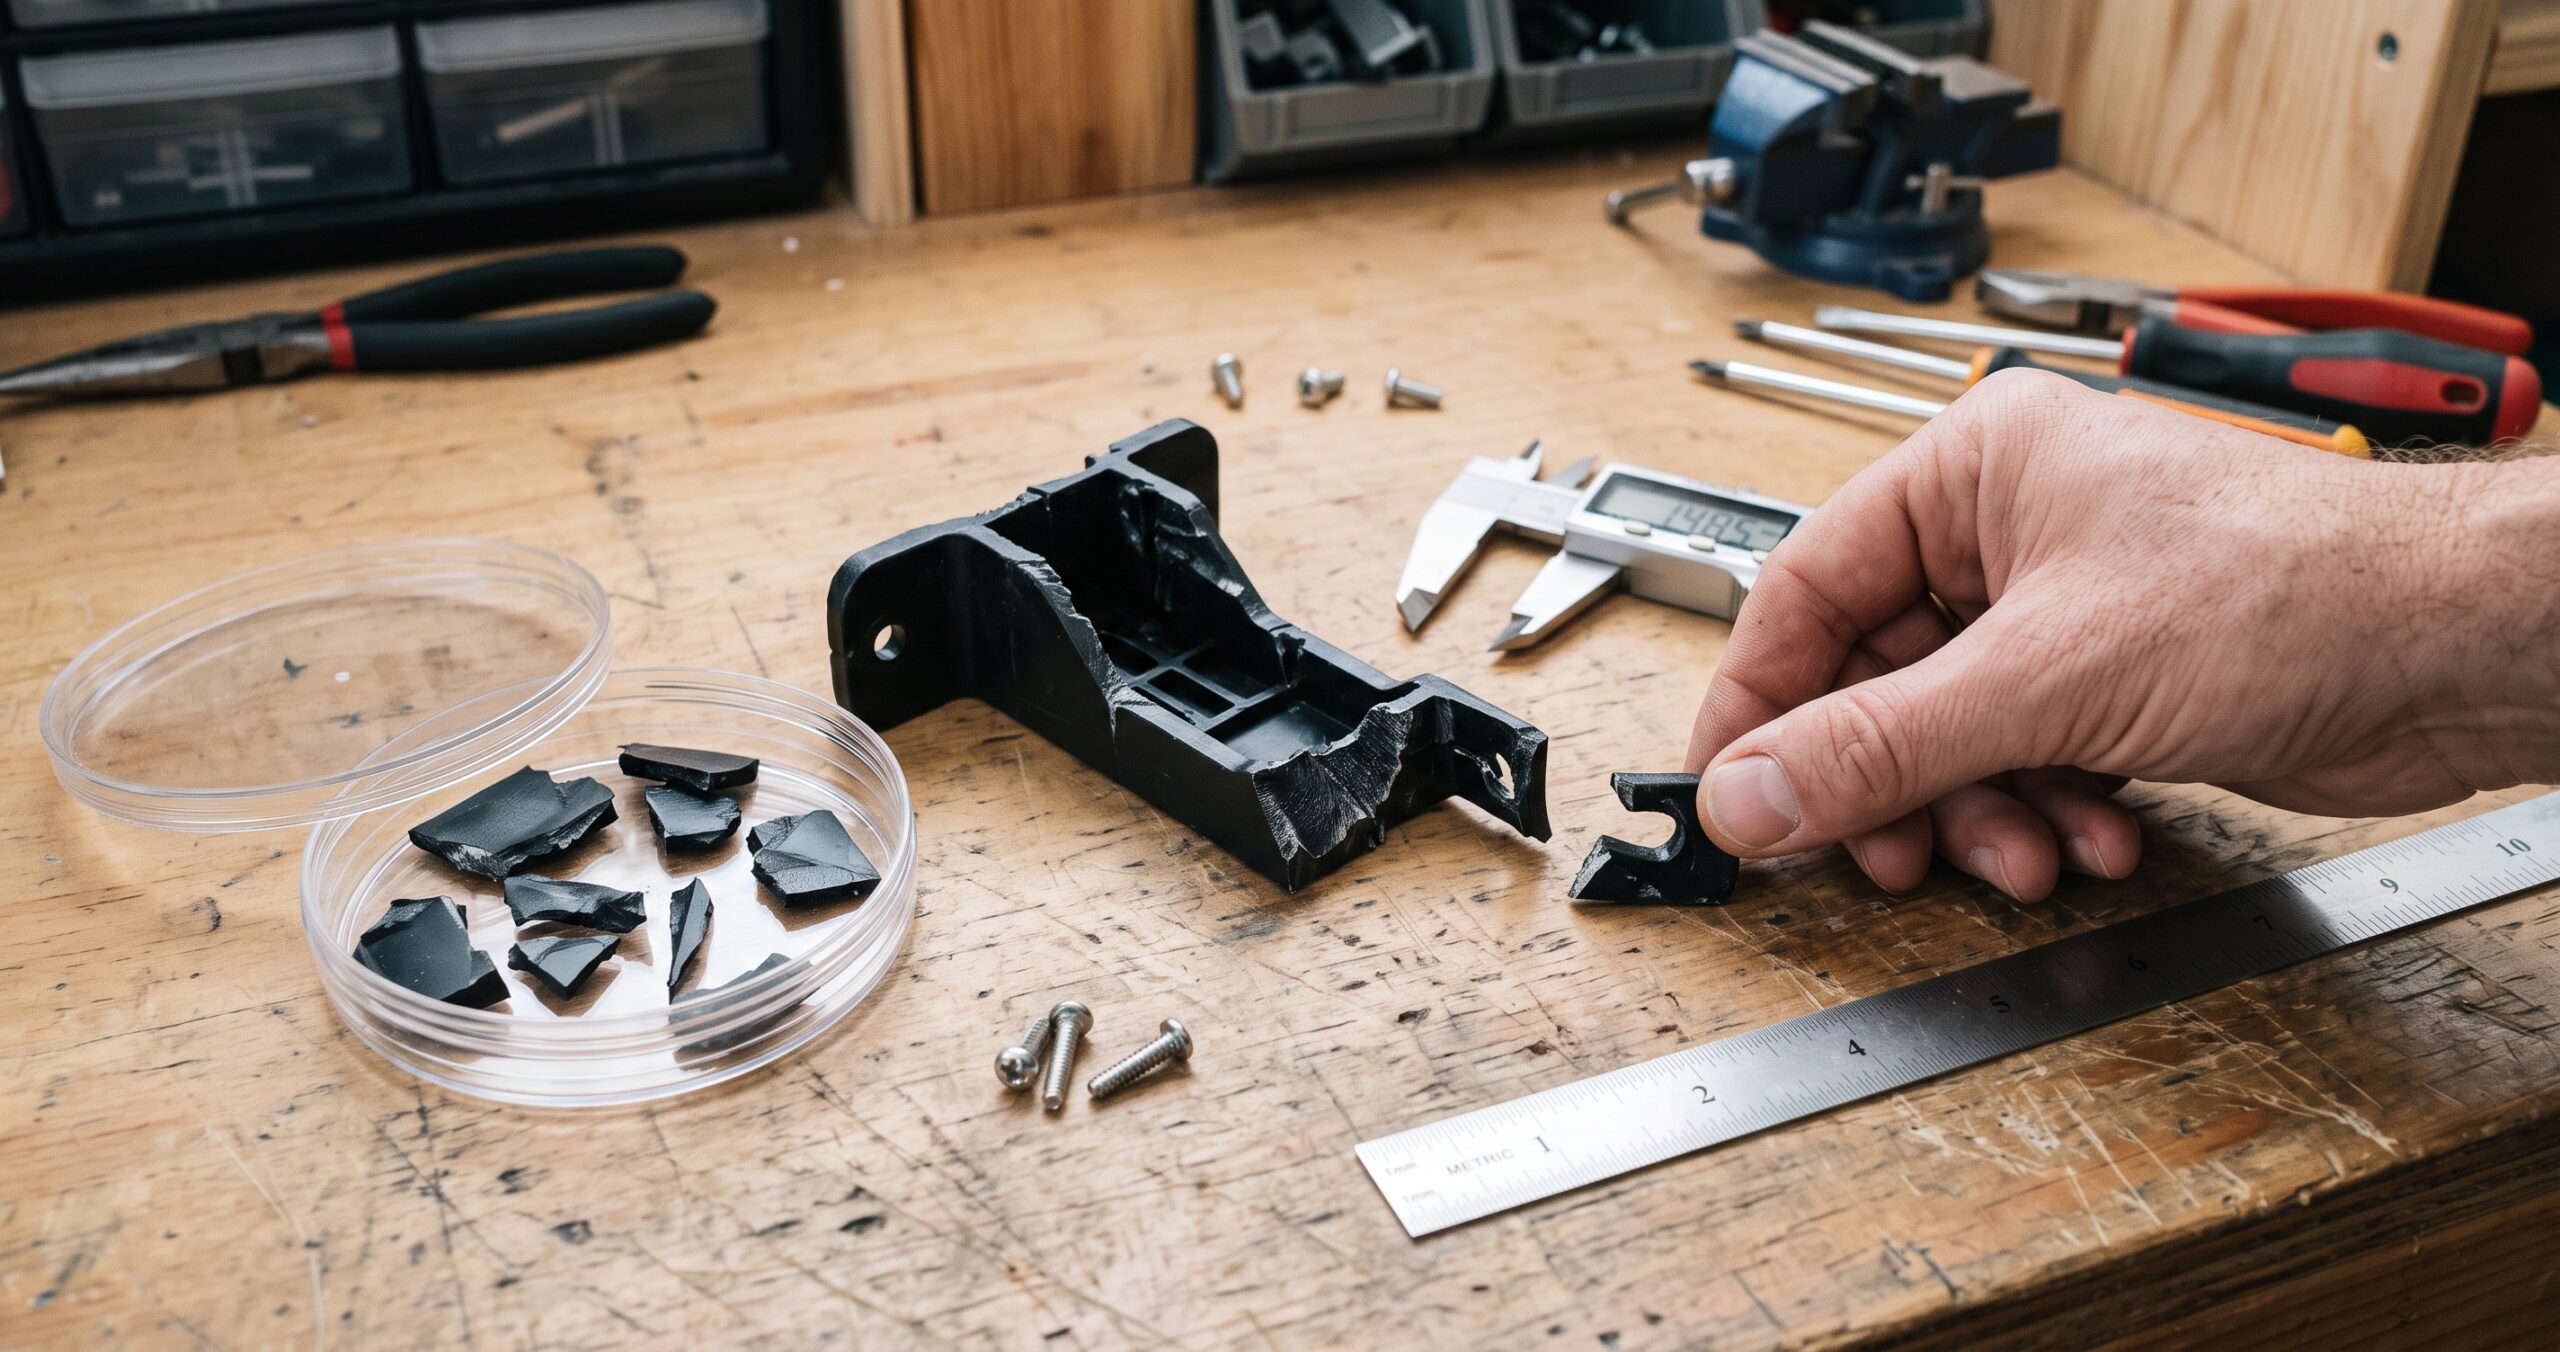
Quick Answer: What Should You Save?
Keep every fragment you can safely recover, the screws or other hardware, and any matching intact part. Photograph the broken piece and its mounting location before changing anything. Include the product model, approximate dimensions with units, and a short explanation of how it failed.
A missing piece does not automatically rule out a replacement. It does mean the missing shape needs reliable evidence, such as the mating opening, an intact matching component, or a drawing.
Why the Smallest Piece May Matter Most
The large section tells you the general shape. A small broken hook may tell you how the part actually stays in place.
That distinction matters for clips, covers, knobs, spacers, and brackets. Reproducing the outline is only one step; the replacement must also meet the surfaces and features around it.
For example, imagine a cover with a missing retaining tab. The cover shows the tab’s starting location, while the opening it engages helps establish the available space. Together, those clues are more useful than a photograph of the cover alone.
This is an illustrative example, rather than a completed customer repair.
Save These Five Things Before Cleanup
- All available fragments. Keep them together in a labeled bag or container. Avoid sanding, trimming, or gluing the fracture surfaces before documenting them; those changes can obscure useful details.
- The original hardware. Save screws, washers, pins, springs, and inserts separately. A replacement may need to accommodate them, even when they are not being printed.
- A matching intact part. If the item has a second clip or bracket, photograph it. Check whether it is identical or a mirrored version before assuming it can be copied.
- The product identification. Record the brand, model, and any visible part number. Check whether an original replacement is still available before committing to custom work.
- The mounting location. Show the opening, shaft, panel, or neighboring component the part connects to. Keep the larger assembly available for measurements and fit checks when practical.
For an overview of the service, see broken bracket and clip replacement with 3D printing.
The Photos That Help Explain a Broken Part
Use a plain background and good light. Take a clear overall photo first, then closer views of the important features.
- Top, bottom, and side views of the surviving part.
- A close view of the break and any loose fragments.
- The mounting location, including the feature the part engages.
- An intact matching part, if one exists.
- A ruler beside the part, with its markings readable.
A ruler photo provides scale context; it does not replace precise measurements. Perspective can make dimensions misleading. Keep the camera as square to the measured surface as practical and send actual measurements separately when you can.
Do not force broken pieces together to make the photo look complete. Photograph them separately, then add a gently arranged view if their original relationship is clear.
- Save the pieces and hardware.
- Show where the part belongs.
- Record dimensions and units.
- Explain its job and failure.
- Plan a prototype and fit check.
What If Some of the Original Is Missing?
| What You Have | What It Can Reveal | What to Add |
|---|---|---|
| Most fragments | Much of the original geometry | Mounting photos and measurements; flag distortion or wear |
| Main body, missing tab | Tab location and surrounding structure | The mating catch or an intact matching tab |
| Intact matching part | A possible reference for reconstruction | Confirm handedness, position, and dimensions |
| Only the mounting location | Available space and connection points | Required function, hardware, drawings, or reference images |
| Only a photograph | General appearance | Known dimensions and additional views; accurate reconstruction may remain uncertain |
Missing geometry should be treated as an open question. A first prototype can help check an inferred shape, but it should not turn a guess into an assumed specification.
Explain What the Part Does, Not Just What It Looks Like
“It is a black plastic clip” leaves important questions unanswered. “It holds a removable panel, flexes during removal, and broke at the base of its hook” gives the review a much better starting point.
Include whether the part encounters warmth, sunlight, moisture, cleaners, steady weight, or repeated movement. Mention whether it broke during installation, removal, an impact, or ordinary use.
Material selection follows those requirements. Prusa’s filament material guide compares properties such as temperature resistance and flexibility, but a material comparison alone cannot establish that a finished replacement suits your application.
A replacement also deserves a look at why the original failed. Clearance, geometry, material, and the way force reaches the part may need attention. Simply making the piece thicker can interfere with fit or prevent a clip from flexing.
For parts whose failure could cause injury or major damage, follow manufacturer requirements and obtain appropriate professional assessment before choosing a replacement process.
Use the P.R.I.N.T. Method™ to Organize the Request
Use a notebook or the project planner in P.R.I.N.T. It Practical — 3D Printing for Beginners to record the decisions behind the repair.
- Problem: What stopped working when this piece broke?
- Requirements: What conditions and movement must the replacement handle?
- Interfaces: What must fit, touch, latch, or connect?
- Next-Best Materials & Methods: Is an original spare, a printed replacement, or another process the practical choice?
- Test & Tune: What will you check on a prototype, and what still needs evaluation after it fits?
Record dimensions from a consistent reference face, label the units, and note which measurements are estimates. Keep revision notes with the photos so an older measurement does not get mistaken for the latest one.
Four-Question Knowledge Check
Choose an answer, then tap each question to reveal the explanation.
1. A tiny hook broke off. Save it or discard it?
Save it. It may reveal the retaining shape and thickness that are missing from the main body.
2. Does a ruler in a photograph establish exact dimensions?
No. It gives scale context. Perspective and camera angle can affect the apparent size; measured dimensions are more useful for accurate reconstruction.
3. Can an opposite-side bracket always be copied directly?
No. It may be mirrored or have different features. Compare its position and interfaces first.
4. If the prototype fits, is long-term performance established?
No. Fit answers a geometry question. The final part still needs evaluation for its intended loads, environment, and repeated use.
Frequently Asked Questions
Can you review a broken part without a CAD file?
Yes. Photos, measurements, a sketch, or the original piece can start the review. Whether enough information exists to develop a replacement depends on the part and its function.
Should I glue the pieces together first?
Photograph and preserve them first. Glue can obscure fracture details or hold pieces in a slightly incorrect position. Ask whether assembly would help before making a permanent change.
Can a replacement be made from photos alone?
Sometimes photos support an initial assessment. Exact fit often requires measurements, access to the original or mating features, and a prototype check. A photo-only request may leave too much uncertainty.
Will a printed replacement be stronger than the original?
That cannot be promised from appearance. Geometry, material, print orientation, manufacturing quality, and use conditions affect performance. Define the requirements and evaluate the proposed replacement.
Before You Throw That Broken Piece Away
Bag the fragments, save the hardware, and take a photo of where the part belongs. Those simple steps preserve options while you decide whether replacement is worthwhile.
Send your part details through the project intake form for review. Include what remains, what is missing, and what the replacement needs to do.
What small plastic part has sidelined something you still want to use? Tell me in the comments. Send private files and contact information through the intake form.
Fact-check note — October 7, 2026: Service and ebook links were checked against the site’s current pages. The material reference is manufacturer guidance. Reconstruction examples are illustrative; feasibility, price, and performance require a project-specific review.
