A clogged 3D printer nozzle can quickly ruin a print and put your project on hold. Even if you have never tackled nozzle maintenance before, you can unclog it quickly with some easy steps. This guide breaks down the fastest and safest way to unclog your nozzle, outlines essential tips based on my own hands-on experience, and covers the best practices for getting your printer back in action without hassle.
Unclogging a nozzle doesn’t need to feel intimidating. I’ve seen that many simple blockages can be cleared with just basic tools and a little patience. Whether you’re working with Creality, 3DMakerpro, or another well known brand, the process is similar. By following the steps here, you’ll save time, protect your machine, and avoid making cleaning mistakes that can cause bigger problems. Getting good at nozzle maintenance pays off and can keep your prints looking sharp for years.
Recognizing and Diagnosing a Clogged Nozzle
Before grabbing any tools, it’s really important to understand what a clog looks like. Most nozzle clogs cause weak, uneven, or missing extrusion. Sometimes, I notice that filament comes out in thin, broken streaks, or nothing prints at all. You might also hear clicking from your extruder motor, or see unusual heat creep on certain models. Being able to spot these signs early helps prevent bigger problems down the line.
Common Reasons for Nozzle Clogs
- Low quality filament with debris or diameter inconsistencies
- Printing at too low or too high of a temperature
- Improper storage of filament (absorbs moisture)
- Mixing materials (like swapping from PLA to PETG without cleaning)
- Skipping periodic nozzle cleaning
If you’re getting error messages, streaky lines, or jams, your nozzle probably needs urgent attention. On 3dprintingbykevin.com, you can find more specific guides for identifying and preventing clogs for different 3D printer models. Keeping an eye out for these symptoms can save time and money.
What You’ll Need: Tools and Safety Prep
Getting ready ahead of time speeds up the cleaning process and keeps your machine safe from accidental damage. I like to prep my work area, power down the printer, and use the following tools:
- Nozzle cleaning needles or pins (usually included in most printer kits)
- Small wire brush
- Tweezers or pliers
- Microfiber cloth
- Heat resistant gloves
- Acetone or isopropyl alcohol (for ABS or stubborn gunk)
- Spare nozzle (optional, for deep clogs)
- Socket wrench if the nozzle is being removed
Safety Reminders
I always let the hotend cool down slightly before working on it, but not so cool that filament can’t be pushed or pulled through. Take care; nozzles get extremely hot! Wearing gloves can save you from burns, and unplugging the printer is good practice for electrical and physical safety. Never rush through this process—patience means fewer costly mistakes.
The Quickest Way to Unclog a Nozzle: Step by Step
Unclogging a 3D printer nozzle doesn’t need fancy equipment. Here’s my fast process to clear most jams and make sure everything’s flowing right again:
1. Heat the Hotend
Turn on your printer and heat it up to the last used filament’s printing temperature. If you printed with PLA, I set it to 200°C; for PETG, 240°C. A warm nozzle softens up plastic and makes cleaning way easier.
2. Use a Cold Pull (“Atomic Pull”)
This is my favorite method; it’s simple and protects the nozzle from scratches.
- Unload any remaining filament (use the unload command).
- Clip off the end of a new filament strand so it’s flat.
- Insert fresh filament by hand until you see a little extrusion from the nozzle.
- Lower the temperature to just above the filament’s glass transition (for PLA, about 80–100°C).
- Once the printer cools to this range, gently pull the filament out. It will take any debris or burnt junk stuck inside with it.
Repeat the cold pull two or three times for stubborn clogs. I see really good results with PLA and PETG, but for sticky or burnt leftovers, I try the needle or brush method next. Cold pulls are a reliable, simple trick that can keep your nozzle running clean with just a few minutes of effort.
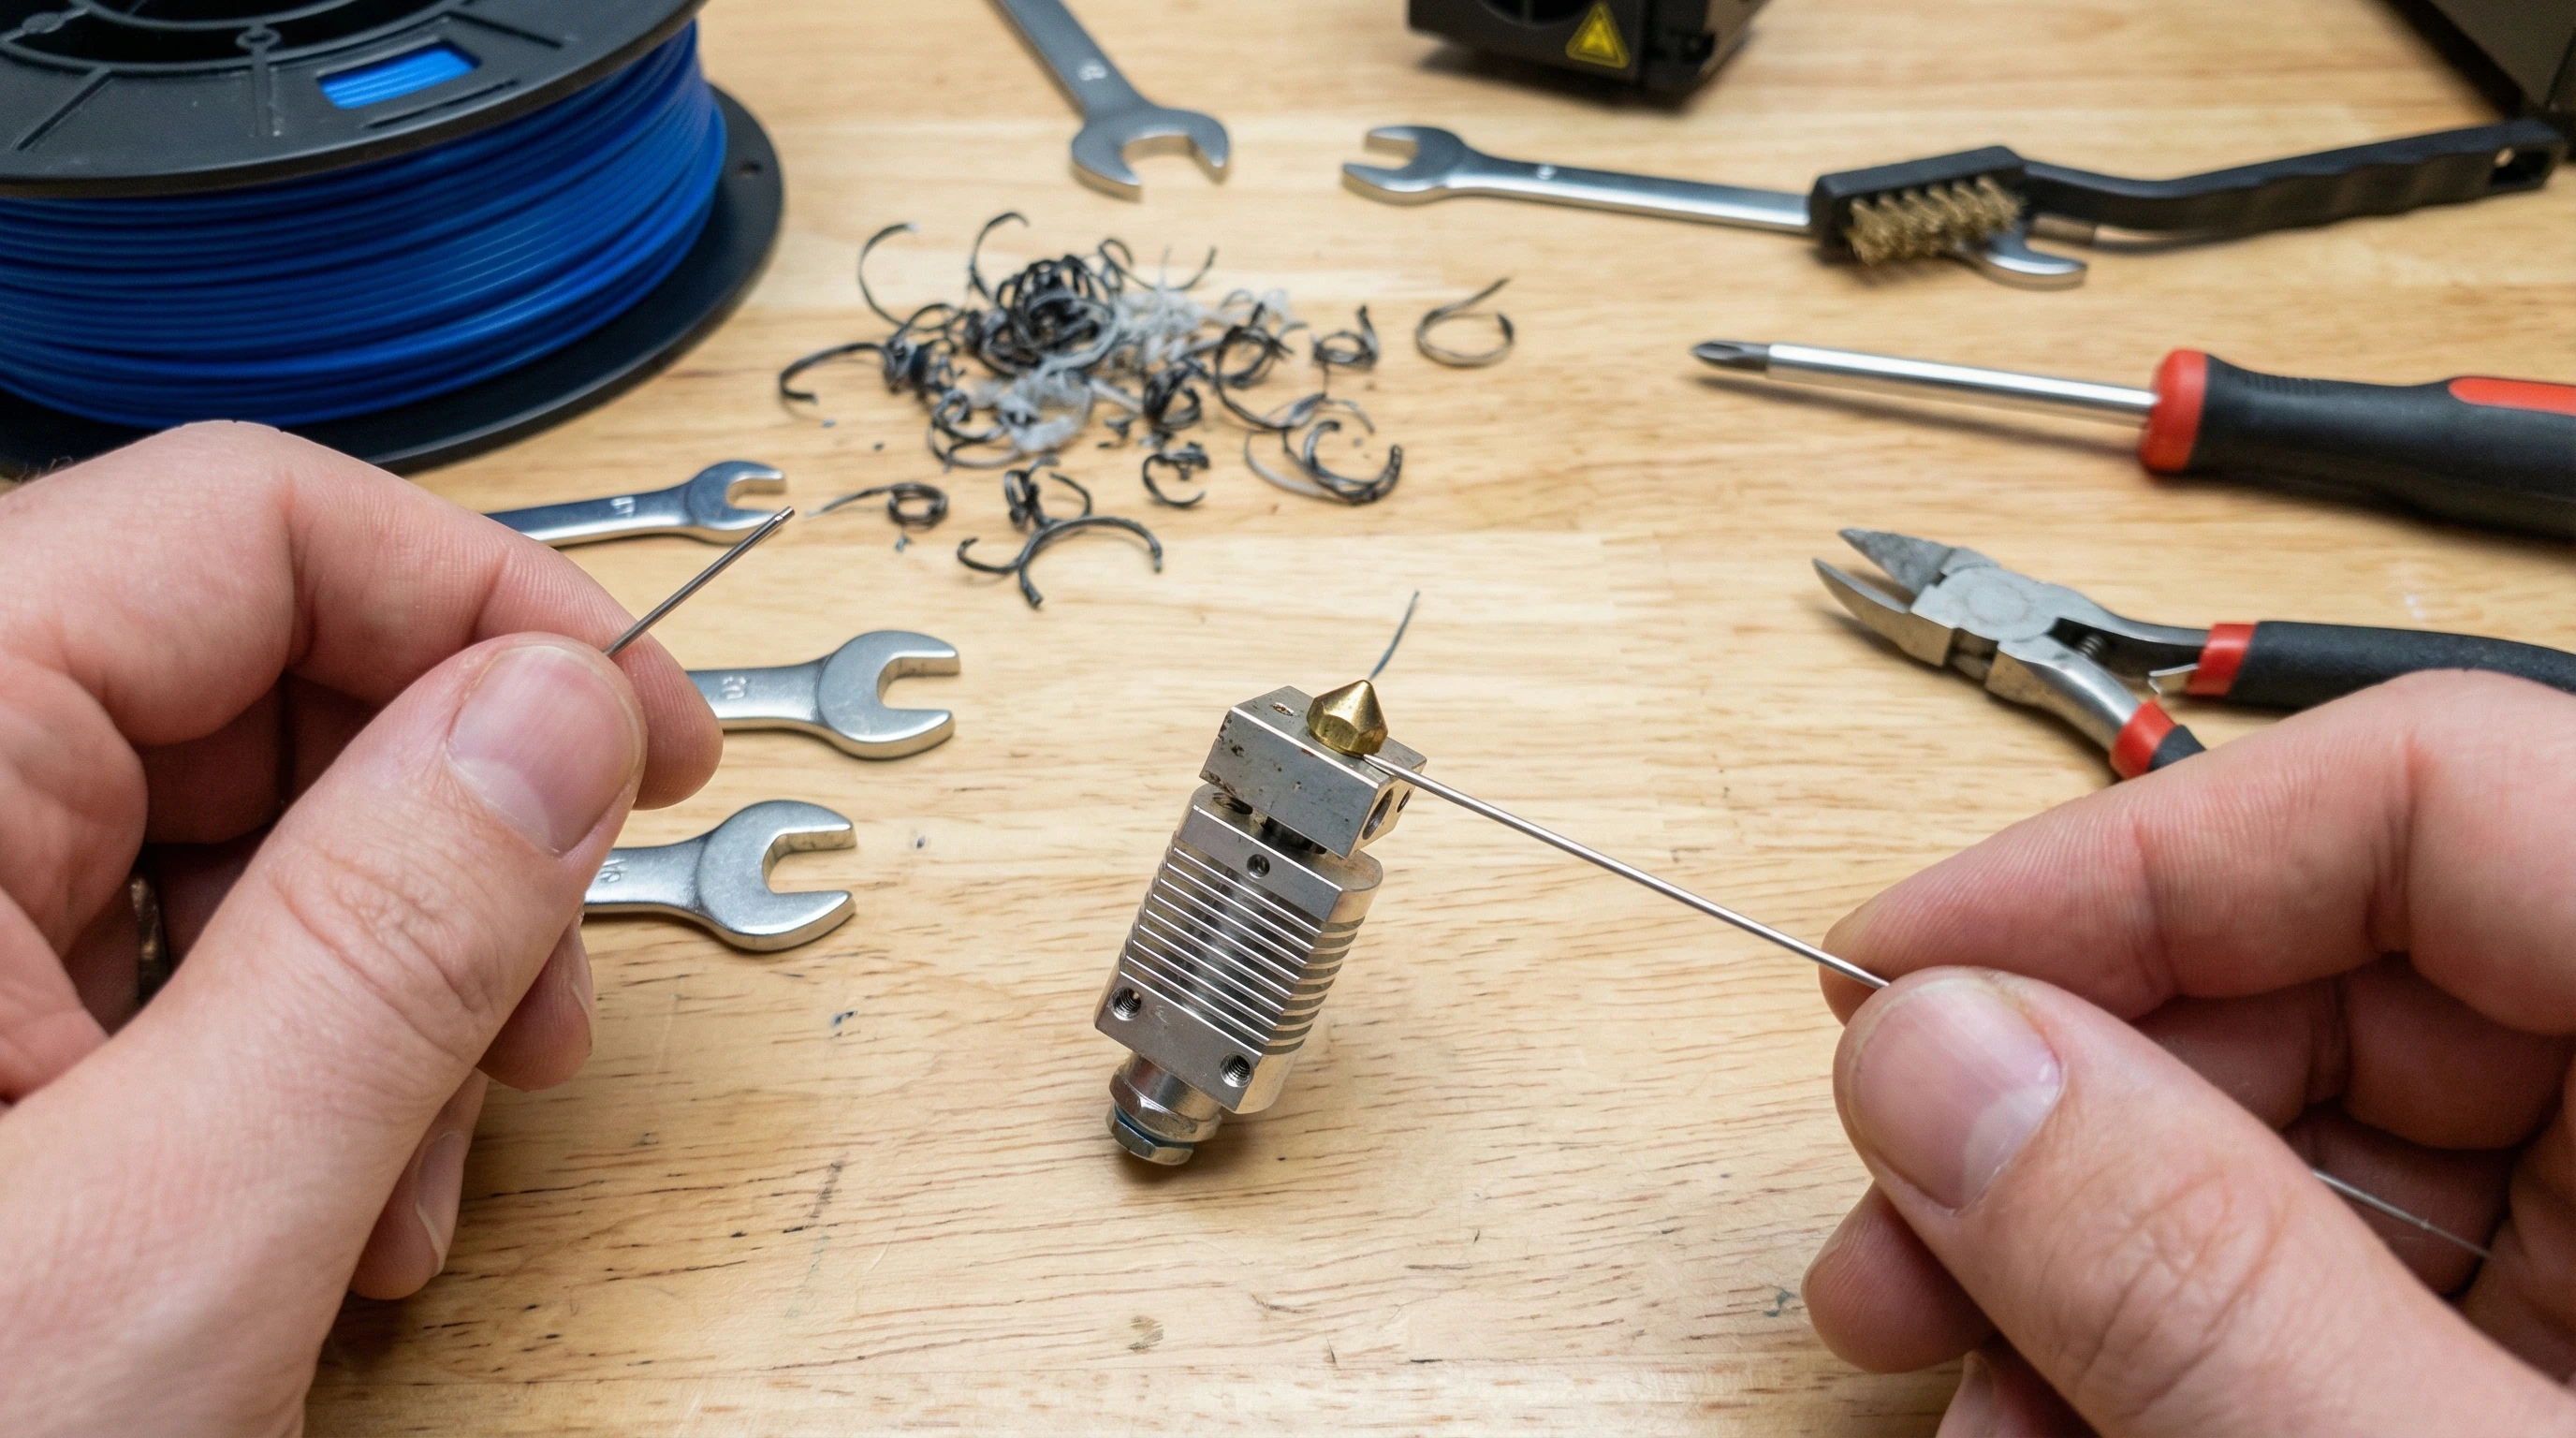
3. Try a Nozzle Cleaning Needle
If the cold pull doesn’t clear things out, I carefully insert a nozzle cleaning needle into the hot nozzle tip. I gently push up and down to dislodge stuck material. I use caution not to bend or force the needle or scratch the nozzle walls. For more advice about using cleaning tools, check out my nozzle cleaning guide. The cleaning needle can work wonders as long as you go slowly and avoid aggressive scraping.
4. Remove the Nozzle for Deep Cleaning (if Needed)
For total blockages or burnt-on residue, I unscrew the hot nozzle using a proper wrench. Soaking it in acetone (for ABS) or isopropyl alcohol (for PLA or PETG) overnight loosens tough buildup. I use a wire brush on the outside and a cleaning needle on the inside, then dry it thoroughly before reinstalling. Deep cleaning gives you the chance to knock out even the most stubborn clogs, restoring top performance.
If you decide to swap out the nozzle instead, look for high-quality spares from your original printer’s supplier or reliable places like Creality, 3DMakerpro, or COEX. These sources help you avoid nozzles that corrode or clog fast, ensuring you don’t trade one problem for another.
Prevent Nozzle Clogs in the Future
Consistent nozzle health saves time and improves print quality over the long run. Here’s how I keep my 3D printer in top shape and avoid surprise jams:
- Use dry, high quality filament from reputable brands. I personally recommend checking filament reviews and buying from trusted sites or manufacturers.
- Store filament spools in airtight containers with desiccant packs. This is especially important for PLA, Nylon, and PVA.
- Run a cold pull every five to ten prints, not just when clogged.
- Avoid switching directly from high temp filaments (like ABS) to low temp ones (like PLA) without flushing with a transition filament.
- Do regular maintenance, like brushing out the extruder gears and checking tension.
- Always finish prints with a nozzle cleaning filament, if available. This can help prevent gunk buildup between prints.
For advanced troubleshooting guides or super detailed maintenance tutorials, my resource hub at 3dprintingbykevin.com covers the latest tips for every printer type and filament brand. Maintaining these habits boosts your odds for smooth sessions and high quality parts.
Fact-Safe Comparisons: DIY vs. Replacement
I sometimes get asked whether it’s faster to just replace a blocked nozzle instead of cleaning it. Here’s my honest take, based on trial and error:
- DIY Cleaning: Saves money, takes 10 to 20 minutes if the clog is mild, keeps your printer original. It needs patience and gentle handling, but can often get a nozzle nearly back to new. You also learn a lot about your printer in the process.
- Replacement: Quicker for total blockages or scorched ends, but you’ll need to recalibrate Z offset and watch for leaks after swapping it in. Cost is low for brass nozzles, but specialty ones can add up. Some may have better coatings or last longer, so check reviews where possible.
Testing between the two, I always try cleaning first. Replacement is my plan B if repeated pulls or flushing don’t clear the jam. Factory nozzles from HONG KONG CHAORONG CO., LIMITED and COEX offer consistency and good print results compared to generic options.
Extra Tips for First-Time Nozzle Cleaners
- If you’re nervous about cold pulls, use an older nozzle to practice or check out easy video tutorials. Clear visual instructions make the steps easy to follow.
- Keep a spare nozzle nearby. It saves time if a clog can’t be cleared quickly, and keeps your project moving forward.
- Label nozzles as you remove them. Mixing up diameters (0.4mm vs 0.6mm) can cause layer or flow problems.
- Maintain a handy toolkit near your printer: hex keys, cleaning needles, tweezers, and a microfiber cloth are always useful.
- Document your filament settings. I keep a basic notebook with temperature and retraction details for different filaments, which helps when troubleshooting.
Building small routines like these adds up to smoother, stress-free printing sessions in the long run. You’ll be more equipped to handle any small hiccups before they turn into major delays.
Frequently Asked Questions & Troubleshooting
How do I know my nozzle is truly unclogged?
When I push filament through and get a steady, strong extrusion without strange noises, the nozzle is clear. Healthy 3D printer nozzles will create a smooth, continuous bead when purged. Watch for solid, even output—if it stutters or looks thin, you might still have a partial blockage.
What if my cold pulls keep coming out with black streaks?
This usually means burnt residue from earlier filament runs. Repeat the cold pull a few more times. For really tough gunk, take the nozzle out for a soak and brush clean. If streaks linger, it could signal larger issues like heat creep or material incompatibility.
Is nozzle cleaning different for different brands?
The basic technique fits all FDM 3D printers. Some exceptions matter, such as all metal hotends or hardened steel nozzles. Always use gentle cleaning needles and don’t overtighten after reinstalling. You’ll find specific maintenance tips for each printer brand at my maintenance resources.
Can I use drill bits instead of a cleaning needle?
I don’t recommend it. Drill bits can score the nozzle and leave metal shavings. Cleaning needles flex and work safely around hard nozzle edges. Stick with the right tool for safe, long lasting results.
When is it time to fully replace the nozzle?
If the nozzle is deformed, corroded, scored, or after several failed cleaning attempts, swapping it out is a smart move. Print quality jumps up and old, worn nozzles can cause issues that you might not catch unless you inspect closely. Use trusted sources, like those mentioned above, for consistent quality.
Action Steps to Keep Your 3D Prints Flowing
- Gather the essential nozzle cleaning tools and keep them within arm’s reach in your printer area.
- Try the simple cold pull method at the first sign of jams or weird extrusion.
- Upgrade to high-quality, dry filament and start safe storage routines to avoid moisture.
- Bookmark resources over at 3dprintingbykevin.com for printer-specific cleaning tips and troubleshooting help.
- Keep a spare nozzle in your toolkit so you’re never stuck, even on a tight deadline or big project.
For more super-detailed printer troubleshooting, tips for first-timers, and expert product reviews, check out my printer maintenance guides or see my top nozzle picks for Creality, 3DMakerpro (Global), and COEX users. These resources can help you get the most out of your printer and avoid common roadblocks.
Disclosure: Some links above may be affiliate links. If you make a purchase through them, I may earn a commission at no extra cost to you. I only recommend products that I personally use and trust. This helps support the ongoing work I do at 3dprintingbykevin.com to keep these guides free and up to date. Thanks for your support!
