
You know exactly what you need. There is just one problem: nobody sells it.
Maybe it is a bracket for a machine you modified, a holder shaped around one particular tool, an adapter between two products that were never meant to work together, or a plastic component that existed only inside an old piece of equipment.
That is one of the places where custom 3D printing becomes genuinely useful. Instead of searching another ten pages of products that almost fit, you can start with the real dimensions, interfaces, environment, and function—and build the part around the job.
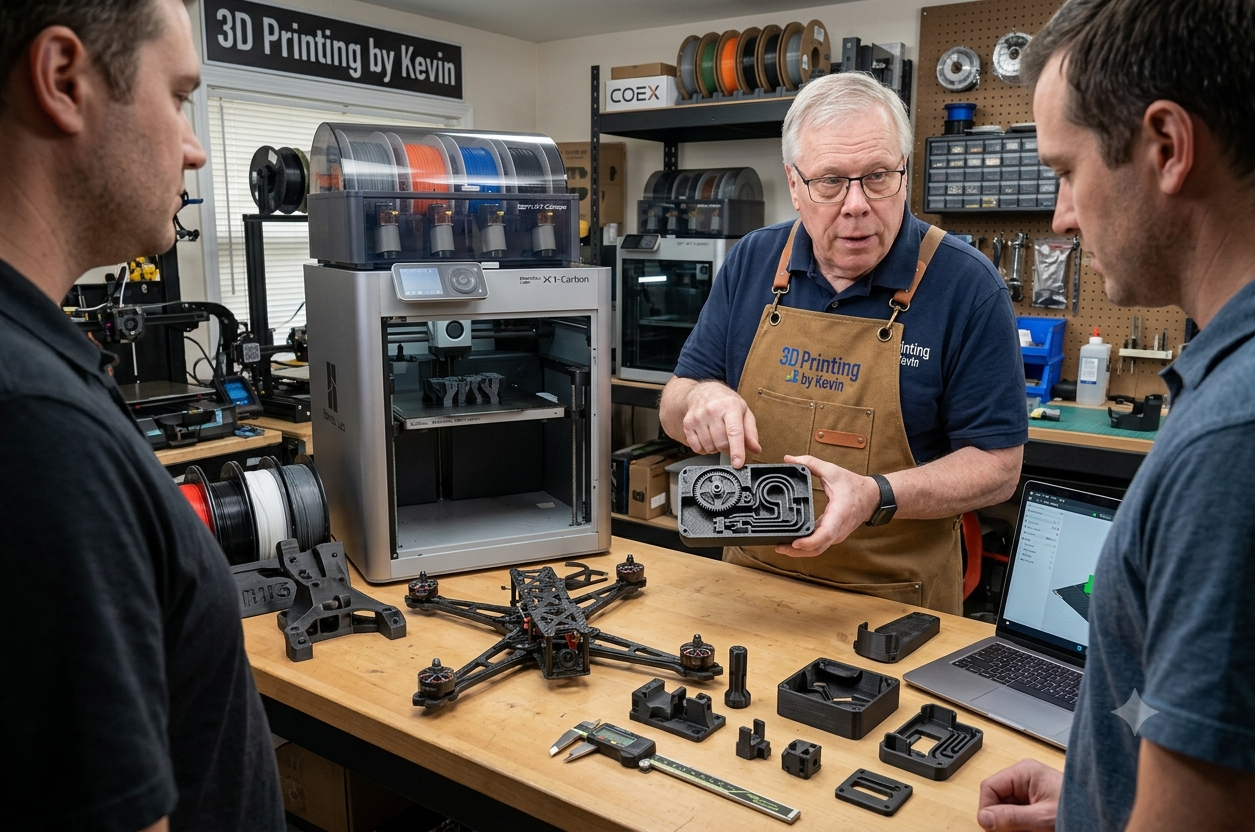
The Best Custom Builds Usually Start With a Problem—not a Printer
It is easy to think custom 3D printing starts with CAD software. In practice, the useful work starts earlier.
What are you trying to hold? What needs to line up? What broke? Where does the part attach? Does it sit in a hot car, flex every day, support weight, see sunlight, vibrate beside a machine, or simply keep something from sliding off a shelf?
Those questions matter more than choosing an infill percentage before the part has even been understood.
At 3D Printing by Kevin, I approach these projects from the other direction: understand the job first, then decide what should be made.
This problem-first approach also explains why additive manufacturing works so well for unusual and low-volume projects. The National Institute of Standards and Technology notes that additive manufacturing can improve the economics of low-volume production and customization while allowing designs to be revised without traditional tooling.
Read NIST’s overview of additive manufacturing and low-volume production.
What Counts as a “Unique Build”?
A unique build does not have to be exotic. Some of the most worthwhile projects are surprisingly ordinary—they are simply specific enough that nobody has a good reason to mass-produce them.
Custom Brackets & Adapters
A bracket that fits one machine, joins two mismatched components, changes an angle, or positions something exactly where you need it.
Mounts & Holders
Tool holders, device cradles, wall mounts, bench organizers, cable supports, positioning fixtures, and oddly specific storage solutions.
Missing or Discontinued Parts
Clips, covers, guides, spacers, knobs, brackets, tabs, housings, and plastic components that are no longer available separately.
Prototype Ideas
A physical first version that lets you evaluate size, grip, clearance, assembly, appearance, or basic function before committing further.
Jigs & Fixtures
Simple aids that position, guide, align, space, hold, drill, assemble, inspect, or repeat a workshop task more consistently.
Small-Batch Parts
Once a design has been verified, a modest quantity of matching parts may make more sense than investing in traditional tooling.
If the job involves replacing an existing component, see my guide to discontinued plastic parts replaced with 3D printing. For cracked tabs, mounting pieces, and snap features, the broken brackets and clips guide goes deeper into that type of project.
Custom 3D Printing vs. Buying Something That Almost Fits
Custom is not automatically better. If a safe, inexpensive, readily available product already solves the problem, buying it may be the smarter choice.
The advantage appears when the compromises start piling up.
| Situation | Off-the-Shelf Part | Custom 3D-Printed Part |
|---|---|---|
| Dimensions | Designed around a general market | Can be designed around your available space and interfaces |
| Mounting | May require drilling, shims, tape, or improvised adapters | Mounting features can be incorporated into the design |
| Quantity | Excellent when a standard item already exists | Useful for one-offs and low-volume needs |
| Revision | You adapt your project to the product | The design can be revised around what the test reveals |
| Odd geometry | Limited to what manufacturers chose to sell | Can address highly specific shapes and clearances |
| Best choice when… | A standard product genuinely fits and meets the requirements | The real problem is too specific for a universal solution |
You Do Not Need a Finished 3D File to Start
This is one of the biggest misconceptions around custom 3D printing.
People sometimes put off a project because they assume they need to learn CAD, create a perfect STL, select a filament, specify tolerances, and understand printer settings before contacting someone.
You do not.
A useful project can begin with any combination of:
- A broken or undamaged original component
- Photos from several angles
- Measurements
- A hand sketch with dimensions
- A STEP, STL, or OBJ file
- A drawing or PDF
- The object the new part must fit around
- A description of what the finished part needs to accomplish
For an unusual part, I am often more interested in seeing where it goes and what touches it than seeing an isolated beauty shot of the broken piece.
The P.R.I.N.T. Method™ for a Part That Has Never Existed Before
Unique-build projects are a natural fit for the P.R.I.N.T. Method™ because they contain more uncertainty than simply downloading a proven model and pressing Print.
Define what needs to be solved.
Identify load, heat, movement, exposure, quantity, and risk.
Measure where the part touches, mounts, slides, clips, or aligns.
Choose sensible geometry, material, orientation, and process.
Prototype, inspect, revise, and verify.
The important part is that the method does not assume 3D printing is automatically the answer.
Sometimes the next-best route is an FDM print. Sometimes it is a revised design, a different material, a metal component, a commercially available replacement, or another manufacturing process entirely.
From “I Wish This Existed” to a Physical Part
The Unique-Build Workflow
1. Define the result
Start with the sentence: “I need this part to…”
Hold a device. Keep a cover closed. Adapt one diameter to another. Position a sensor. Replace a missing guide. Support a hose. Organize five unusual tools. Prevent a cable from rubbing against an edge.
A clear job statement prevents the design from becoming a collection of dimensions without a purpose.
2. Identify the interfaces
Interfaces are the places where the new part interacts with the real world: screw holes, slots, mating faces, clips, shafts, curves, ledges, surfaces, handles, cables, neighboring components, or moving mechanisms.
These are normally more important than copying every cosmetic curve from the original object.
3. Choose geometry and material around the job
A part that works indoors on a shelf has different requirements from a part sitting inside a vehicle, beside a motor, outdoors in sunlight, or under repeated flexing.
Material choice cannot be separated from geometry, print orientation, wall design, fasteners, temperature, load direction, and expected use.
That is why simply requesting “the strongest filament” is rarely enough information.
4. Test the uncertainty—not necessarily the entire part
One of the most useful habits in custom fabrication is printing the smallest test that can answer the biggest unanswered question.
If the uncertainty is a hole pattern, test the mounting face. If it is a snap feature, test the clip. If it is a curved fit, print a narrow section of the curve.
A controlled prototype can save time and make revisions much easier to interpret.
My guide Why 3D-Printed Replacement Parts Need a Test Fit walks through this process in detail.
5. Verify the finished configuration
Once the geometry works, the final version still needs to make sense in the intended material, orientation, assembly method, environment, and quantity.
One successful prototype is especially valuable before producing a batch. Printing ten copies of an uncertain design does not reduce uncertainty. It multiplies it.
When Custom 3D Printing Is Especially Good at Solving the Problem
Custom FDM printing is particularly compelling when the project combines several of these conditions:
- The needed quantity is low.
- The geometry is specific to one object or workspace.
- The original component is unavailable.
- The design may need one or more revisions.
- A prototype would answer useful questions.
- Traditional tooling would be disproportionate to the project.
- The part can be safely produced from a suitable printable material.
The best candidate is not necessarily the fanciest object. A simple spacer that solves an annoying alignment problem can deliver more practical value than a complicated print that has no real job.
When 3D Printing May Not Be the Right Answer
This is just as important.
A custom desktop FDM part should not automatically be treated as a replacement for every original component simply because its shape can be reproduced.
Safety guards, pressure-containing parts, structural vehicle components, medical devices, food-contact applications, high-energy rotating equipment, electrical safety components, lifting hardware, and other critical applications can require certified materials, engineering analysis, regulated manufacturing, or another process altogether.
The FDA, for example, regulates 3D-printed medical devices under the same regulatory framework that applies to conventionally manufactured medical devices. A part being printable does not by itself establish that it is appropriate for a regulated or safety-critical use.
Learn more about 3D printing and medical devices from the FDA.
A good project review should be allowed to reach the answer: “This should not be an ordinary FDM print.”
Unique-Build Project Planner
Before You Request a Quote, Gather What You Can
You do not need every answer. This checklist simply helps turn a vague idea into a project that can be evaluated efficiently.
- What does the finished part need to do?
- Where will it be used?
- What does it attach to or fit around?
- What are the most important dimensions?
- Does it need to flex, slide, rotate, clip, or release?
- Will it experience heat, sunlight, moisture, chemicals, impact, or vibration?
- Does it support weight or resist a repeated force?
- Do you have the original object or broken part?
- Do you have photos, sketches, CAD files, or drawings?
- How many finished parts do you need?
- Is appearance important, or is function the priority?
- What would happen if the part failed?
Want to Build It Yourself?
Some readers arrive here because they want the part made. Others see a strange problem and immediately think, “Okay, now I need a printer.” I understand that reaction.
If you want to develop your own custom-part workflow, these are resources I use or recommend for the DIY path:
3D Printers
Explore Creality 3D printers if you are researching desktop machines for prototypes, functional parts, and custom projects.
3D Scanning
Explore 3DMakerpro scanners when an existing physical object or complex surface may help provide reference geometry for a modeling workflow.
Filament
Shop COEX filament. Use code 3DPRINTINGBYKEVIN for 15% off eligible orders.
Affiliate disclosure: Some links above are affiliate or partner links. If you purchase through them, 3D Printing by Kevin may earn compensation at no additional cost to you. Recommendations are included for readers who want to build their own workflow; hiring me for a custom part does not require purchasing any of these products.
Build Better Projects With the P.R.I.N.T. It Guide
If you would rather understand the entire workflow—from choosing equipment and materials to troubleshooting prints and developing useful parts—my P.R.I.N.T. It: Practical 3D Printing for Beginners ebook was built around that process.
It includes the P.R.I.N.T. Method™, practical planning tools, troubleshooting guidance, material decisions, calibration, maintenance, and a workflow for moving beyond random prints toward useful projects.
Quick Knowledge Check
Open each question to see whether you caught the most important ideas.
1. Do you need an STL file before asking about a custom 3D-printed part?
No. An STL or STEP file can help, but a project can begin with photos, measurements, sketches, an original component, a broken part, or a clear description of the problem.
2. What should be decided first: infill percentage or what the part needs to do?
The function comes first. Load, heat, movement, attachment, environment, geometry, failure risk, and interfaces should guide the design and printing decisions.
3. Why might a small test section be smarter than printing the entire part?
A smaller test can isolate an uncertain hole, clip, mounting surface, clearance, or curve. That makes the result faster and easier to interpret before committing to the complete design.
4. If a component can physically be 3D printed, does that automatically mean it should be?
No. Safety-critical, regulated, high-temperature, structural, pressure, medical, electrical, or other demanding applications may require engineering review, certified materials, another manufacturing process, or an original replacement.
Frequently Asked Questions
What kinds of unique parts can be custom 3D printed?
Common candidates include brackets, adapters, mounts, holders, clips, covers, guides, spacers, knobs, organizers, prototype housings, jigs, fixtures, discontinued plastic components, and other low-volume parts. Suitability depends on the geometry, material requirements, use environment, load, and consequences of failure.
Can you design a part if I only have an idea or sketch?
Potentially, yes. A useful starting point can include a sketch, photographs, measurements, the mating object, or a description of what the part needs to accomplish. The first step is reviewing whether enough information exists to develop a practical design path.
Can you reproduce a part from an original physical component?
Many suitable parts can be measured, modeled, or reverse-engineered from an original reference. The process depends on the geometry and condition of the component. Complex surfaces may require additional reference measurements, scanning, or controlled test fits.
What file formats can I send?
STL, STEP, and OBJ files are useful starting formats. You can also provide photographs, sketches, drawings, PDFs, measurements, or project notes when a finished 3D model does not yet exist.
How many prototypes will my custom part need?
There is no universal number. A simple bracket with complete dimensions may work immediately. A part involving damaged references, snap fits, moving interfaces, hidden geometry, or tight clearances may require controlled revisions. The objective is to resolve uncertainty efficiently rather than promise that every first print will be the final one.
Can you make more copies after the first part works?
Often, yes. Once the design, material, print orientation, finishing, and fit are verified, additional copies may be much more straightforward. Small-batch suitability still depends on part size, print time, quantity, inspection needs, deadline, and production capacity.
Do you only work with customers in Northern Kentucky?
3D Printing by Kevin is based in Independence, Kentucky and serves the Northern Kentucky/Cincinnati area locally. Suitable projects can also be reviewed for customers who are able to send the required files, measurements, reference parts, or other project information.
The Part Does Not Have to Exist Yet.
If you need a bracket nobody sells, a holder built around one particular object, a discontinued plastic component, a prototype, or something so specific that searching for it has become ridiculous, send me what you have.
A broken original, sketch, measurements, photos, or digital model can all be useful starting points.
What Would You Make If the Part Actually Fit Your Problem?
I am curious about the oddly specific projects because those are often where 3D printing earns its keep. Have you ever needed a bracket, adapter, replacement piece, organizer, or little plastic thing that apparently nobody on Earth thought was worth selling?
Tell me about it in the comments. Even if you never print it, describing the problem is often the first step toward realizing what the solution actually needs to be.
