Calibrating your 3D printer isn’t just a technical ritual — it’s the heartbeat of quality printing. Whether you’re new to the hobby or aiming for silky ASA prints on your Creality CR-M4, proper calibration transforms frustration into flawless output. This guide breaks down essential techniques for beginners, helping you avoid common pitfalls while dialing in your machine for peak performance.

Bed Leveling & Z-Offset: Your Print’s Foundation
For first-time users, nothing affects success more than bed leveling and Z-offset adjustment. Think of it as prepping a canvas before a masterpiece. A poorly leveled bed leads to poor adhesion, warped prints, or nozzle crashes. Start by using the paper test to check resistance across corners and center, or trust your auto bed leveling — just make sure it’s properly stored with mesh data (M500) and verified after firmware changes.
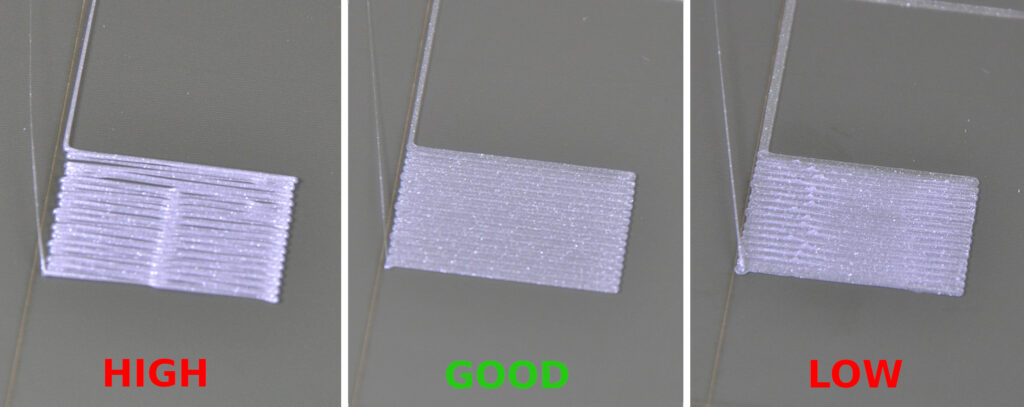
Equally crucial, Z-offset tuning ensures your nozzle kisses the bed just right. Too high and your filament won’t stick; too low and it carves into your print like a bulldozer. A smooth, glossy first layer is your sign that it’s dialed in.
E-Step & Flow Calibration: Controlling Your Extruder’s Heartbeat
Once your base is solid, move to extrusion tuning. E-steps tell the extruder how much filament to push — if it’s off, you’ll see gaps or overbuilt blobs. Mark your filament, extrude 100mm, then measure. Update your firmware with:
M92 E[new_value]
M500
After E-steps, adjust flow rate by printing a single-wall cube. Measure wall thickness and tweak the flow setting until it matches your nozzle diameter (typically 0.4mm). This fine-tuning directly impacts wall strength and dimensional accuracy.
Temperature Towers: Discovering Filament Sweet Spots
Not all ASA or PLA is created equal, and generic temps won’t cut it. Run a temperature tower ranging from 220°C to 260°C depending on your filament. Watch for changes in stringing, bridging, layer adhesion, and discoloration. Dial in the temperature where quality stabilizes.
Retraction Tuning: Say Goodbye to Stringing
Stringing happens when your nozzle oozes between travel moves. Retraction solves this — but it’s a balancing act. For direct drive setups like the CR-M4, start around 1.5–2mm distance and 30–40mm/s speed. Use retraction test prints to find the sweet spot without causing clogs or under-extrusion.
PID & XYZ Calibration: Temperature Stability Meets Dimensional Accuracy
PID tuning stabilizes your hotend’s temperature swings. Use the command M303 E0 S[target_temp] C8, then lock it in with M500. This ensures precise extrusion over long prints, especially crucial for high-temp filaments like ASA.
Next, check your printer’s XYZ steps/mm by printing a 20×20×20mm cube. Measure each axis with calipers and update firmware if dimensions don’t match. Accurate steps mean your prints will be true to size — essential for mechanical or functional parts.
Don’t Skip Calibration Prints: Practice Makes Precision
Calibration models aren’t just time-fillers — they’re your diagnostic tools. Start with an XYZ cube for sizing, Cali Cat or Cali Dragon for fine features, and Benchy for overall performance. Use them to validate slicer settings, nozzle performance, and adhesion tweaks.
Ultimate G-Code Calibration Script for CR-M4 Users
Ready to automate your calibration routine? This G-code script walks your printer through essential steps: corner probing, nozzle heating, and Z-offset prep.
gcode
; CR-M4 Beginner Calibration Routine
G28                 ; Home all axes
G29                 ; Auto bed leveling
M500                ; Save mesh data
M104 S240           ; Set hotend temp (adjust based on filament)
M140 S85            ; Set bed temp (adjust based on filament)
M190 S85            ; Wait for bed to reach temp
M109 S240           ; Wait for hotend to reach temp
G1 Z0.2 F1200       ; Move to first layer height
G1 X20 Y20 F6000    ; Move to corner
G1 X200 Y20 F6000   ; Sweep to next corner
G1 X200 Y200 F6000  ; Continue sweep
G1 X20 Y200 F6000   ; Final corner
G1 X110 Y110 F6000  ; Center move
; Pause for Z-offset inspection
M0                  ; User adjusts Z-offset manually
G92 E0              ; Reset extruder
G1 E10 F100         ; Prime extruder

