
THE FAILED PRINT IS LEAVING YOU A CLUE
Same spot. Another failure.
Make the next test count.
Before starting the file again, work out what is actually repeating: the height, the feature, or the time on the clock.
Two unfinished parts sit beside the printer. Their lower walls look good. Both go wrong near the same point, and a third attempt is tempting because the first half looked so promising.
Keep those failed parts. Place them side by side, measure where the trouble starts, and open the sliced preview. That comparison can make your next troubleshooting decision much more useful.
Quick answer: Why do prints fail at the same height?
A repeated failure can track a mechanical restriction, a difficult model feature, a programmed event, or a problem that develops during a longer print. Repeating the same file also repeats its timing and toolpath, so height alone cannot identify the cause.
Start with the first visible symptom. A sideways shift, missing extrusion, a lifted corner, and a stopped printer need different checks. Record the height and elapsed time before changing settings.
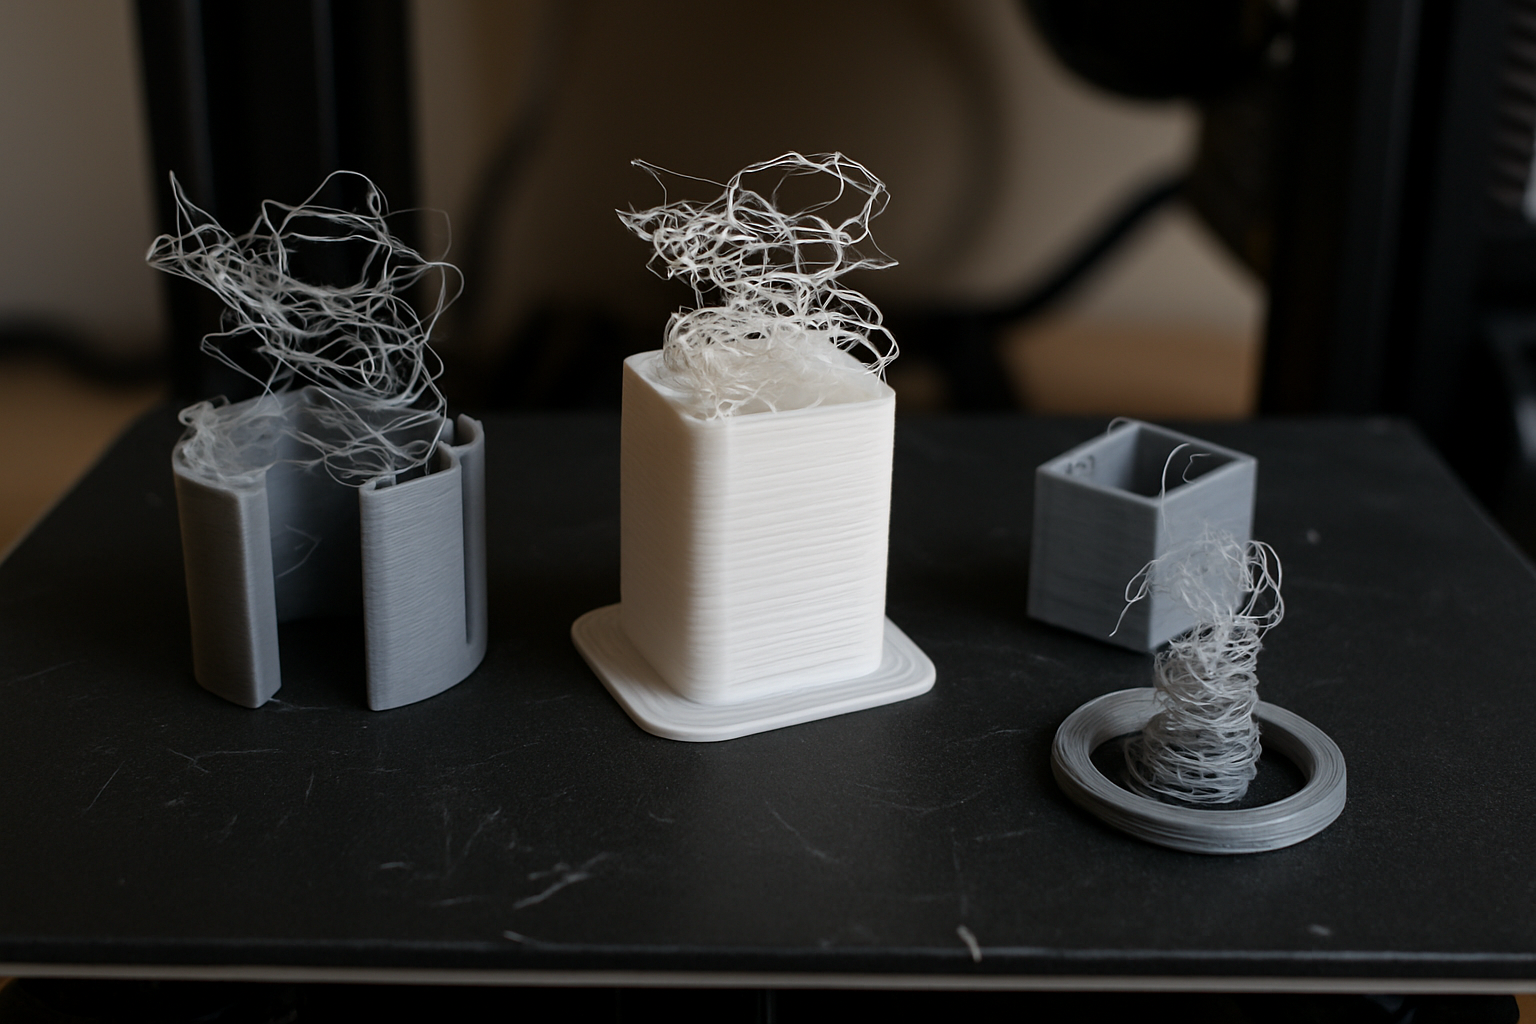
Three clues that narrow the investigation
The guide below is a troubleshooting framework, not a diagnostic guarantee. Use each pattern to choose what to inspect next.
01 · Same height
Different models, similar Z height.
Look for restricted travel, cable tension, or a filament path that tightens as the machine moves.
02 · Same feature
Trouble starts at a ledge, roof, or narrow section.
Inspect support, curling, toolpaths, and settings around that transition.
03 · Same time
Different jobs fail after a similar duration.
Investigate heat buildup, feeding trouble, and recorded printer errors.
First, name the failure you can actually see
| What happened? | Start here | Evidence to save |
|---|---|---|
| The upper part shifted sideways. | X/Y motion, belt or pulley condition, and possible collisions. | Shift direction; a video of the moment it starts. |
| The head moved but plastic stopped coming out. | Filament supply, drive gears, a jam, and hotend cooling. | Clicking, ground filament, fan behavior, temperature history. |
| A corner lifted before the mess appeared. | Adhesion, warping, and nozzle contact. | The earliest lifted edge, not just the final spaghetti. |
| The display showed a pause or error. | The exact message, scheduled events, and file transfer. | A photo of the screen and the original job file. |
| Layers compressed and the nozzle scraped. | Z travel and possible obstruction; also inspect raised plastic. | Measured height and the first signs of scraping. |
For a sideways shift, Prusa’s layer-shifting guide covers motion obstructions, belt tension, pulleys, and collisions with curled overhangs. Use the instructions for your own printer before adjusting hardware.
1. Check what changes at that height
With the print removed, inspect the route taken by the bed or gantry. Depending on the machine, the bed may descend while the toolhead stays at a fixed height. Follow the moving components rather than assuming every printer has a rising gantry.
Use the manufacturer’s homing and movement procedure. Where supported, use the controls to move slowly through the suspect region, with hands clear and enough clearance for the nozzle. Stop if movement becomes restricted.
- Does a cable bundle become taut or touch the frame?
- Does a tube kink or press against an enclosure?
- Is there debris or an obstruction along the travel path?
- Does resistance depend on where the toolhead sits in X/Y?
2. Watch the filament supply before blaming the nozzle
Trace the filament from the spool to the extruder. Check for a spool rubbing its holder, a trapped strand, a sharp bend, or an empty supply. Observe whether the drive gear turns while the filament stays still.
Ground filament or clicking indicates a feeding problem, but it does not identify why feeding became difficult. A blocked nozzle, excessive flow demand, or resistance upstream can produce overlapping symptoms.
Simplify3D’s mid-print extrusion guide includes depleted filament, stripped filament, clogging, and motor-driver overheating among the checks. Start with what you can observe before replacing parts.
3. Separate elapsed time from physical height
Imagine two attempts at one file fail around 45 mm after 90 minutes. Both height and time repeated. That result alone cannot tell you whether a movement restriction or a developing thermal problem is responsible.
A useful comparison: review another job with a different shape and duration. Does it pass 45 mm? Does trouble still develop around 90 minutes? Existing job history may answer this without another long print.
Heat creep means heat reaches too far into the hotend’s cooler filament path and can contribute to a jam. It is one possibility, not the automatic explanation for every mid-print extrusion failure.
Check that the heatsink cooling fan works as designed and that its airflow is unobstructed. The part-cooling fan serves a different purpose; setting every fan to 100% is not a universal fix.
Follow the printer’s material-specific enclosure guidance, especially for PLA. See Prusa’s heat-creep explanation for the mechanism and model-specific checks. Preserve the exact error message if the printer reports a thermal fault; do not disable protection to continue printing.
4. Look at the layer before the failure
Open the sliced preview and move through several layers below and above the trouble spot. Look for the first unsupported island, a bridge, a new overhang, a narrow tower, or the transition to solid layers.
Ask a concrete question: what will the next line of plastic sit on? If the answer is empty space, inspect orientation and support. If the underlying edge is curling upward, look for nozzle contact in a recording.
Also inspect pauses, filament changes, modifiers, and custom commands. PrusaSlicer supports pauses and custom G-code at chosen layers, so an orderly stop may have been scheduled.
Save the original project, then re-slice with the correct machine, nozzle, and material profiles. If a file or storage problem is suspected, export a fresh copy and use a manufacturer-supported transfer method. Keep the original error and file for comparison.
Choose a test that can answer your question
These are proposed comparison tests. A successful result narrows the possibilities; it does not prove every part of the printer is healthy.
- Suspected height restriction: after inspecting movement, use a stable, simple test that passes the suspect height. Keep the material and profile consistent. A tower passing that point does not rule out problems at other X/Y positions.
- Suspected feature problem: print a supported section containing the transition. This can test support or geometry, but cropping changes height, time, and thermal history.
- Suspected flow overload: reduce the relevant print speed or volumetric-flow limit conservatively within the material profile, then compare extrusion. Avoid changing temperature and retraction simultaneously.
- Suspected time-related problem: compare jobs with different geometry and record when symptoms begin. A quick tower cannot rule out a problem that appears only during a long run.
MAKE THE RESULT READABLE
One observation. One planned change. One recorded result.
If you change the spool, nozzle temperature, retraction, speed, and support together, a successful print will not tell you which change helped.
Put the failure into your P.R.I.N.T. planner
Use the Test & Tune stage of my P.R.I.N.T. Method™ to turn the next attempt into a useful comparison. Copy this record into your project notes:
Problem: First visible symptom: __________
Requirements: What must the next test demonstrate? __________
Interfaces: Bed contact, support contact, cable clearance, or filament path to inspect: __________
Next-Best Materials & Methods: One change to test: __________
Test & Tune: Height: ___ mm · Elapsed time: ___ · Result: __________
Keep with the record: Printer, nozzle, filament, slicer/profile, temperatures, project file, and a photo.
For a reusable planning reference, P.R.I.N.T. It Practical: 3D Printing for Beginners includes planners, checklists, and troubleshooting guidance.
Four-question knowledge check
Decide what you would do, then tap each question to reveal the explanation.
1. The same file fails twice at 50 mm. Does that prove Z-axis binding?
No. The file also repeats its geometry, commands, and approximate timing. Compare those clues before choosing a mechanical adjustment.
2. The top half shifts sideways. Which motion system deserves attention first?
X/Y motion and possible collisions. Record the direction and inspect the relevant belt, pulley, travel path, and raised model features using the machine’s instructions.
3. A cropped section prints successfully. Have you ruled out a long-print problem?
No. Cropping changes the job’s duration and physical height. It can answer a local geometry question without reproducing the original conditions.
4. What should you record before the next retry?
The first symptom, height, elapsed time, and one planned change. Save the profile and job file too, so the comparison remains useful.
Frequently asked questions
Can a damaged file cause a repeatable failure?
Yes, a file or transfer problem can produce a repeatable interruption. Check the printer’s message and compare a fresh export. A repeated failure alone does not prove file corruption.
Should I recalibrate E-steps?
Only if evidence points to an extrusion-calibration problem and your machine supports that procedure. A failure that begins halfway through a print is not, by itself, a reason to change E-steps or rotation distance.
Will slowing the print fix it?
It may help if motion or extrusion demand is too high. It also changes print duration, so treat it as a controlled test. It will not remove an obstruction or supply missing support.
When should I stop troubleshooting and contact support?
Stop repeated retries if movement binds, the machine crashes into the part, wiring appears damaged, or a thermal error recurs. Send support the error text, height, elapsed time, project file, and a short recording where available.
Give the next attempt a clear purpose
Pick the strongest clue, make one appropriate change, and record what happens. For symptoms that do not fit this pattern, use my broader 3D printing troubleshooting guide.
Need help getting a custom part designed or printed? Include the intended use, dimensions, and relevant photos with your project request.
Discuss your custom printing project
What repeats on your printer? Share the printer model, filament, failure height, elapsed time, and whether it shifted, stopped feeding, lifted, or paused in the comments.
