
A colorful print can cost more in discarded filament than in the finished model. That is why the SparkX i7 deserves a closer look—and why its price tag alone cannot settle the buying decision.
Start with the right bundle, the parts you actually want to make, and the cost of finishing them.
Assessment basis: This buying guide uses manufacturer documentation, a dated US store price check, and attributed independent reviews. It does not present an in-house SparkX i7 test or numerical performance ratings.
Affiliate disclosure: Creality and COEX partner links may earn me a commission at no additional cost to you. Buying advice is based on project fit; a purchase is not required to use the planner or guides.
Quick answer: is the SparkX i7 a good budget multicolor buy?
The SparkX i7 Color Combo is worth shortlisting for regular PLA signs, labels, organizers, and gifts. Creality’s standard US series listing showed $359 for the printer plus CFS Lite when checked on September 3, 2026. This is a dated listing price; promotions, stock, tax, and shipping can change. See the exact bundle listing.
My recommendation is conditional: buy it when the complete setup suits your projects and compares favorably with other color bundles. There is not enough evidence here to crown it the winner for every budget buyer.
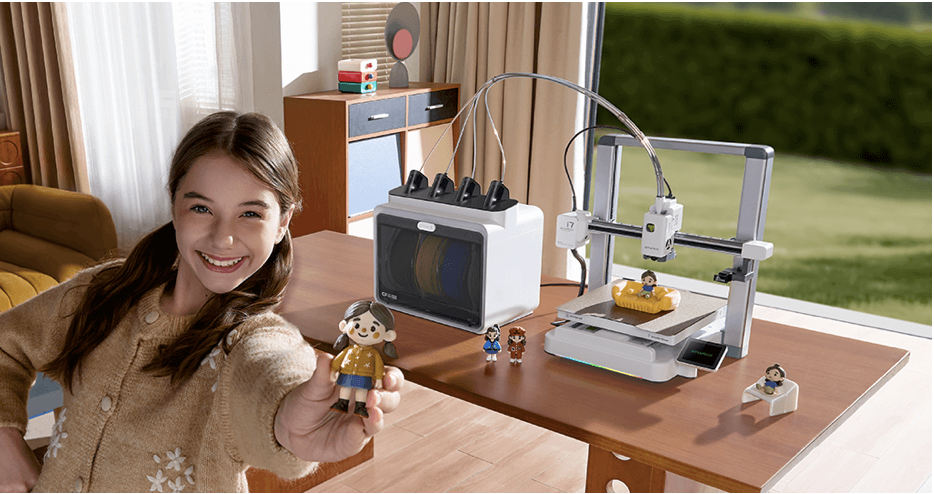
Check the bundle before comparing prices
A low advertised SparkX i7 price may refer to a different filament system. In particular, automatic spool refill and automatic color changes solve different problems.
- Single spooli7 standaloneThe printer for ordinary single-filament jobs. CFS Lite is not included.
- Keep printingi7 AutofillCFS mini switches spools for continued single-color printing. It does not add multicolor printing.
- Change colorsi7 Color ComboThe printer plus CFS Lite, with up to four loaded colors feeding one nozzle.
There is also a separate Nano Combo. Creality’s packing list identifies its feeder as CFS nano. This article evaluates the CFS Lite Color Combo; do not substitute Nano pricing or assume the systems have identical storage features.
Compare delivered totals for the exact packages, then check return terms, regional warranty coverage, and replacement-part availability. A launch discount from an old review is not today’s checkout price.
The affiliate link opens Creality’s store homepage. Select the SparkX i7 Color Combo with CFS Lite to compare the package discussed here.
The features that make the i7 worth considering
| Feature | Practical meaning |
|---|---|
| 260 × 260 × 255 mm build volume | Useful space for organizers and signs. Supports, brims, and a purge tower can reduce the room available for the model. |
| Automatic calibration and bed leveling | Less manual setup, while plate cleanliness and correct profiles still matter. |
| 0.4 mm hardened-steel nozzle | A wear-resistant starting nozzle. Feeder compatibility still needs checking before using abrasive filament. |
| 300°C nozzle / 100°C bed limits | Hardware maximums, not permission to print every engineering material. |
| Camera and AI monitoring | Remote viewing and detection features provide extra information; they cannot guarantee that a job will succeed. |
Sources: i7 specifications and limits, independent setup and leveling assessment, and camera functions.
I would put setup, service access, and a workable slicer profile ahead of lighting effects. A machine earns its place when you can repeat a useful print and recover sensibly when something goes wrong.
For maintenance planning, Creality publishes an i7 parts list covering hotends, cutters, wiping parts, fans, and feeder components. Check local stock and delivery costs before assuming a listed part is immediately available.
SparkX i7 vs. A1 Combo vs. A1 mini Combo
These three options make a useful comparison for buyers considering an open-frame printer with automatic color feeding. They are a shortlist, not an exhaustive ranking of the 2026 market.
| Package | Build volume | Why compare it? | Check before buying |
|---|---|---|---|
| SparkX i7 Color Combo | 260 × 260 × 255 mm | CFS Lite and a competitive dated bundle price. | Exact feeder, current profiles, purge estimate, and spool fit. |
| Bambu Lab A1 Combo | 256 × 256 × 256 mm | Similar part capacity with AMS lite. | Complete combo price and whether its software workflow suits you. |
| Bambu Lab A1 mini Combo | 180 × 180 × 180 mm | A smaller build area may be enough for tags, small models, and compact parts. | Your largest planned model plus supports and color-printing overhead. |
Specifications: Creality i7; Bambu’s official A1 Combo guide (PDF) and A1 mini Combo guide (PDF). A reliable current Bambu checkout price was not available during this update, so none is presented as a verified live offer.
The i7’s bed-size advantage over the A1 is small: only 4 mm on each horizontal axis, with 1 mm less height. That is not a meaningful upgrade for most models that already fit an A1. The difference from the A1 mini is much more relevant.
Load your three most likely projects into the relevant slicer profiles. Compare fit, filament use, estimated time, and your comfort with each workflow. If you already own a working multicolor printer, require a specific solved problem before buying another.
Lower purge waste does not mean low-cost printing every time
Creality attributes reduced color-change waste to a shorter hotend filament path and retracting before cutting. Its roughly 50% reduction claim uses an earlier generation of similar designs as the comparison. It is not a promise that every i7 project uses half the filament of every rival. Read the manufacturer’s explanation.
Tom’s Hardware’s launch review praised the printing experience but found very high waste on a small four-color model with its test settings. FauxHammer reported color contamination and feeding problems, while explicitly identifying its unit and software as pre-release.
A useful owner discussion on Reddit shows another trap: switching printer profiles without using their intended flushing settings distorted a waste comparison. That is one person’s report, not a controlled reliability study, but it reinforces the need to record settings.
Software version matters. Creality’s firmware history includes changes to detection, feeding behavior, and stability after launch. The latest entry visible during this check was 1.1.5.8, dated August 11, 2026. Early tests are useful context; they do not establish current failure rates.
Illustrative planning example—not a measured SparkX i7 result.
- 40 g finished model
- 45 g flushed filament
- 10 g tower
- 5 g supports
Make color earn its place in the design
- Begin with raised text or a color change at a layer boundary. Compare that estimate with a model requiring frequent swaps through its height.
- Batch identical models when you need the copies. Shared layer-by-layer color changes can spread overhead across more finished pieces.
- Try separate colored components. Printing a base and insert individually may use less material; allow for assembly and fit.
- Validate a small dark-to-light transition. Reducing flushing too aggressively can leave the next color contaminated.
These are ways to compare designs, not universal settings to copy. Save a baseline and test one change at a time; the calibration guide explains that approach.
Match the filament to both the printer and the feeder
Start with ordinary PLA for learning the workflow. For a functional part, choose material according to heat, load, flexibility, and the consequences of failure—not simply because four colors are available.
- Ordinary 95A TPU: follow Creality’s external-spool procedure. Its dedicated TPU guide recommends 95A or harder for standalone use and specifies 64D or harder for CFS Lite. Shore A and Shore D are different scales. Official TPU guide.
- CF, glow, and other specialty filament: a hardened nozzle does not guarantee that a brittle or rough filament will travel reliably through the feeder. Check the exact material and spool against the CFS Lite compatibility guide.
- ABS, ASA, and high-temperature engineering materials: Creality does not recommend these for the open-frame i7. If those materials are central to your work, select a suitable controlled printing environment and machine. Manufacturer material limits.
CFS Lite includes desiccant compartments, according to its module guide. Do not count that as a substitute for drying damp filament using the filament maker’s instructions. Storage and drying are separate jobs.
Partner option: Browse COEX filament if you are comparing suppliers. Verify the exact spool dimensions and feeder compatibility before ordering. Check any partner-code discount in the cart rather than assuming it applies to every item.
Build your multicolor buying plan
Use the P.R.I.N.T. Method™ to turn a printer comparison into a project decision.
- P — Problem: Name three things you expect to print regularly.
- R — Requirements: Set size, material, appearance, budget, and turnaround needs.
- I — Interfaces: Check mating dimensions, workspace, spool fit, and software workflow.
- N — Next-Best Materials & Methods: Compare automatic color, separate parts, manual layer changes, and a printing service.
- T — Test & Tune: Start with one small model and record its actual result.
The article’s planner processes entries in this page only; it has no submission or storage feature. Copy your notes before leaving.
Defaults are examples. Replace them with your quote and slicer totals. Startup spending includes purchased filament; the per-job figure estimates consumption from that supply and should not automatically be added again. It excludes electricity, wear, labor, and failed attempts.
For a fuller reference on setup, slicing, and practical parts, explore The Practical Guide to 3D Printing: 2026 Expanded Edition, the updated P.R.I.N.T. It beginner ebook.
Your first week should test the workflow
- Set up and run a small single-color print. Follow the current manual, inspect the machine, and watch the first layer.
- Print a two-color label. Compare the slicer’s total material estimate with what the job actually consumes.
- Test the hardest planned color transition. Check that a light surface stays clean after a darker color.
- Repeat a useful project. Record material, software versions, settings, failures, cleanup, and print time.
The step-by-step beginner guide can help you establish a repeatable first-print routine.
Plan the room as carefully as the print. EPA notes that desktop 3D printing can release gases and ultrafine particles. Use suitable ventilation and exposure controls; PLA and a camera do not make an occupied room emission-free. Keep children and pets clear of hot and moving parts, and follow the operating manual. Read EPA’s printing-emissions guidance.
Four-question knowledge check
Choose one answer for each question. Use the answer key below whenever you want to review the reasoning.
Open the answer key and explanations
- Color Combo. The CFS Lite bundle provides automatic four-color feeding.
- Total filament use. Flushing, the tower, and supports can materially change the cost.
- External spool. Ordinary 95A TPU is outside CFS Lite’s supported flexible-filament range.
- Software context. Updates can change behavior, but improvements require verification rather than assumption.
Frequently asked questions
Is the SparkX i7 the cheapest way to get multicolor prints?
Not necessarily. Compare complete bundles at checkout, then include filament consumption and your project requirements. Printing separate colored pieces or changing filament at a layer boundary may meet a simple need with equipment you already own.
Can CFS Lite run ordinary 95A TPU?
Creality’s compatibility guidance excludes ordinary 95A TPU from CFS Lite. Use the external-spool procedure described in the linked TPU guide, and check the exact filament and profile before printing.
Does four-color printing also mean four different plastics?
Do not assume so. Feeding four colors of one compatible material is a simpler starting point. Different plastics can require conflicting temperatures or fail to bond as intended; validate the complete combination and feeder compatibility.
Will the AI camera prevent failed prints?
No detection system should be treated as a guarantee. Use the camera as another source of information while maintaining safe operating habits, checking the first layer, and investigating recurring faults.
Should I replace a working printer just to get the i7?
Only if it addresses a specific limitation at a sensible total cost. List what your existing machine cannot do, then compare a new printer with a feeder upgrade where supported, separate-part printing, or outsourcing that project.
The i7 makes sense when your projects justify the color system
I would shortlist the SparkX i7 Color Combo for regular creative projects, then let the complete price, real model estimates, workspace, and current software decide. That is a stronger reason to buy than an unsupported category trophy.
If you need one custom part or a short run, a project quote may be a better starting point than purchasing a machine.
What would you print in color? Share your first project in the comments. If you already own an i7, include your feeder, firmware, slicer version, and a model-versus-total-filament example so other readers can make a useful comparison.
