
Functional 3D printing · Snap-fit design
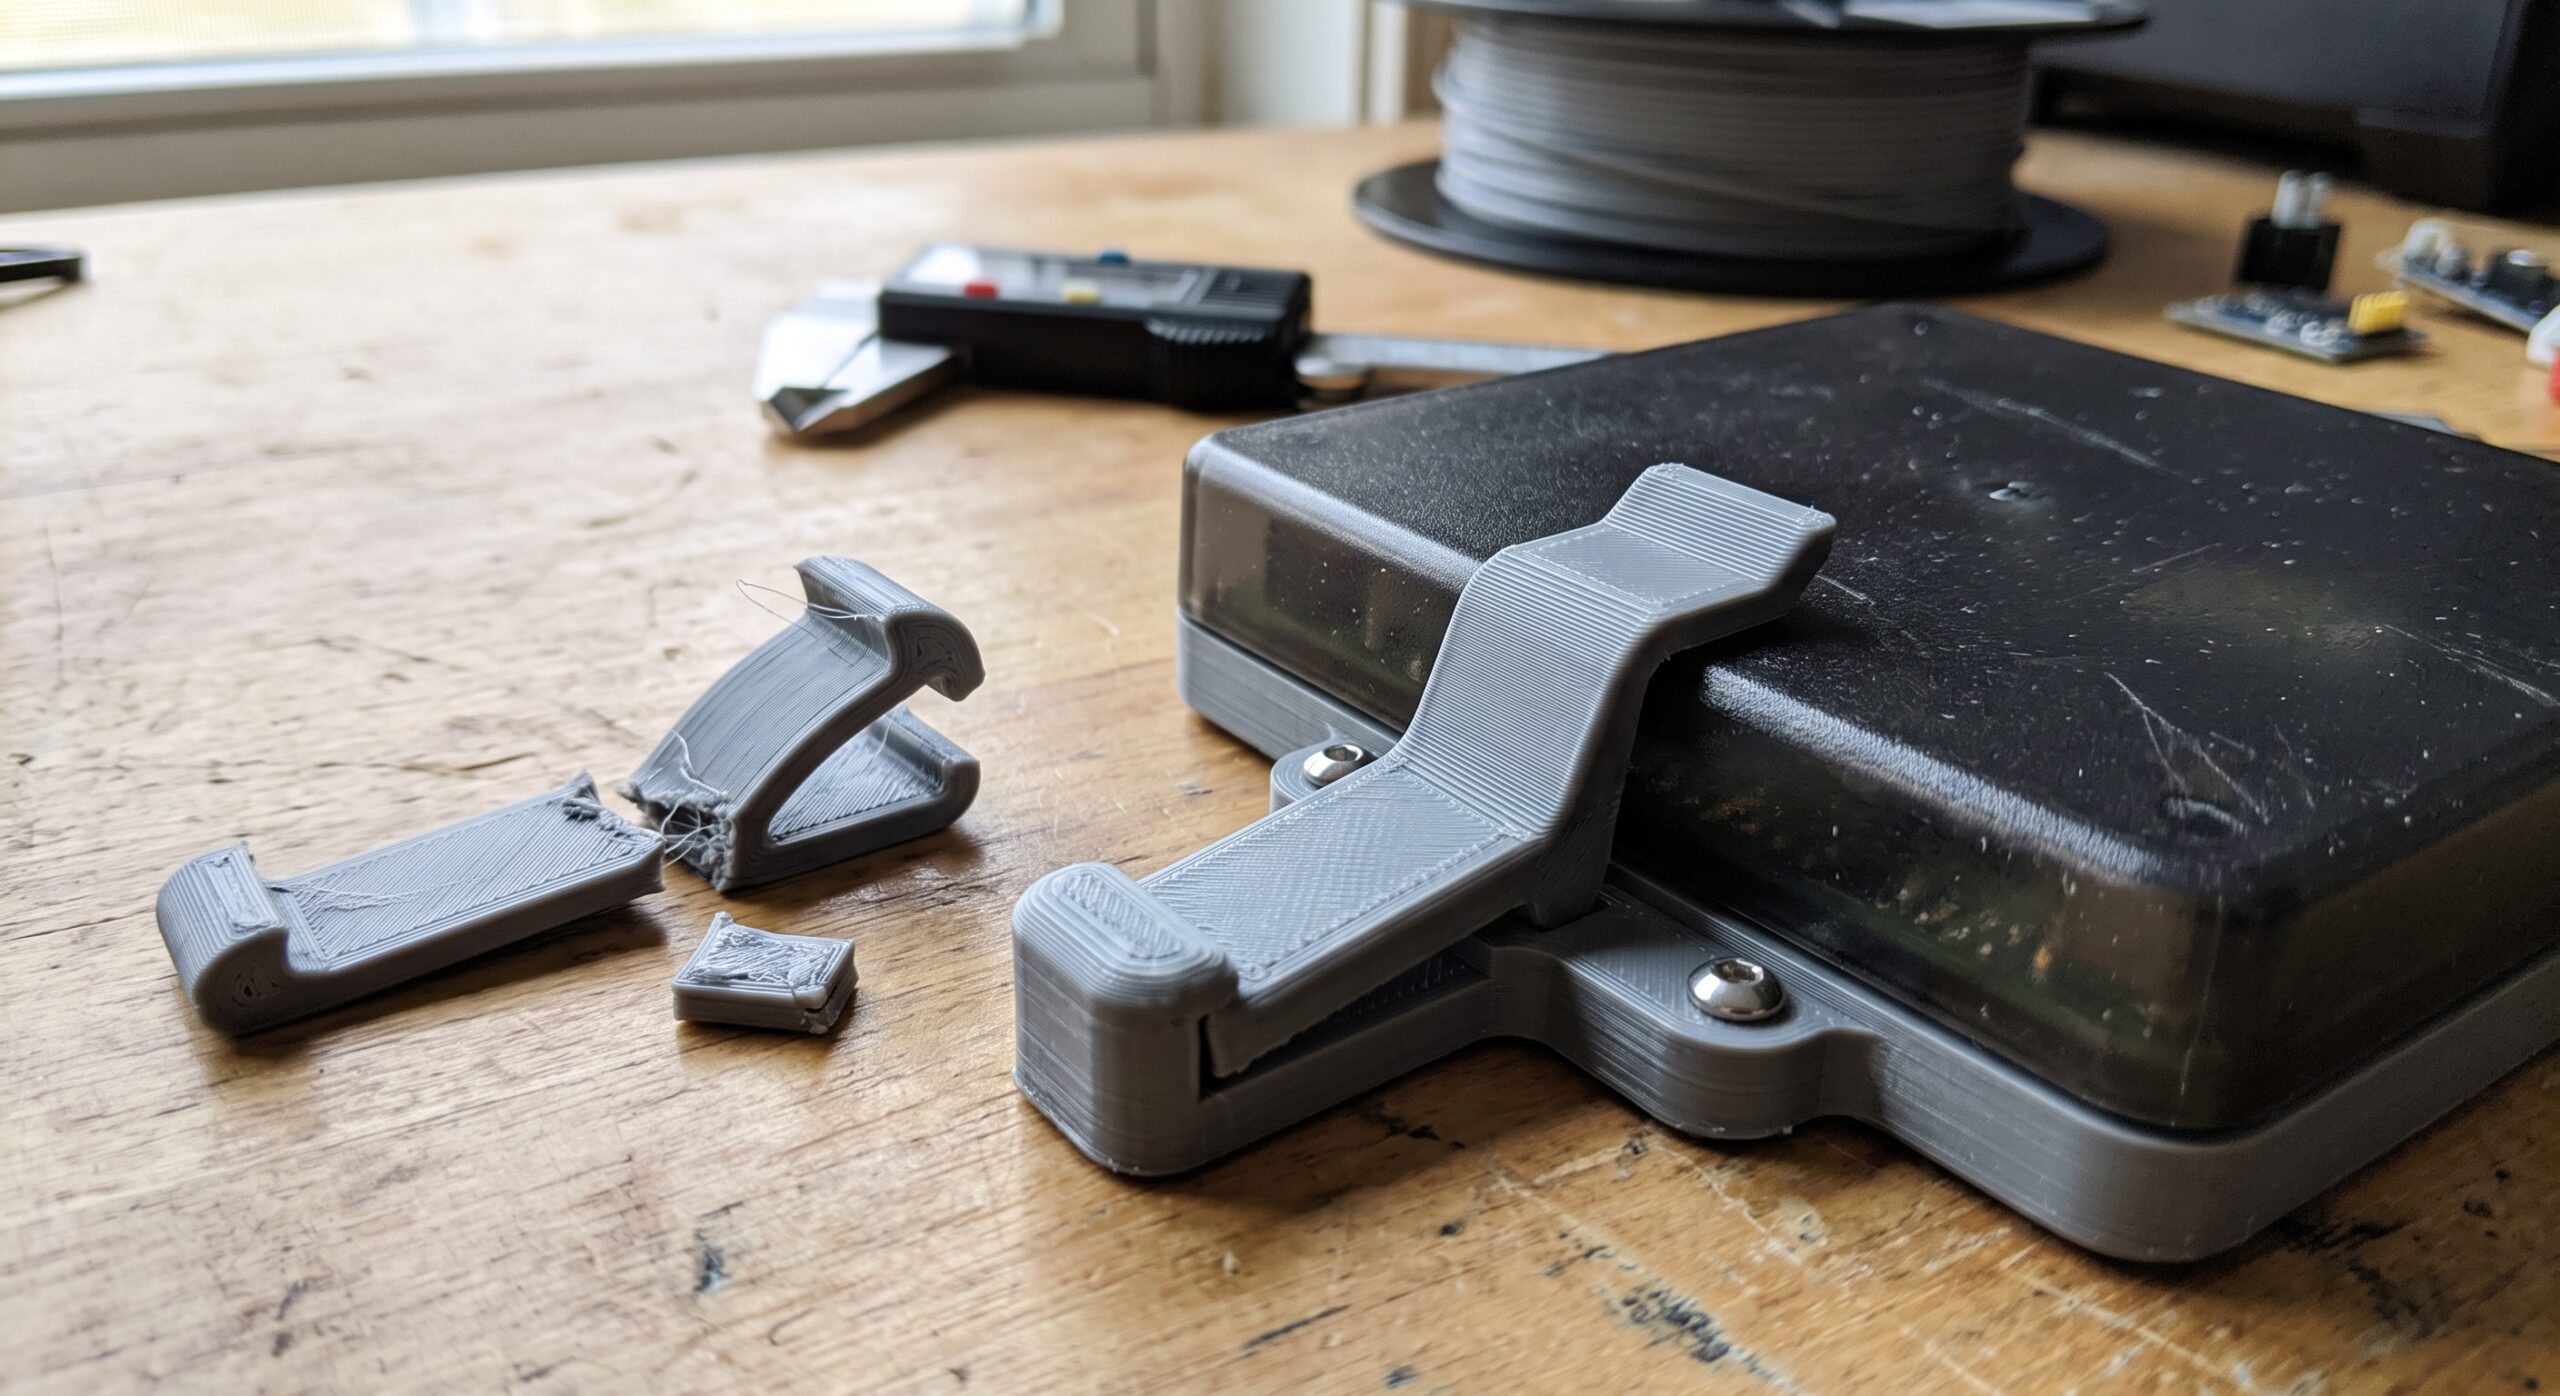
The clip snapped into place. The cover sat flush. For a few days, the part looked like a success.
Then a pale line appeared at the base of the clip. The latch felt softer each time it opened. One more removal—and the arm broke exactly where it joined the part.
That is not just a filament problem. A snap-fit clip is a spring, and it must be designed around how far it bends, where the strain collects, and how many times it needs to move.
Why a clip can fit once and still be a bad design
A first fit proves only that the parts can assemble. It does not prove that the clip can survive the strain, stay latched under vibration, tolerate heat, or open repeatedly.
When the mating part passes over the clip’s hook, the arm bends away. That temporary movement creates stress. If most of the bending occurs at one sharp corner, or if the arm must travel too far, the plastic may whiten, take a permanent set, delaminate, or fracture.
The six reasons 3D-printed snap fits fail
A short cantilever must bend sharply to travel the same distance. A longer arm can distribute that movement over more material.
A square inside corner concentrates stress exactly where the arm meets the body. A smooth fillet provides a gentler transition.
A tall engagement bump or steep entry face demands excessive deflection during assembly.
The arm needs open space behind it. If it bottoms against the housing, the remaining motion becomes crushing rather than controlled flex.
If the root opens across layer boundaries, the clip can split even when the same outline survives in another print orientation.
Heat, sunlight, chemicals, moisture, repeated loading, and cold conditions can change how a polymer behaves.
What the damage is trying to tell you
| What you see | Likely design question | Useful next test |
|---|---|---|
| White line at the root | Is strain concentrated at a sharp transition? | Add a larger fillet and lengthen the arm. |
| Clip stays bent after release | Is required deflection too high, or is sustained load causing deformation? | Reduce engagement and check the part after a timed hold. |
| Layers peel apart | Does the print orientation place root stress across layer interfaces? | Reorient or redesign the clip as a separate replaceable piece. |
| Hook edge chips | Is the entry angle abrupt or the tip too thin? | Use a smoother lead-in and more supported hook geometry. |
| Clip survives but rattles | Is retention too low or is the mating clearance too large? | Change one engagement dimension in a labeled coupon series. |
Design the flex before you design the hook
Many first attempts begin with the visible latch feature. I start with the flexible arm. Where can it bend? How far must it move? What stops it from being forced past its intended travel? Can the user release it without prying sideways?
Give the arm length
If space permits, extend the flexible section rather than making a short clip thinner and hoping it survives. The goal is controlled, distributed bending—not a hinge line accidentally created at the root.
Round the root generously
A visible radius is usually preferable to a sharp inside corner. The fillet must also appear meaningfully in the sliced toolpath; a tiny CAD fillet that disappears into one extrusion line may not change the printed structure enough.
Use a gentle lead-in
The entry face should guide the mating part over the hook without asking the arm to jump abruptly. The retention face can be more deliberate, but it still needs a release plan if the assembly is meant to open again.
Add an over-travel stop
A physical stop can keep a user from bending the arm far beyond its working range. Place it so normal assembly remains smooth and debris or print variation does not cause premature contact.
Material choice helps—but geometry decides where it bends
PLA, PETG, ASA, nylon, and flexible materials do not behave the same way. Even two products with the same generic material name can differ because of formulation, moisture, colorants, printing temperature, and layer bonding.
PETG is often considered for practical clips because it can be less brittle than typical PLA, but that does not make every PETG snap fit dependable. A poorly proportioned PETG clip can still whiten, creep, or split. Fiber-filled materials may improve stiffness and dimensional stability while becoming a poor choice for a thin feature that must flex repeatedly.
Use manufacturer data as a screening tool, then test the printed geometry. Prusa’s official material guidance, for example, notes that composite-filled filaments can be more brittle—an important warning when a design depends on repeated bending.
External reference: Prusa Research’s composite-material guidance. Always consult the documentation for your exact filament and printer.
Print direction can rescue—or ruin—the same model
FDM parts are direction-dependent. A clip printed upright may put the root across layer interfaces. Laid in another orientation, the filament paths may run more continuously through the arm—but supports, surface finish, hook accuracy, and bed contact may change.
Do not select orientation from the thumbnail alone. Inspect the sliced preview around the root, sides, and hook. Look for continuous perimeters, thin interruptions, seam placement, and areas where support removal could scar a working surface.
High print speed can also undermine small mating features if the machine cannot maintain the intended flow and corner accuracy. Bambu Lab’s documentation notes that volumetric-speed limits matter for functional parts including snap fits and tight-tolerance features.
External reference: Bambu Lab on volumetric speed and functional features.
The P.R.I.N.T. Method for a clip that must last
- P — Problem: Does the clip need to retain, locate, close, release, or protect something?
- R — Requirements: Record opening cycles, load, vibration, temperature, weather, chemicals, and consequences of failure.
- I — Interfaces: Measure the mating edge, approach direction, available flex space, engagement depth, and release access.
- N — Next-Best Materials & Methods: Compare an integral clip with a screw, captive nut, separate spring, hinge, magnet, or replaceable latch.
- T — Test & Tune: Print a small coupon, cycle it, inspect it, and change one variable at a time.
The project planner and fillable worksheet in P.R.I.N.T. It: Practical 3D Printing for Beginners give you a place to record the geometry, material, orientation, and result instead of repeating the same failed version.
Run a clip test before printing the full enclosure
- Copy the real interface. Model only the clip and the nearby section of its mating edge.
- Create labeled variations. Try changes in arm length, root fillet, hook height, and clearance—but isolate the variables clearly.
- Use the production setup. Print the intended material, orientation, wall strategy, layer height, and speed.
- Cycle consistently. Assemble and release the coupon the expected number of times, using the same motion each time.
- Inspect between stages. Look for whitening, permanent bend, cracks, layer separation, reduced retention, or damage to the mating part.
- Test the complete part. A coupon answers the local flex question; the final housing still needs evaluation in its real load and environment.
Knowledge check: will your clip survive?
1. A short clip must bend a long distance. What is the first design move to consider?
Lengthen the flexible arm and reduce unnecessary travel. This can spread bending over a larger region instead of forcing it into the root.
2. Why does a generous root fillet help?
It softens the transition where stress tends to concentrate. Confirm that the radius also produces useful toolpaths in the sliced model.
3. The clip fits on the first try. Is testing finished?
No. Repeat the expected assembly cycle, inspect for damage and permanent deformation, and test the final part under realistic conditions.
4. Should you switch to a stiffer fiber-filled filament for a clip that must flex?
Not automatically. Greater stiffness and dimensional stability can come with reduced suitability for repeated bending. Check exact material data and test the printed geometry.
Frequently asked questions
Why does my PETG clip turn white?
Stress whitening can indicate that the material is being strained or damaged locally. Check how far the arm bends, whether the root is sharp, and whether the hook or clearance forces excessive travel.
Should a snap-fit clip be solid?
Global 100% infill is not a universal fix. The clip’s outline, perimeters, root transition, layer direction, and material determine how it bends. Inspect the slicer preview and test representative coupons.
Can I repair a broken clip with glue?
Glue may reconnect the fracture, but it rarely removes the geometry or load condition that caused it. For a functional repair, redesigning the clip—or replacing it with a mechanical fastening method—may be more dependable.
When should I avoid an integral printed clip?
Consider a screw, replaceable latch, metal spring, magnet, or separate flexible component when the clip must survive many cycles, cannot be oriented well, has no room to flex, faces harsh conditions, or carries unacceptable consequences if it releases.
Can Kevin recreate a broken replacement clip?
Possibly. Send clear photos, dimensions, the broken and undamaged mating parts if available, the number of times it opens, its environment, and what happens if it fails through the project intake form. Projects are reviewed for feasibility, safety, design permissions, schedule, budget, and process fit.
A clip is a spring—not just a hook
Design the bending path, print the smallest useful test, and inspect what changes after repeated use. That is how a part moves from “it snapped in” to “it keeps working.”
Request a project review Explore the P.R.I.N.T. It ebookWhat kind of clip keeps failing for you?
Tell me in the comments what the clip holds, how often it opens, and which material you used. Your example may become the next practical test in this series.
