
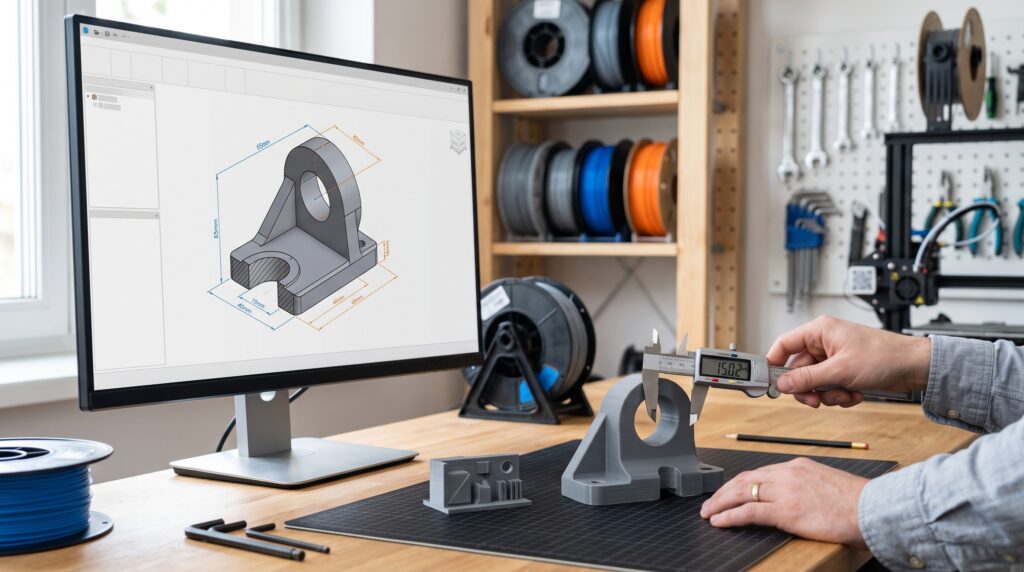
The file looked perfect on the screen. The printer finished without an error. Then the mounting holes missed, the lid would not close, or the bracket split along a layer line.
That is the difference between a model that can be printed and a design that is ready to work. A slicer can turn almost any valid mesh into machine instructions, but it cannot know whether the object will fit your drawer, survive a hot car, hold a load, or respect the designer’s license.
After more than eight years of 3D printing and 3D modeling, I have learned to judge a design by what happens after the print leaves the build plate. This guide shows you what to check before you download, modify, design, or print the next file.
What does “3D printer design” actually mean?
The phrase can describe three different starting points. Knowing which one you have determines how much control—and how much responsibility—you carry.
Downloaded model
You receive a finished STL or 3MF file. It may be ready to slice, but you still need to check scale, orientation, supports, material, fit, and license terms.
Modified design
You resize, repair, add text, change a hole, or combine models. Small edits can alter tolerances, wall thickness, support needs, and permission requirements.
Original CAD model
You control dimensions, features, interfaces, and revisions. This offers the best path for replacement parts, prototypes, brackets, organizers, and custom tools.
The five-stage path from idea to reliable print
- Define the job
- Build or choose the model
- Inspect the geometry
- Slice and preview
- Test, measure, revise
Beginners often focus on stage two because the digital model is visible and exciting. Most expensive mistakes, however, come from skipping stages one, three, or five. The object’s job, its interfaces, and the evidence from a real test print matter more than how polished it looks in CAD.
STL, 3MF, STEP, or G-code: choose the right file
Not every 3D file serves the same purpose. Keep the editable source model whenever possible, then export the most useful format for the next step.
| File type | What it contains | Best use | Main limitation |
|---|---|---|---|
| Native CAD | Editable sketches, features, bodies, dimensions, and design history, depending on the software | Future revisions and original design work | Usually tied to a particular CAD program or workflow |
| STEP | Precise solid or surface geometry | Moving editable geometry between compatible CAD systems | May not preserve the original feature history |
| 3MF | Mesh geometry plus units and potentially colors, materials, components, and print-project information | Modern print-ready projects and multi-part assemblies | Support varies by software; a saved project may also include machine-specific settings |
| STL | A triangulated surface mesh | Simple geometry and broad slicer compatibility | No built-in units, color, material, or editable feature history |
| G-code | Machine movements, temperatures, speeds, extrusion commands, and other printer instructions | Running a job already prepared for the exact printer and setup | Not a design file and unsafe to treat as universally interchangeable |
The 3MF Consortium explains why 3MF was built for additive-manufacturing data that an STL cannot carry. STL remains useful, but it should usually be an export—not your only master copy.
Can you edit an STL?
Yes, but an STL is a mesh made from triangles rather than a clean parametric model. Simple changes such as scaling, cutting, or adding text can be easy. Moving a hole precisely, changing a fillet, or rebuilding a complex interface can be much harder than editing the original CAD file.
For a part you expect to revise, save the native file and a STEP copy before exporting the print mesh. That small habit can save hours later.
Seven checks every design needs before printing
- Purpose: What must the finished object actually accomplish?
- Scale and units: Is the object the expected size in millimeters or inches?
- Geometry: Is the mesh closed, free of unintended internal faces, and interpreted correctly by the slicer?
- Interfaces: Do holes, clips, slots, fasteners, mating faces, and clearances match the real object?
- Orientation: Are layer lines, support contact, surface quality, and the load path working together?
- Material and environment: Will the part face heat, UV, chemicals, impact, flexing, moisture, or continuous load?
- Toolpath: Does the layer preview show continuous walls, closed top surfaces, sensible supports, and no missing features?
If you are recreating a broken or missing part, start with the surfaces that touch something else. My guide to measuring a part for 3D printing explains what to record before you open the modeling software.
Design rules are starting points, not guarantees
A design rule copied from another printer may fail on yours. Nozzle size, line width, layer height, material, cooling, speed, orientation, and machine calibration all change the result. Use published guidance to build a test—not to skip testing.
| Design feature | What can go wrong | Better approach |
|---|---|---|
| Wall thickness | A thin wall may disappear, become a single fragile line, or slice inconsistently. | Design around the intended line width and inspect the perimeter count in the preview. |
| Clearance | Parts modeled at the exact same size may fuse, bind, or refuse to assemble. | Print a labeled coupon with several gaps—such as 0.20, 0.30, 0.40, and 0.50 mm—using the real printer and material. |
| Holes and pins | Printed holes can finish smaller and pins can finish larger than the nominal CAD dimensions. | Test the actual orientation and hardware; use a hole or pin ladder before the full part. |
| Overhangs | Unsupported plastic can curl or sag, while excessive supports waste material and damage surfaces. | Use 45 degrees as a conservative test baseline, then learn your printer’s real limit with the chosen material. |
| Bridges | A span that works in PLA may sag with another material or a different cooling setup. | Shorten the span, add a self-supporting angle, change orientation, or print a bridge test. |
| Text and small detail | Fine lettering may close up, detach, or vanish when sliced. | Make details generous, preview every layer, and prefer raised or recessed features that match the nozzle and orientation. |
| Sharp inside corners | Stress can concentrate at the corner and start a crack. | Add a practical fillet, spread the load, and leave enough material around fasteners and transitions. |
For a useful overview of overhangs, bridging, orientation, and related geometry, see Prusa’s modeling-with-3D-printing-in-mind guide. Then verify the result on your own machine.
Design for the printing process you will use
| Process | Design priorities | Often chosen for |
|---|---|---|
| FFF/FDM | Layer direction, wall paths, bridging, overhangs, warping, nozzle-sized features, and support access | Functional parts, brackets, organizers, prototypes, jigs, and larger affordable prints |
| Resin/SLA/MSLA | Drainage, hollowing, suction, support marks, brittle features, washing, curing, and safe resin handling | Fine detail, miniatures, patterns, dental or jewelry workflows, and smooth small models |
| SLS or MJF | Powder escape, minimum features, nested geometry, surface finish, and service-specific design rules | Complex nylon parts, small production runs, and geometry that benefits from powder support |
A model is not automatically portable from one process to another. A hollow resin piece needs drainage; an FFF bracket needs a deliberate layer direction; a powder-bed part needs a way to remove trapped powder. Use the rules from the exact printer, material, or manufacturing service.
Which 3D design software should you learn?
Choose software around the work you want to do. A simple tool that matches your projects is more useful than a powerful program you never feel comfortable opening.
| Tool | Good fit for | What to know |
|---|---|---|
| Tinkercad | First models, classroom projects, and simple organizers or adapters | A free browser-based introduction built around combining and subtracting basic shapes |
| Shapr3D | Functional parts, tablet-based modeling, and visual direct-modeling workflows | Strong for measured practical work; plan your file exports and keep the editable project |
| FreeCAD | Open-source parametric modeling and dimension-driven mechanical designs | Capable and flexible, with a steeper interface-learning curve for some beginners |
| Onshape | Browser-based parametric CAD, revision control, and collaboration | Cloud-native workflow; review the current plan and document-visibility terms before choosing it |
| Blender | Organic shapes, sculpting, characters, props, and artistic mesh work | Excellent creative control, but dimension-driven mechanical parts may be easier in parametric CAD |
I have spent more than four years using Shapr3D, but I do not believe everyone needs the same software. Learn the smallest useful set of commands—sketch, dimension, extrude, cut, fillet, mirror, and pattern—then let real projects pull you toward more advanced tools. For a deeper learning path, read how to design 3D objects for printing.
Use the P.R.I.N.T. Method before you model
The most reliable design workflow begins with the problem, not the software. I use the P.R.I.N.T. Method™ to keep practical projects focused.
State the need or failure in one clear sentence.
List load, heat, weather, flexibility, safety, lifespan, and appearance.
Measure every place the part fits, touches, slides, clips, screws, or rests.
Choose the simplest reliable geometry, material, orientation, and hardware.
Print the smallest useful test, measure it, change one variable, and verify again.
What experience changes about design
Early on, it is easy to treat the entire model as equally important. In practical work, a few interfaces usually decide whether the part succeeds: a hole center, a slot width, a clip angle, a mating face, or the clearance around a screw head.
I now prototype the uncertain feature first. A 15-minute fit coupon can answer more than a full eight-hour print. It protects material, machine time, and confidence while creating a measurement you can use on the next revision.
A finished print is not the goal. A part that solves the intended problem is.
Your two-minute design planner
Copy these answers into your project notes before opening CAD or downloading a model.
- The problem: I need this object to ____________________.
- Critical dimensions: The three measurements that cannot be wrong are ____________________.
- Environment: It will face indoor/outdoor use, heat, sunlight, moisture, chemicals, or impact: ____________________.
- Load and failure: It must support ____________________, and failure would cause ____________________.
- Material: My current candidate is ____________________ because ____________________.
- Print orientation: The likely layer direction and support surfaces are ____________________.
- Smallest useful test: Before the complete part, I can print ____________________.
- License or ownership: I created the design, have permission, or verified the model’s terms: ____________________.
From downloaded file to finished part: the safer workflow
- Read the model page. Check recommended orientation, material, supports, assembly notes, hardware, and known problems.
- Check the license. Downloading a file does not automatically grant permission to sell the file or printed objects.
- Open the model at the intended scale. Compare at least one known dimension with the description or real object.
- Inspect and repair only when needed. Automatic repair can close holes or change features, so compare before and after.
- Orient for function. Consider layer direction, support marks, surface finish, warping, and how forces pass through the part.
- Preview the sliced layers. Look for missing walls, accidental gaps, unsupported islands, poor first-layer contact, and unnecessary supports.
- Print a test. Use a fit coupon, short section, or draft prototype before the final material and settings.
Creative Commons licenses can allow different combinations of sharing, adaptation, and commercial use. The official Creative Commons license guide explains the conditions. Always read the license attached to the exact model; do not assume every file on a repository has the same terms.
Choose material after the design requirements
Material should follow the job. PLA can be excellent for prototypes, models, organizers, and many indoor parts. PETG may help when toughness, moisture resistance, or a little more temperature margin matters. ABS or ASA can suit higher-temperature or outdoor work when the printer, ventilation, and process are appropriate. TPU is useful when controlled flexibility is part of the design.
A premium filament cannot rescue a poor load path, thin wall, weak layer direction, or untested interface. Geometry, material, orientation, and process must work as a system.
Need filament for a tested design?
Compare the material requirements first, then view current filament options from COEX. Use code 3DPRINTINGBYKEVIN for 15% off eligible purchases.
Explore COEX FilamentWhen 3D printing is not the right answer
Good design also means knowing when to stop. A printed part may be the wrong choice when failure could injure someone, a regulated application requires certified materials or validation, continuous heat exceeds the material’s capability, the load is poorly understood, or another manufacturing method is safer and more economical.
For safety-critical, medical, food-contact, electrical, lifting, pressure, or structural applications, general desktop-printing guidance is not a substitute for qualified engineering review and applicable standards.
Common 3D printer design mistakes
- Scaling a model without checking whether wall thickness, holes, and clearances still work.
- Printing every part in the orientation shown by the designer instead of evaluating the load path.
- Assuming more infill will solve weak walls, sharp corners, or poor layer direction.
- Using one universal tolerance number across every printer and material.
- Skipping the layer preview because the model looked fine in CAD.
- Printing the full object when a small test section could answer the important question.
- Deleting the editable source file after exporting the STL.
- Ignoring licensing because the file was free to download.
If a design slices correctly but the print fails, use the symptom-based 3D printing troubleshooting guide and change one variable at a time.
Have an idea, sketch, broken part, or file you are unsure about?
You do not need a finished STL to start. Send photos, measurements, sketches, the original part, or a description of what the object needs to do. I can review the project for printability, fit, material needs, and the next practical step.
Start the Quote / Project Intake See a Broken-Part WorkflowBuild a stronger foundation beside your printer
The Practical Guide to 3D Printing: 2026 Expanded Edition covers current file workflows, slicers, calibration, materials, replacement-part design, troubleshooting, and the complete P.R.I.N.T. Method™ in a 40-page digital guide.
Explore the P.R.I.N.T. It Practical EbookKnowledge check: Is the design ready?
Open each answer after making your choice.
1. A model opens and slices without errors. Does that prove it will fit the real object?
Answer: No. Slicing confirms that the software can generate a toolpath. Fit still depends on correct measurements, scale, printer behavior, material, orientation, and tested clearances.
2. Which file should you preserve for future design changes?
Answer: Keep the editable native CAD file whenever possible, plus a neutral format such as STEP when useful. STL is is normally best treated as an export for printing, not the only master.
3. What is the safest way to choose clearance for two mating parts?
Answer: Print a small labeled tolerance coupon on the intended printer, material, orientation, and settings. A universal clearance number cannot account for every setup.
4. If a functional part is weak, should you increase infill first?
Answer: Not automatically. Inspect the load path, wall thickness, transitions, layer direction, material, and fastener geometry. More infill may add time and material without fixing the true weak point.
Frequently asked questions
What is the best file format for 3D printing?
For a modern print project, 3MF is often more informative than STL because it can preserve units and additional project data. STL remains broadly compatible. For design revisions, keep the native CAD file and consider STEP for exchanging precise geometry.
Can any 3D model be 3D printed?
No. A visual model may contain open surfaces, zero-thickness features, intersecting geometry, trapped volumes, details below the printer’s capability, or shapes that need a different process. Inspect the model and the sliced layers before printing.
How much clearance should I add between printed parts?
There is no universal number. Machine calibration, material, geometry, orientation, and fit type all matter. Print a small coupon with several labeled clearances using the same setup planned for the finished object.
Do all 45-degree overhangs print without supports?
No. Forty-five degrees is a useful conservative starting point, not a guarantee. Cooling, layer height, line width, material, speed, shape, and overhang length influence the result.
Can I sell prints made from a downloaded STL?
Only when the model’s license or the creator’s permission allows that use. Free download does not automatically mean commercial permission. Keep a record of the exact license and source.
Does stronger filament fix a weak design?
Not by itself. A stronger or more suitable material can help, but geometry, wall structure, layer orientation, load path, fasteners, temperature, and print quality remain part of the system.
What should I send for help with a custom 3D design?
Send clear photos from several angles, critical measurements, the broken original if available, a sketch, the intended use, load and environment details, quantity, deadline, and any existing CAD, STEP, STL, or 3MF files.

What is the design problem slowing you down?
Is it a stubborn fit, a weak bracket, a confusing file format, or a downloaded model that will not slice correctly? Share the printer, material, design type, and the symptom in the comments. Your example may help shape a future troubleshooting guide for another maker.