
Beginner Field Guide | November 2026 | 3D Printing by Kevin
Maybe you have watched a 3D printer turn a spool of plastic into a useful object and thought, “I would love to do that—but how much do I need to learn first?” Then you see a slicer full of settings, a failed first layer, and a discussion about calibration. Suddenly that printer looks a lot less beginner-friendly.
That hesitation is reasonable. The real question is not whether 3D printing has a learning curve. It is which part of 3D printing you want to learn—and how far up that curve you actually need to climb.
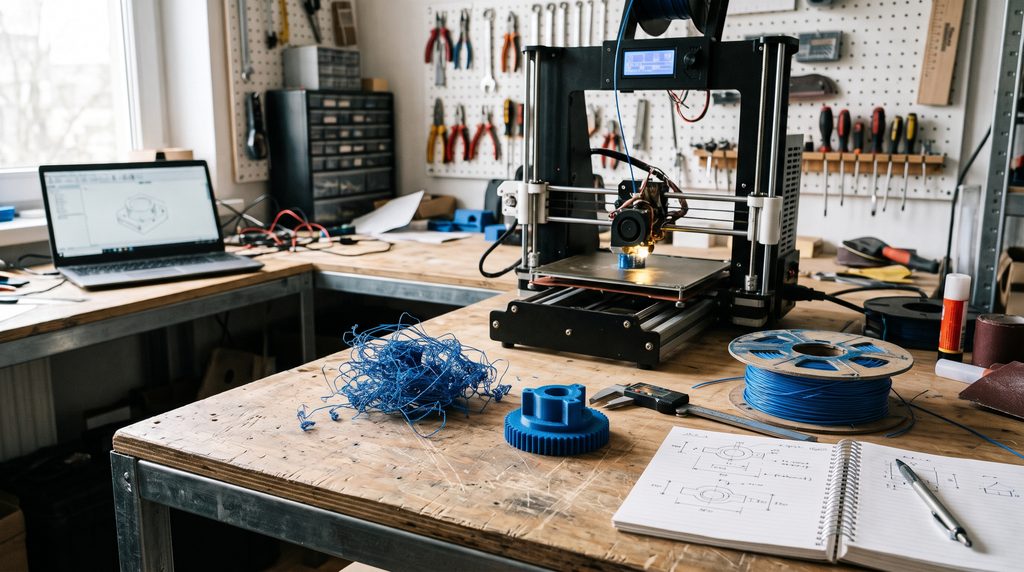
Quick Answer: Is the 3D Printing Learning Curve Steep?
It can be, but it depends on your goal. Printing a ready-made model with a well-supported modern FDM printer can be approachable. Diagnosing repeated failures takes more practice. Designing a precise replacement part that must fit, withstand heat, or carry a load is a more demanding skill.
You do not need to master all three to enjoy your first successful print.
My starting rule: One printer. One ordinary PLA filament. One reliable slicer profile. One small project. Build from there.
There Isn’t One Learning Curve. There Are Three.
People often talk about “learning 3D printing” as if it were a single skill. In my workshop, it makes more sense to separate the work into printing, diagnosing, and designing. Each asks a different question.
Print an Existing Model
Usually the easiest starting point
Choose a good file, use a matching profile, prepare the plate, and watch the first layer.
Question: Can I print this successfully?Make Results Repeatable
More troubleshooting and judgment
Understand adhesion, moisture, orientation, supports, fit, and why one change affects another.
Question: Why did this one fail?Design a Working Part
Often the longest learning path
Measure real objects, learn CAD, choose a material, plan clearances, and test the finished fit.
Question: Will it do the job safely and reliably?You can stop happily at Stage 1 if you enjoy printing models. You can reach Stage 2 without becoming a CAD expert. But if you want to recreate a discontinued clip or build a durable mounting fixture, Stage 3 starts to matter.
For a step-by-step explanation of the machinery and workflow, see my 3D Printing for Absolute Beginners guide.
This article focuses instead on what is difficult, why, and what to learn next.
The Five Moments When Beginners Think, “This Is Harder Than I Expected”
1. The Slicer Makes a Simple Project Look Complicated
A slicer is the software that converts a 3D model into instructions your printer can follow. Programs can show temperatures, speed, walls, supports, layer heights, retraction, infill, and dozens of other controls.
Seeing all of them at once makes it easy to think you must understand them all.
You do not.
Begin with the correct printer, nozzle, build plate, and material profile. Slice a simple model, then inspect the preview. Learn what a setting does only when a project gives you a reason to change it.
Prusa’s official first-print walkthrough explains the basic model-to-print workflow.
2. The First Layer Fails Before You Can Learn Anything Else
A clean first layer matters because everything else is built on it. If plastic does not bond to the build surface, the failure may show up as loose strands, lifted corners, or a blob around the nozzle.
Start with a clean plate using the manufacturer’s approved method. Confirm the correct build-plate type and calibration procedure. Watch the entire first layer of a new setup.
Even a printer with automatic leveling cannot correct every cause of poor adhesion.
Prusa identifies first-layer problems as one of the common issues new users encounter in its first-layer troubleshooting guide.
3. A Finished Print Looks Right—but Doesn’t Fit
This is the point where printing turns into practical problem-solving.
Imagine a small replacement drawer clip. It prints cleanly, the walls look good, and the color matches. But the tab is a fraction too thick to snap into place.
The printer did what you asked. The design was not ready.
You may need calipers, a better measurement of the mating surfaces, a clearance allowance, and a small fit-test section before printing the entire replacement.
Appearance and fit are two separate acceptance tests.
When the project involves a real replacement part, my replacement-part filament guide also explains why material choice needs to reflect heat, sunlight, load, and movement—not just the color of the spool.
4. One Failed Print Produces Ten Possible Explanations
Stringing can involve temperature, retraction, filament condition, or other causes. Warping can involve build surface preparation, cooling, geometry, material behavior, and ambient conditions.
The challenge is not memorizing a hundred fixes. It is learning how to narrow the causes.
Keep a known-good baseline. Change one likely variable at a time, run a small test, and record whether the result improved.
If you change temperature, speed, cooling, and retraction together, your next print may look better—but you won’t know why.
5. The First Useful Part Introduces Real Responsibilities
Models for display and parts that have to do work are not the same. A bracket used near heat, a clip that flexes repeatedly, or an outdoor cover needs more thought about materials, layer direction, durability, and test conditions.
Do not use an unverified hobby print for safety-critical applications where failure could injure someone.
Workspace safety matters, too. Filament printing may release ultrafine particles and volatile chemicals. Choose lower-emitting materials where practical and follow the manufacturer’s safety instructions and appropriate enclosure and ventilation guidance.
A printer cabinet by itself is not proof of adequate air control. The NIOSH safe-printing guidance is a useful starting reference.
The most useful skill isn’t knowing every setting by heart. It’s recognizing whether the problem belongs to the printer, the material, the model, or the job the part is supposed to perform.
What’s Easier Now—and What Technology Still Can’t Decide for You?
Modern printers may offer automatic bed probing, guided setup, tuned slicer profiles, runout sensing, and monitoring tools.
These features reduce some setup chores, but capabilities differ by model and feature. They do not eliminate dirty plates, unsuitable models, wet filament, poor fit, or decisions about strength.
Automation gives beginners a better starting point; it doesn’t replace understanding.
| Task | What a Modern Printer May Help With | What You Still Need to Learn |
|---|---|---|
| Bed setup | Automatic probing and guided calibration | Plate cleaning, surface selection, first-layer inspection |
| Slicing | Ready-made profiles and visual previews | Orientation, size, supports, and noticing preview problems |
| Filament | Material presets and, on some machines, identification aids | Compatibility, storage, moisture, and application limits |
| Print monitoring | Alerts or camera-based detection on supported systems | Deciding when to stop a failure and diagnosing the cause |
| Custom parts | Better repeatability when the process is tuned | Measurement, CAD, clearances, mechanical requirements, and fit testing |
If you haven’t bought a printer yet, prioritize reliable first-print results and accessible support over maximum advertised speed.
My 3D printer buying guide walks through the trade-offs.
A Beginner’s Four-Print Roadmap: Learn One Skill at a Time
Forget an arbitrary promise that you’ll “master 3D printing in a weekend.”
Try four small projects instead. Finish each learning goal before adding complexity.
Small, flat-bottom model. Learn the first layer and safe removal.
Try a basic size-check piece; measure the finished result.
Make one documented adjustment, then compare two prints.
Choose an organizer, cable guide, or noncritical fit-test part.
For a first attempt, use a small model with a broad footprint and no required supports, plus a manufacturer-approved PLA profile.
Once you can repeat it, a tool tray or cable guide makes a more useful challenge than a complex articulated model.
Browse 10 useful beginner-friendly print ideas when you need inspiration.
Do you need CAD for these four projects? No. A verified, properly licensed pre-made model is enough.
Add simple CAD when you want to adjust a dimension, design a missing feature, or solve a problem that available models cannot solve.
When Something Goes Wrong, Use This Decision Table Before Changing Settings
Most wasted effort begins when the symptom and the proposed fix are unrelated. This quick-reference table is a starting diagnosis, not a guarantee of a single cause.
| What You Notice | Check First | Avoid Doing Immediately |
|---|---|---|
| First layer won’t stick | Plate cleanliness, correct plate and profile, first-layer calibration | Changing a long list of print settings |
| Fine strings between features | Correct material profile; then filament condition and suitable temperature and retraction checks | Assuming moisture is the only possible cause |
| Part breaks along layers | Print orientation, extrusion quality, layer bonding, geometry, and load direction | Assuming more infill alone will solve it |
| Part is too tight or loose | Measurements, scale, model dimensions, intended clearance | Reprinting the full part without a fit test |
| Prints fail after a material change | Exact filament grade, profile, moisture condition, and printer compatibility | Buying upgrades before finding a specific cause |
For a reusable baseline, bookmark my go-to reliable 3D printer settings.
Use the guidance with your printer manufacturer’s requirements, not as a universal recipe for every machine.
Your Five-Minute First-Project Planner
Before pressing Print, write down these five answers. The goal is to turn a vague idea into a project you can actually evaluate.
- Purpose: What job must this object do?
- Starting point: Am I printing an existing model, troubleshooting one, or designing a new part?
- Constraints: Does it need to fit a space, tolerate heat, flex, or carry a load?
- Baseline: What printer, nozzle, material, and proven profile will I use?
- Success check: How will I know it worked—first-layer quality, dimensions, repeatability, or a fit test?
Example: “I need a desk cable guide. I will start with a licensed model, print it in ordinary PLA using the recommended profile, measure the cable opening, and confirm it holds the cable without pinching.”
That’s a manageable first project.
For a printable P.R.I.N.T. Project Planner, first-print checklist, troubleshooting chart, and fillable worksheet, my Print It Practical: 3D Printing for Beginners ebook organizes the process into a repeatable method.
Want a Guide Beside the Printer Instead of Another Browser Tab?
Print It Practical: 3D Printing for Beginners is my 56-page digital guide built around the P.R.I.N.T. Method.
- P — Problem: Identify what you want to accomplish.
- R — Requirements: Determine what the finished object needs to do.
- I — Interfaces: Understand how the part fits or interacts with other objects.
- N — Next-Best Materials & Methods: Choose a practical way to manufacture it.
- T — Test & Tune: Evaluate the result and make controlled improvements.
It includes checklists and planning pages you can reuse as your projects get more ambitious.
Listed price: $15 for the digital PDF. Check the product page for the latest details.
Explore the Ebook and WorksheetsPLA First, PETG Later? Keep Materials From Becoming Another Learning Curve
My usual recommendation is to become comfortable with ordinary PLA on a compatible FDM printer before expanding into other filaments.
PLA is relatively easy to print, making it useful for your first learning projects. PETG may be a sensible next step for everyday functional parts, but it can require different handling, profiles, and build-surface care.
ASA, ABS, TPU, and nylon introduce additional properties and setup considerations. None is automatically “better” for every part.
Prusa’s official filament material guide is a useful reference when comparing plastics.
For repair work, the real choice comes from the part’s environment and demands—not from a material ranking on social media.
Filament Option From a Shop Partner
Affiliate disclosure: I may earn a commission from qualifying purchases through the COEX link at no additional cost to you.
I use COEX filament in my own 3D-printing work. If you’re buying material for a compatible printer, you can explore their filament selection.
Try discount code 3DPRINTINGBYKEVIN for a listed 15% discount, subject to checkout eligibility and any changes.
Choose the exact material your machine and project support.
Explore COEX FilamentWhen Should You Learn 3D Printing—and When Should You Hire Someone?
If you want the hobby, the creative process, or the ability to make many different things over time, learning to operate your own printer can be rewarding.
If your main goal is to replace one broken plastic component, create a prototype for a deadline, or obtain a small batch of reliable parts, learning CAD and printer troubleshooting may be more work than the project justifies.
| Situation | Best Path to Consider | Why |
|---|---|---|
| You want a lasting creative hobby | Learn to print at home | The learning process itself has value |
| You want to make organizers and simple models repeatedly | Start with a beginner-friendly FDM setup | Repeated small projects build experience |
| You need one discontinued replacement part | Consider a custom-printing service | Measurement and fit may matter more than owning a printer |
| You need a functional prototype or small batch | Compare DIY time against a professional quote | Materials, tolerances, testing, and deadlines affect the choice |
Need the Finished Part, Not the Learning Curve?
I operate 3D Printing by Kevin in Northern Kentucky, helping with replacement and discontinued plastic parts, prototypes, and practical small-batch projects.
You do not need to know CAD terminology to start a conversation. Photos, measurements, intended use, quantity, and a deadline are useful starting information.
A drawing or STL is helpful when you have one, but not required for an initial review.
When replacement parts disappear, we make the next one.
Ask Kevin to Review a ProjectFour-Question Knowledge Check: Have You Found Your Starting Point?
Select one answer for each question, then choose Check My Answers. You’ll get explanations, not just a score.
Frequently Asked Questions
Is 3D printing hard to learn for someone who isn’t technical?
Not necessarily. Starting with a preassembled, well-supported FDM printer, ordinary PLA, and a simple licensed model removes many early hurdles. Troubleshooting and designing your own precise parts take more practice.
How long does it take to learn 3D printing?
There is no reliable universal timeline. You might get a successful first print during your initial setup session, while reliable multi-material work or accurate CAD-based replacement parts can take many projects.
Judge progress by what you can repeat, not by the calendar.
Do I need coding or advanced math to operate a 3D printer?
No coding is required to begin ordinary FDM printing from suitable existing models. Basic measurement, file handling, and attention to the slicer preview are more immediately useful. CAD and mechanical design skills become valuable for custom parts.
Which filament should a beginner learn first?
Standard PLA is generally a practical first choice for many compatible FDM printers. It is not automatically suitable for hot, heavily loaded, or outdoor applications. Follow your printer and filament manufacturers’ instructions.
Will an automatic 3D printer eliminate failed prints?
No. Automation can reduce setup work, but poor adhesion, unsuitable geometry, material issues, fit mistakes, and mechanical faults can still produce failures. Always inspect the new setup and first layer.
Is learning CAD the steepest part of 3D printing?
For some beginners, yes—especially when reproducing a broken part with tight clearances. But it depends on the goal and the software. You can learn to print existing models without learning CAD first.
So, Is the Steep Learning Curve Real?
Yes—but it is not a wall you must climb in one attempt.
A beginner can enjoy 3D printing long before learning complex design, while someone trying to manufacture a precise replacement part may need substantial practice in measurements, material selection, and verification.
Here’s the distinction I want you to remember:
The first successful print teaches you how the machine works. The first reliable, useful part teaches you how to solve a problem.
Both are achievements. They just require different skills.
Let’s Talk About Your Learning Curve
I’d love to hear your experience in the comments.
What’s the one thing that has made 3D printing feel difficult to you?
- Understanding slicer settings?
- Dealing with failed prints?
- Choosing the right filament?
- Learning CAD and designing your own models?
- Knowing which printer to buy?
If you’ve already started, what was the first lesson that made everything click?
Mention your printer and filament so your answer can help another beginner.
