
Functional 3D printing guide
The bracket looked solid. The machine screw tightened normally. Then the part had to come apart for maintenance—and the plastic threads began to feel loose.
That does not automatically mean the filament was wrong or the print was weak. It often means the fastening method did not match the job. A screw used once to secure a light cover has very different requirements from a screw removed every month from a loaded machine fixture.
Quick answer
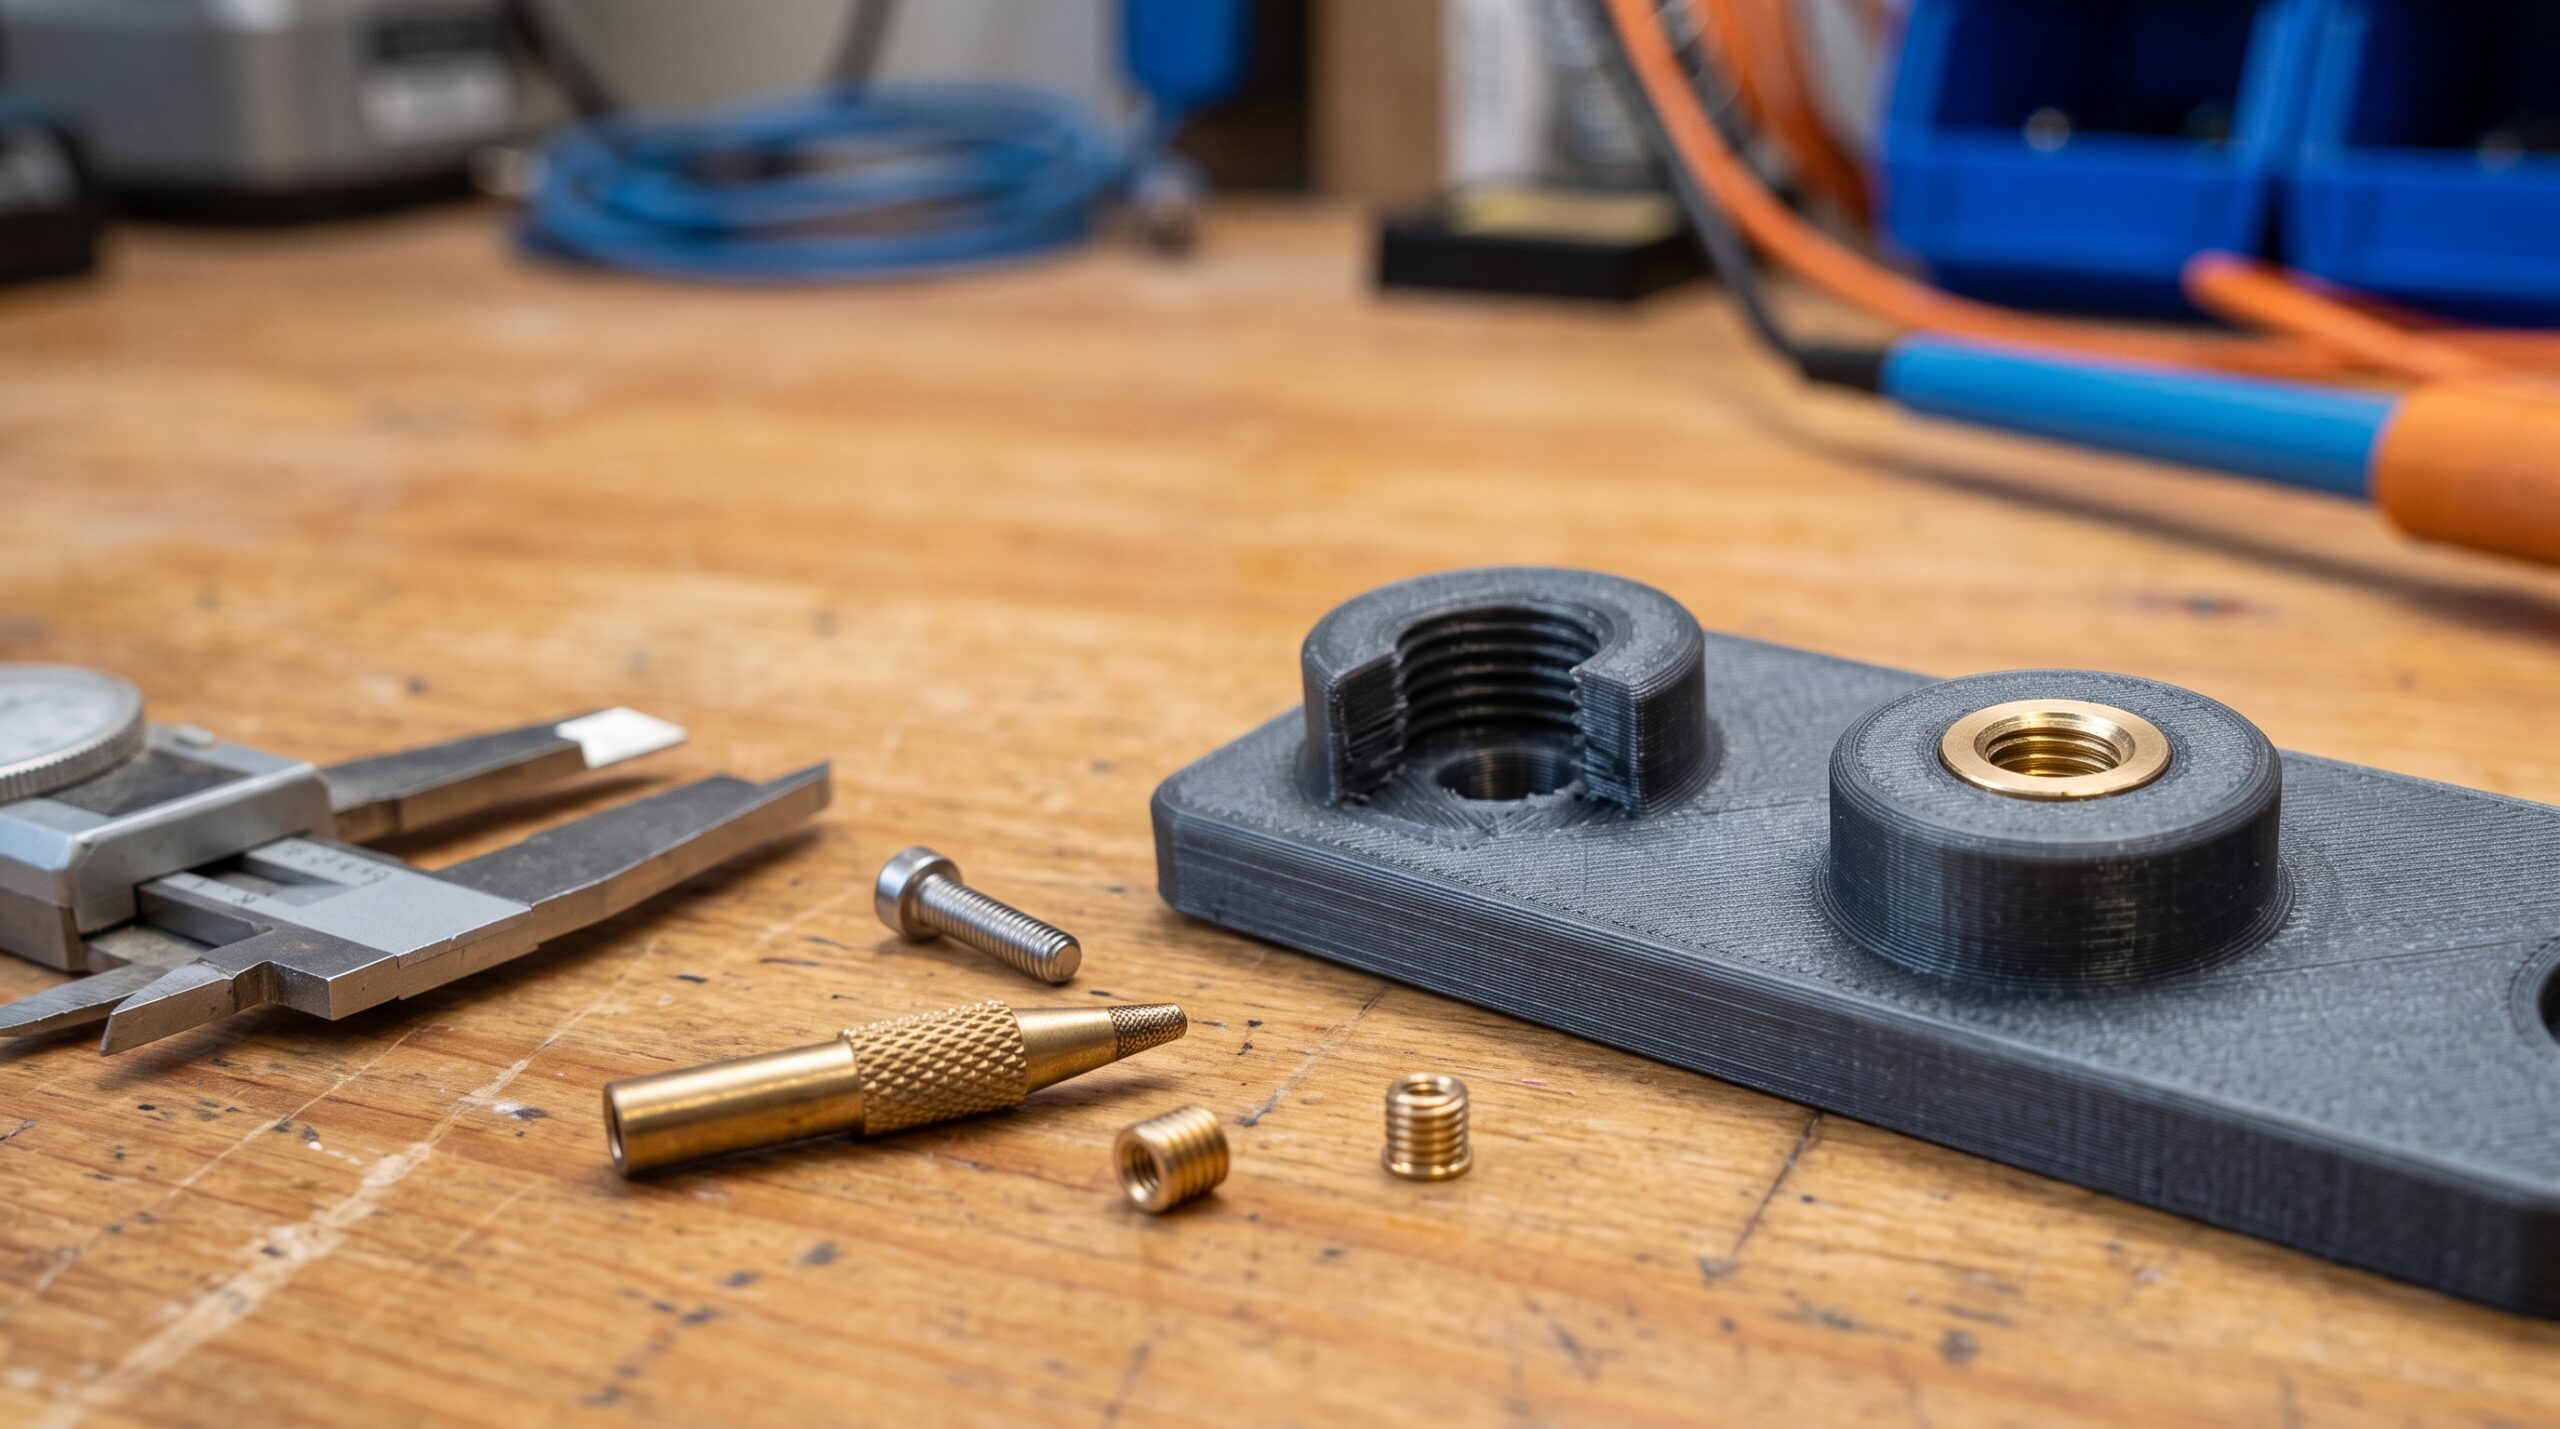
Heat-set inserts are often the better choice when a functional thermoplastic part must be assembled repeatedly, hold a machine screw securely, or be serviced without wearing plastic threads. Printed threads can be practical for large diameters, light duty, prototypes, and infrequent assembly. Tapped holes are simple but depend heavily on wall thickness, material, print quality, and careful tightening. Captured nuts are an excellent option when the geometry provides access and the nut cannot spin or pull through.
The fastener is part of the design—not an afterthought
Threads concentrate force into a small region. In an FDM part, that region is affected by boss diameter, wall count, layer direction, hole size, material behavior, screw torque, heat, and the direction of the load. Raising infill alone cannot correct a thin boss, poor orientation, or an insert placed too close to an edge.
This is why I start with the connection itself: What is being joined? How often will it be opened? Does the fastener pull straight out, twist, vibrate, or bend the surrounding part? What happens if it loosens?
Heat-set inserts vs printed threads at a glance
| Thread method | Best fit | Main advantage | Main caution |
|---|---|---|---|
| Heat-set insert | Repeated assembly, service panels, fixtures, enclosures | Reusable metal thread in a thermoplastic part | Boss and pilot hole must match the exact insert and material |
| Printed thread | Large threads, knobs, caps, light-duty adjustment | No extra hardware or installation step | Small threads can print poorly and wear with repeated use |
| Tapped printed hole | Prototypes and moderate, infrequent fastening | Clean thread made after printing | Easy to strip through over-tightening or insufficient wall thickness |
| Thread-forming screw | Low-cost enclosure assembly designed for that screw | Fast assembly with no separate insert | Wrong pilot size or repeated cycling can damage the boss |
| Captured nut | High clamp force where a nut pocket is accessible | Standard hardware and a durable metal thread | Pocket must prevent rotation and allow reliable assembly |
When printed threads make sense
Printed threads are most convincing when they are large enough for the printer to reproduce cleanly. Think adjustable feet, jar-style lids, camera-style rings, caps, knobs, and coarse lead-screw features—not a tiny machine-screw thread squeezed into a thin wall.
- The thread diameter and pitch are generous for the nozzle and layer height.
- The connection will be used lightly or only a few times.
- A little clearance can be added and verified with a short test print.
- Eliminating separate hardware brings real value.
- Failure would be inconvenient, not dangerous.
Do not assume a CAD thread will emerge at its nominal size. Layer height, line width, seam placement, material shrinkage, and printer calibration all change the fit. Print only the male-and-female thread section first, then adjust clearance before committing to the complete part.
When a heat-set insert earns its place
A heat-set insert is a metal threaded insert installed into a properly sized thermoplastic boss with controlled heat. The softened plastic flows around the insert’s external features and holds it after cooling. The result gives the machine screw a metal thread while the printed boss carries the surrounding load.
That makes inserts useful for electronics enclosures, machine guards, removable panels, jigs, fixtures, equipment mounts, and assemblies that will be opened for maintenance. However, the insert does not magically make the entire part strong. It can still pull out, spin, tilt, or split the boss if the geometry, hole, installation, torque, or load direction is wrong.
Five details that matter
- Use the insert maker’s hole recommendation. Similar-looking inserts may need different pilot holes. Measure the actual hardware and test it in the same filament.
- Give the insert enough plastic. Build a substantial boss around the hole and keep it away from thin edges. Perimeters around the boss usually matter more than distant infill.
- Install it square. A tilted insert can misalign the screw and leave uneven plastic around its body.
- Stop at the intended depth. Do not push through the bottom or leave the insert proud unless the design specifically requires it.
- Let it cool before testing. Moving or loading the insert while the plastic is soft can weaken the surrounding pocket.
Shop safety: An insert tool, soldering iron, insert, and softened plastic can cause burns. Secure the part, keep the hot tool in a stable stand, use ventilation appropriate for the material, and keep hands away from the insertion path. Do not use your everyday electronics tip if contamination or tip damage would be a concern.
What about tapping the hole after printing?
Tapping can produce a cleaner thread than printing a small internal thread directly. It works best when the pilot hole is designed for the tap, the boss has enough perimeter material, and the fastener is not repeatedly over-tightened. Back the tap out to clear chips and keep it aligned with the hole.
The tradeoff is that the thread is still plastic. For a prototype cover installed once, that may be entirely reasonable. For a serviceable fixture opened dozens of times, a metal insert or captured nut usually deserves consideration.
The P.R.I.N.T. Method™ for choosing a threaded connection
P — Problem
Define what the fastener must hold and why the assembly must come apart.
R — Requirements
Record load, vibration, heat, moisture, service cycles, screw size, torque sensitivity, and failure consequence.
I — Interfaces
Check boss diameter, hole depth, screw engagement, tool access, mating surfaces, and alignment.
N — Next-Best Materials & Methods
Compare printed threads, a tapped hole, thread-forming screw, heat-set insert, captured nut, or a different manufacturing process.
T — Test & Tune
Print a small coupon containing the actual boss and hole. Install the real hardware, assemble it several times, and test it in the direction the finished part will be loaded. This inexpensive test can reveal a splitting boss, spinning insert, tight printed thread, poor tool access, or misaligned screw before a long print begins.
The same plan fits the workflow in How to Measure a Part for 3D Printing. Measure the screw and mating part as carefully as the object’s outside shape. If a broken mount or bracket needs to be reconstructed, see Broken Brackets and Clips Replaced with 3D Printing.
A practical selection guide
- One-time light cover: a carefully sized thread-forming screw or tapped hole may be enough.
- Large hand-adjusted knob: printed coarse threads can work well after a fit test.
- Frequently serviced enclosure: consider heat-set inserts or captured nuts.
- Thin wall with little room for a boss: redesign the joint instead of forcing an insert into inadequate plastic.
- High load, heat, vibration, or serious failure consequence: treat the connection as an engineering decision and consider professional review or a different material and process.
For broader orientation, wall, support, tolerance, and material considerations, UltiMaker’s design-for-3D-printing guidance reinforces an important point: functional geometry and production choices must be evaluated together.
Quick knowledge check
1. Which method is usually worth considering for a panel removed frequently?
A heat-set insert or captured nut, because the machine screw engages a reusable metal thread.
2. Why can more infill fail to fix a weak threaded boss?
The critical material is around the hole. Boss diameter, perimeters, orientation, hole size, and load path can matter more than infill far from the connection.
3. When are printed threads most practical?
They are most practical when the thread is relatively large and coarse, the load is modest, the assembly cycles are limited, and a test coupon confirms the fit.
4. What should you print before the full part?
A small coupon containing the real boss, hole, material, orientation, and hardware so the connection can be installed and tested cheaply.
Frequently asked questions
Are heat-set inserts always stronger than printed threads?
No. Performance depends on the insert, boss, material, installation, screw engagement, orientation, and load direction. Inserts often improve durability through repeated assembly, but a poorly designed insert boss can fail sooner than a well-designed alternative.
Can I install heat-set inserts in PLA or PETG?
Both are thermoplastics and can accept suitable heat-set inserts, but their heat response and working feel differ. Match the pilot hole to the exact insert and filament, control the heat, and test a coupon before installing hardware in the finished part.
Should the insert go in from the load side?
Whenever the geometry allows, consider a layout where tightening or service loads push the insert into supporting material rather than relying only on pull-out resistance. The best direction depends on the joint and access.
Can Kevin add inserts to a custom printed part?
Potentially. The project first needs a review of the model, screw size, material, expected load, quantity, service needs, and failure consequence. Submit the details through the project intake form.
Build the joint around the job
A durable threaded connection does not begin with “add an insert.” It begins by understanding the load, the service life, and the space available around the fastener. Sometimes the simplest printed or tapped thread is enough. Sometimes a heat-set insert is the practical upgrade. Sometimes the right answer is a captured nut or a redesigned joint.
If you want the complete problem-first workflow beside your printer, explore P.R.I.N.T. It Practical—3D Printing for Beginners. If you need a finished replacement, bracket, mount, prototype, or short run, start a project review.
What threaded connection has given you the most trouble—printed threads, a stripped plastic hole, or an insert that spun loose? Share the part, material, and fastener size in the comments. Your experience may help another maker choose a better joint before the next print begins.
Affiliate disclosure: Some links on 3DPrintingbyKevin.com may be affiliate links. If you purchase through them, 3D Printing by Kevin may earn a commission at no additional cost to you. Recommendations are based on practical project fit, not commission.
