
The lights come on. The sound plays. But the arm that should rise out of the shadows stays still.
Before you write off the whole Halloween decoration, there is a smaller question worth asking: did one plastic component stop the show?
A damaged gear, cam, clip, or mounting bracket may be the part that needs attention. Custom 3D printing can sometimes provide a replacement—but the useful first step is understanding what broke and why.
Quick Answer: Can 3D Printing Fix a Halloween Decoration?
Sometimes. 3D printed Halloween replacement parts may be practical when a noncritical plastic component is broken or unavailable and enough information remains to recreate its fit and function. Keep the original, photograph its installed position, and check for an underlying obstruction or damaged mating part before commissioning a replacement.
A printable shape alone does not establish that a repair will work. Moving mechanisms need the correct geometry, material, clearances, and testing.
My Workshop Example: A Small Part With a Big Job
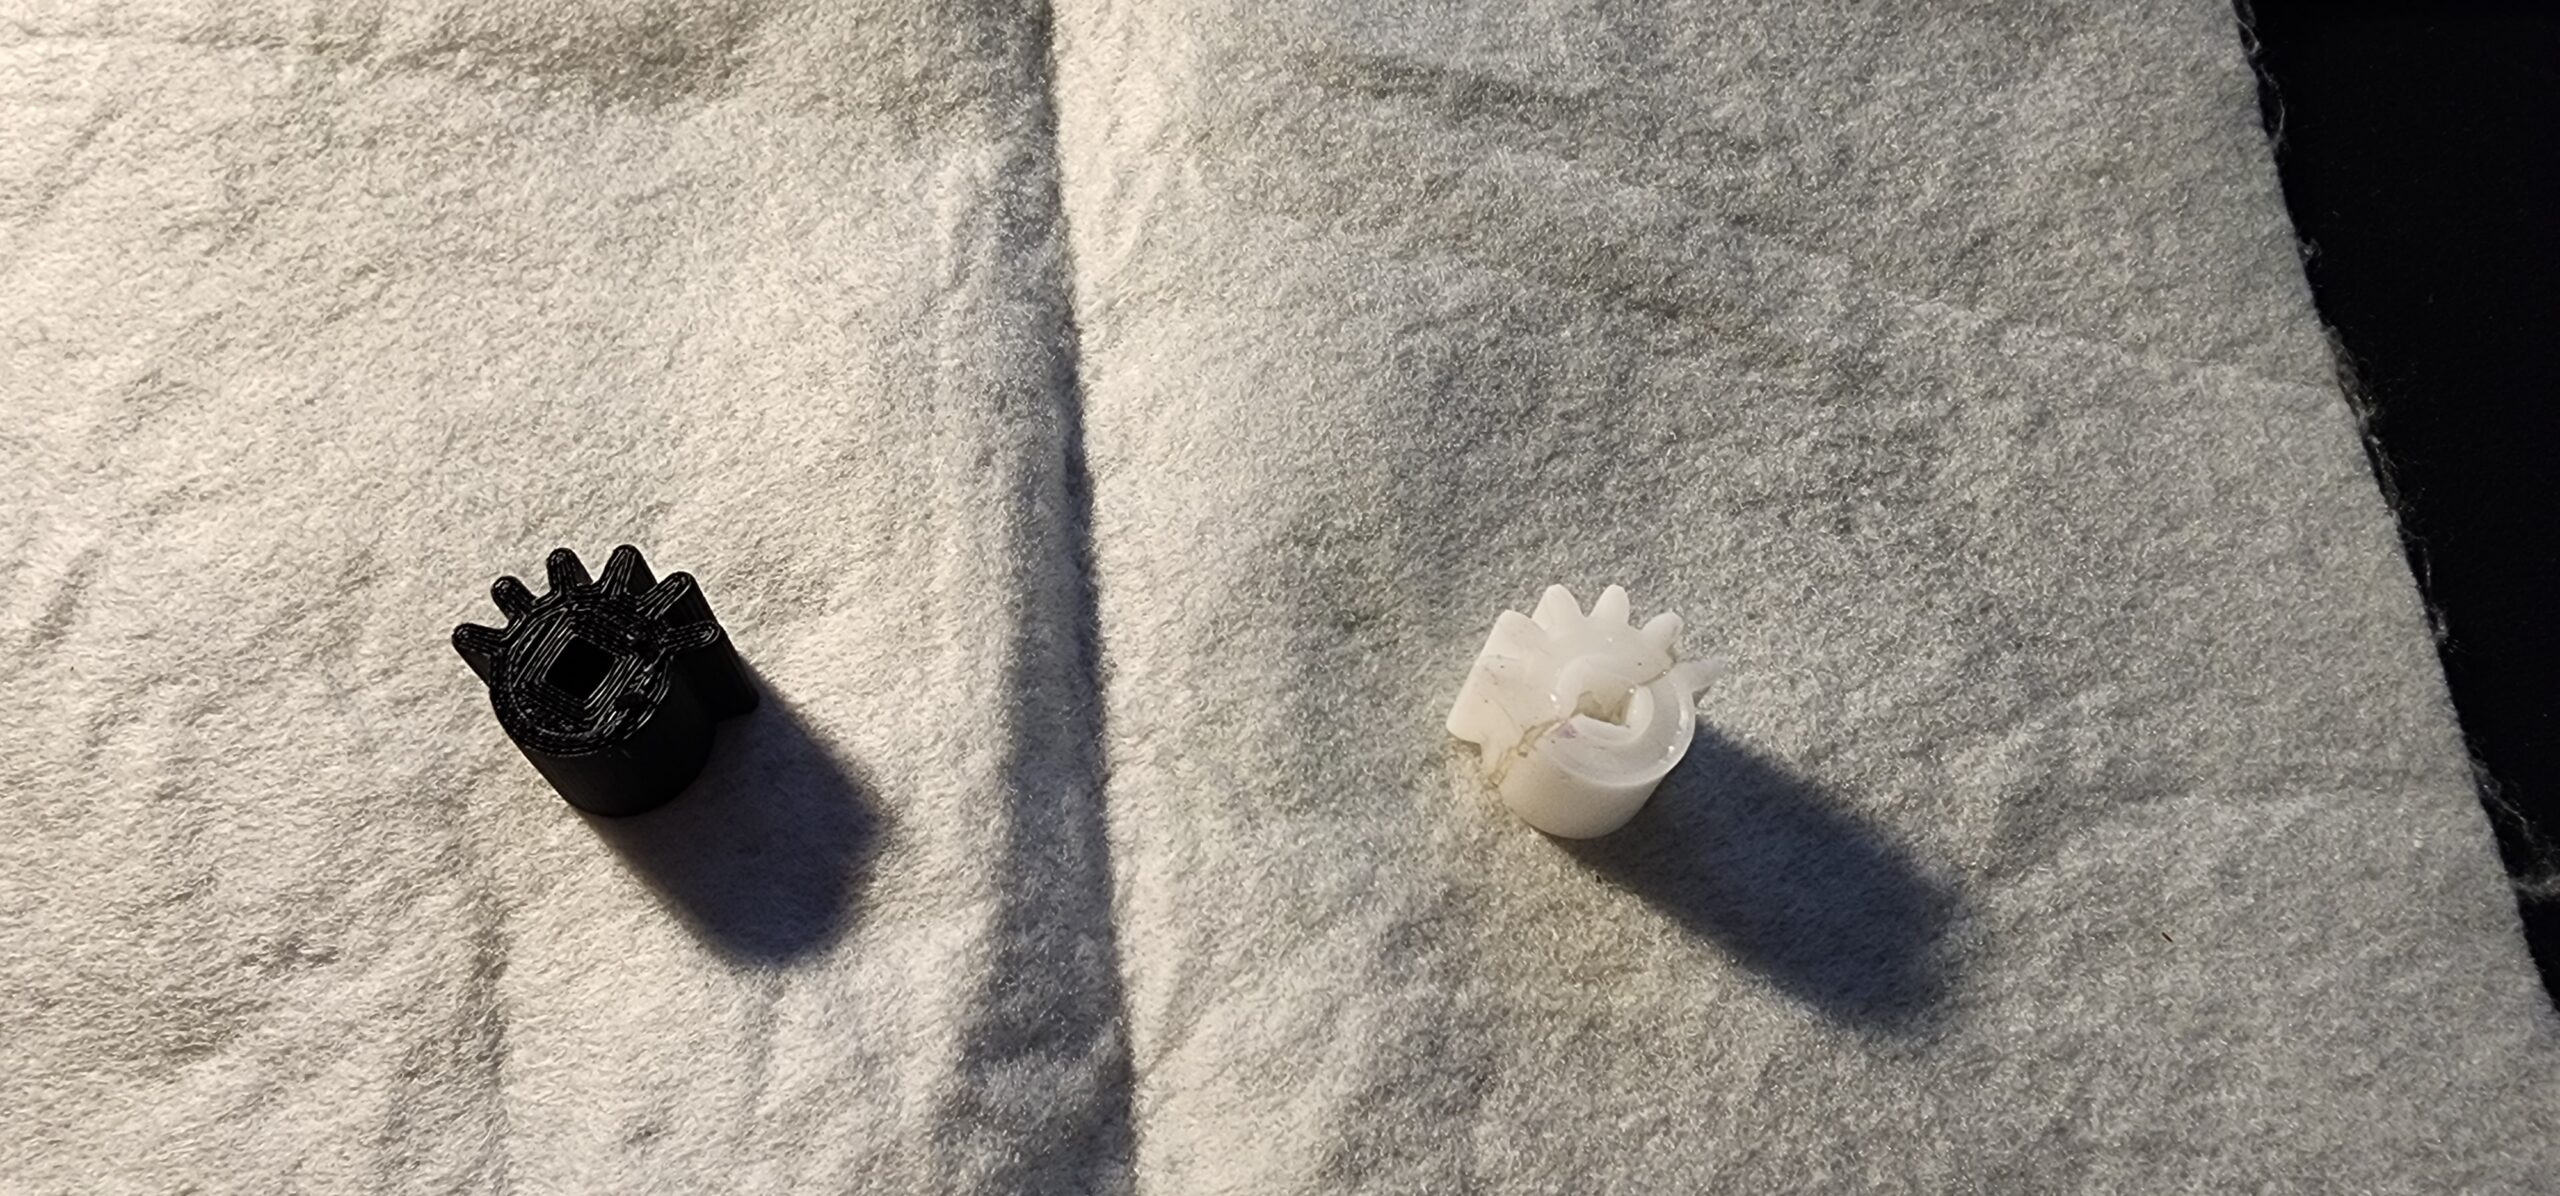
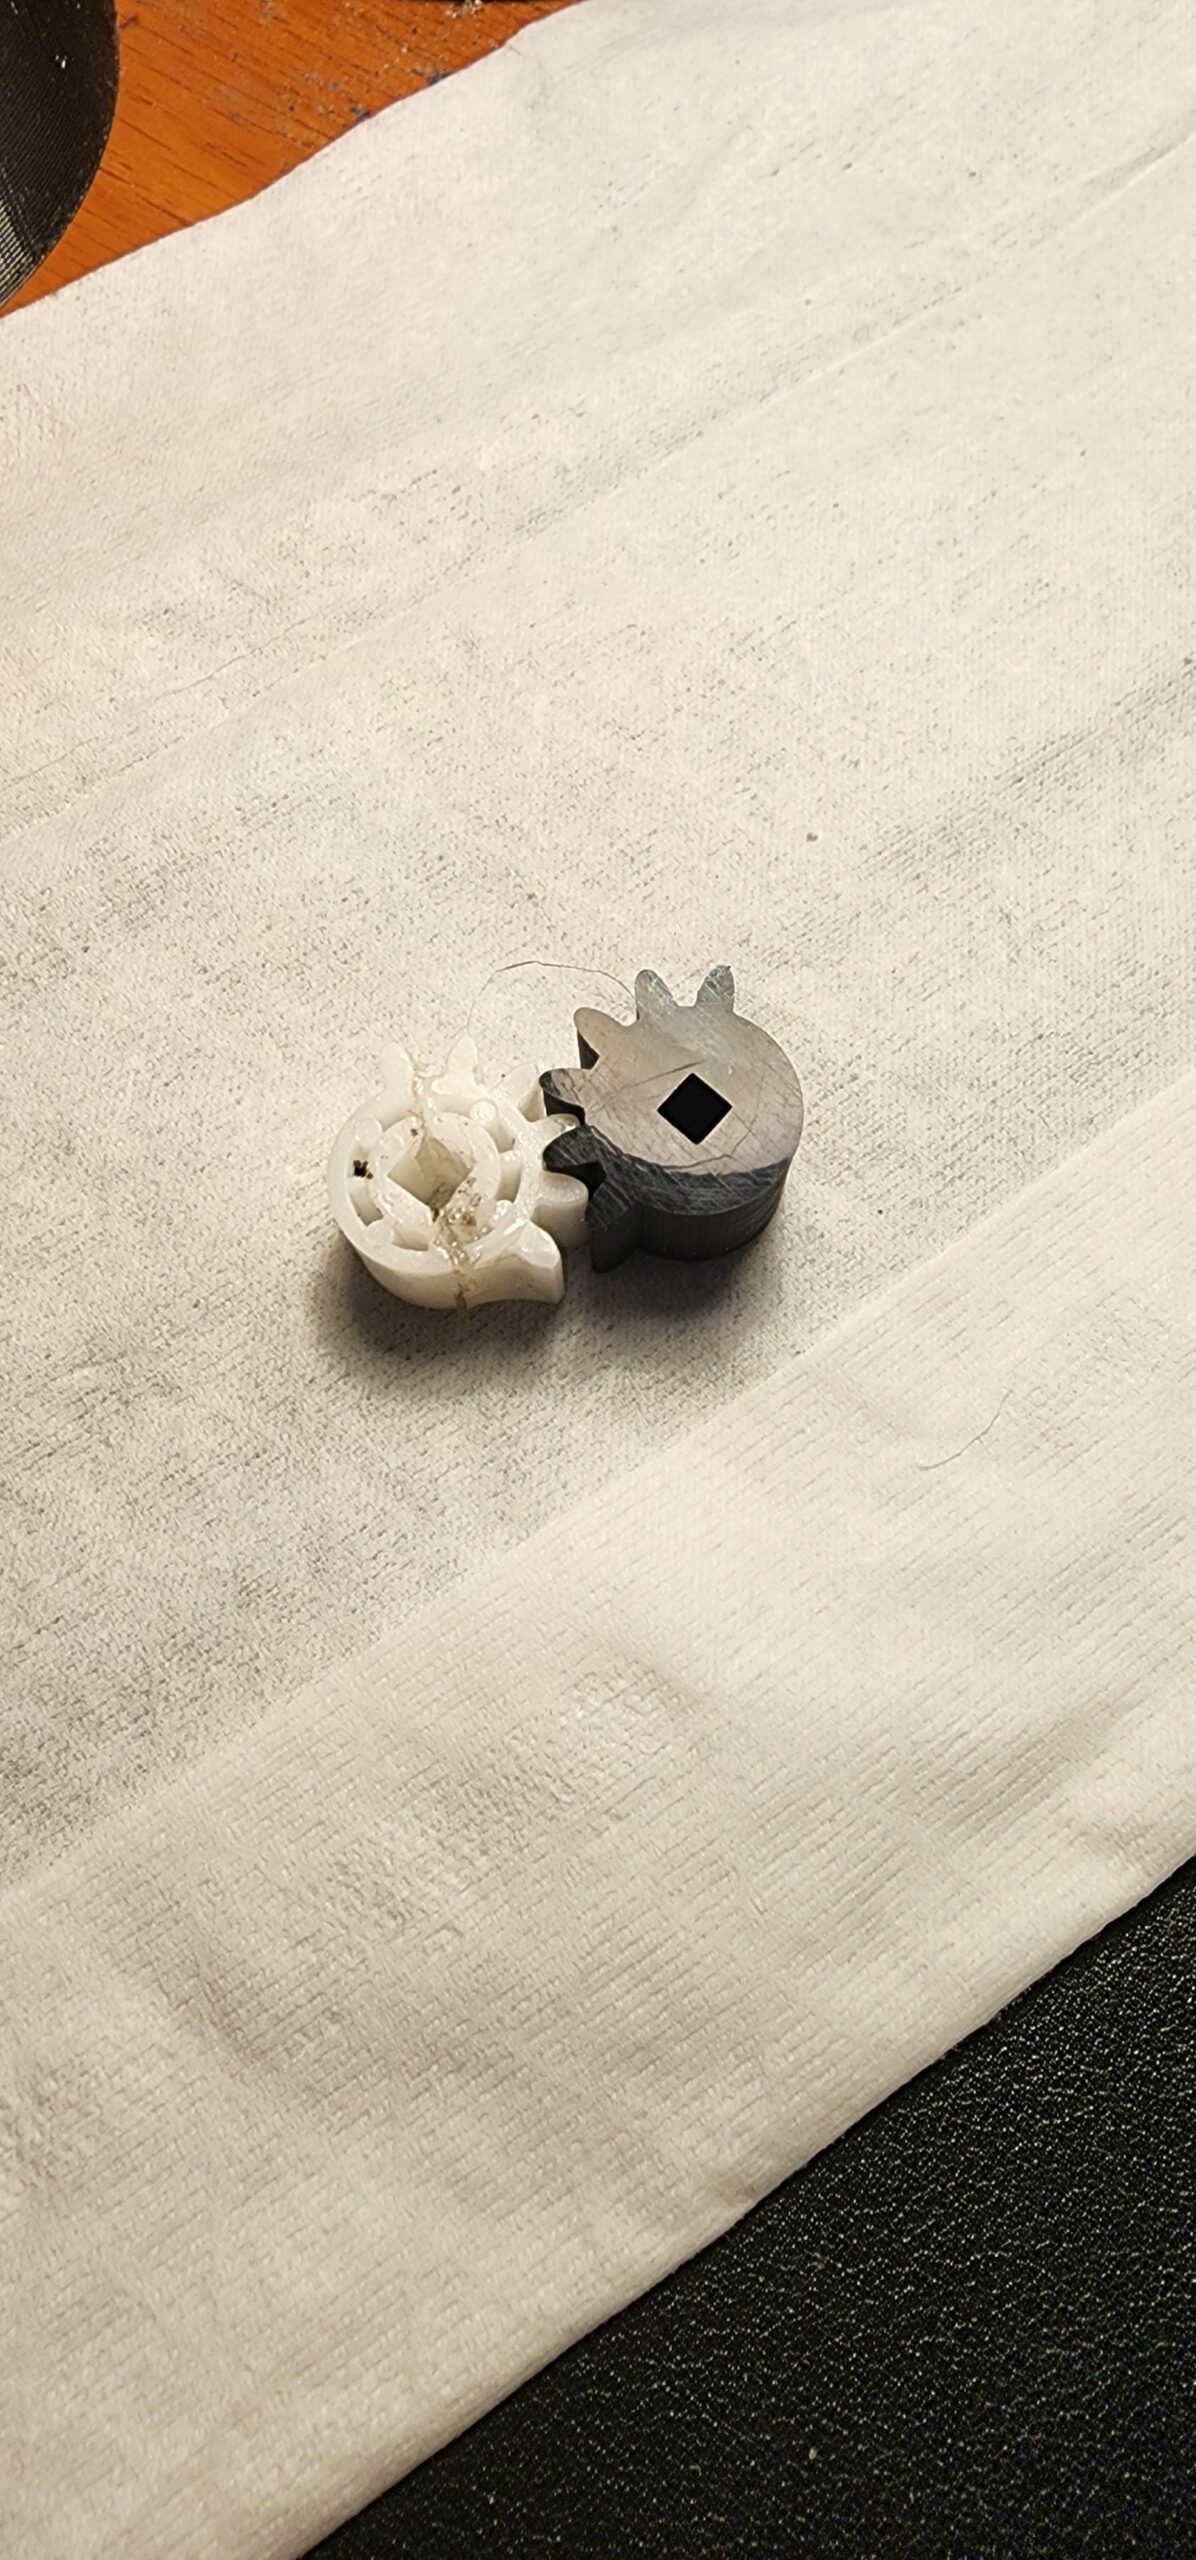
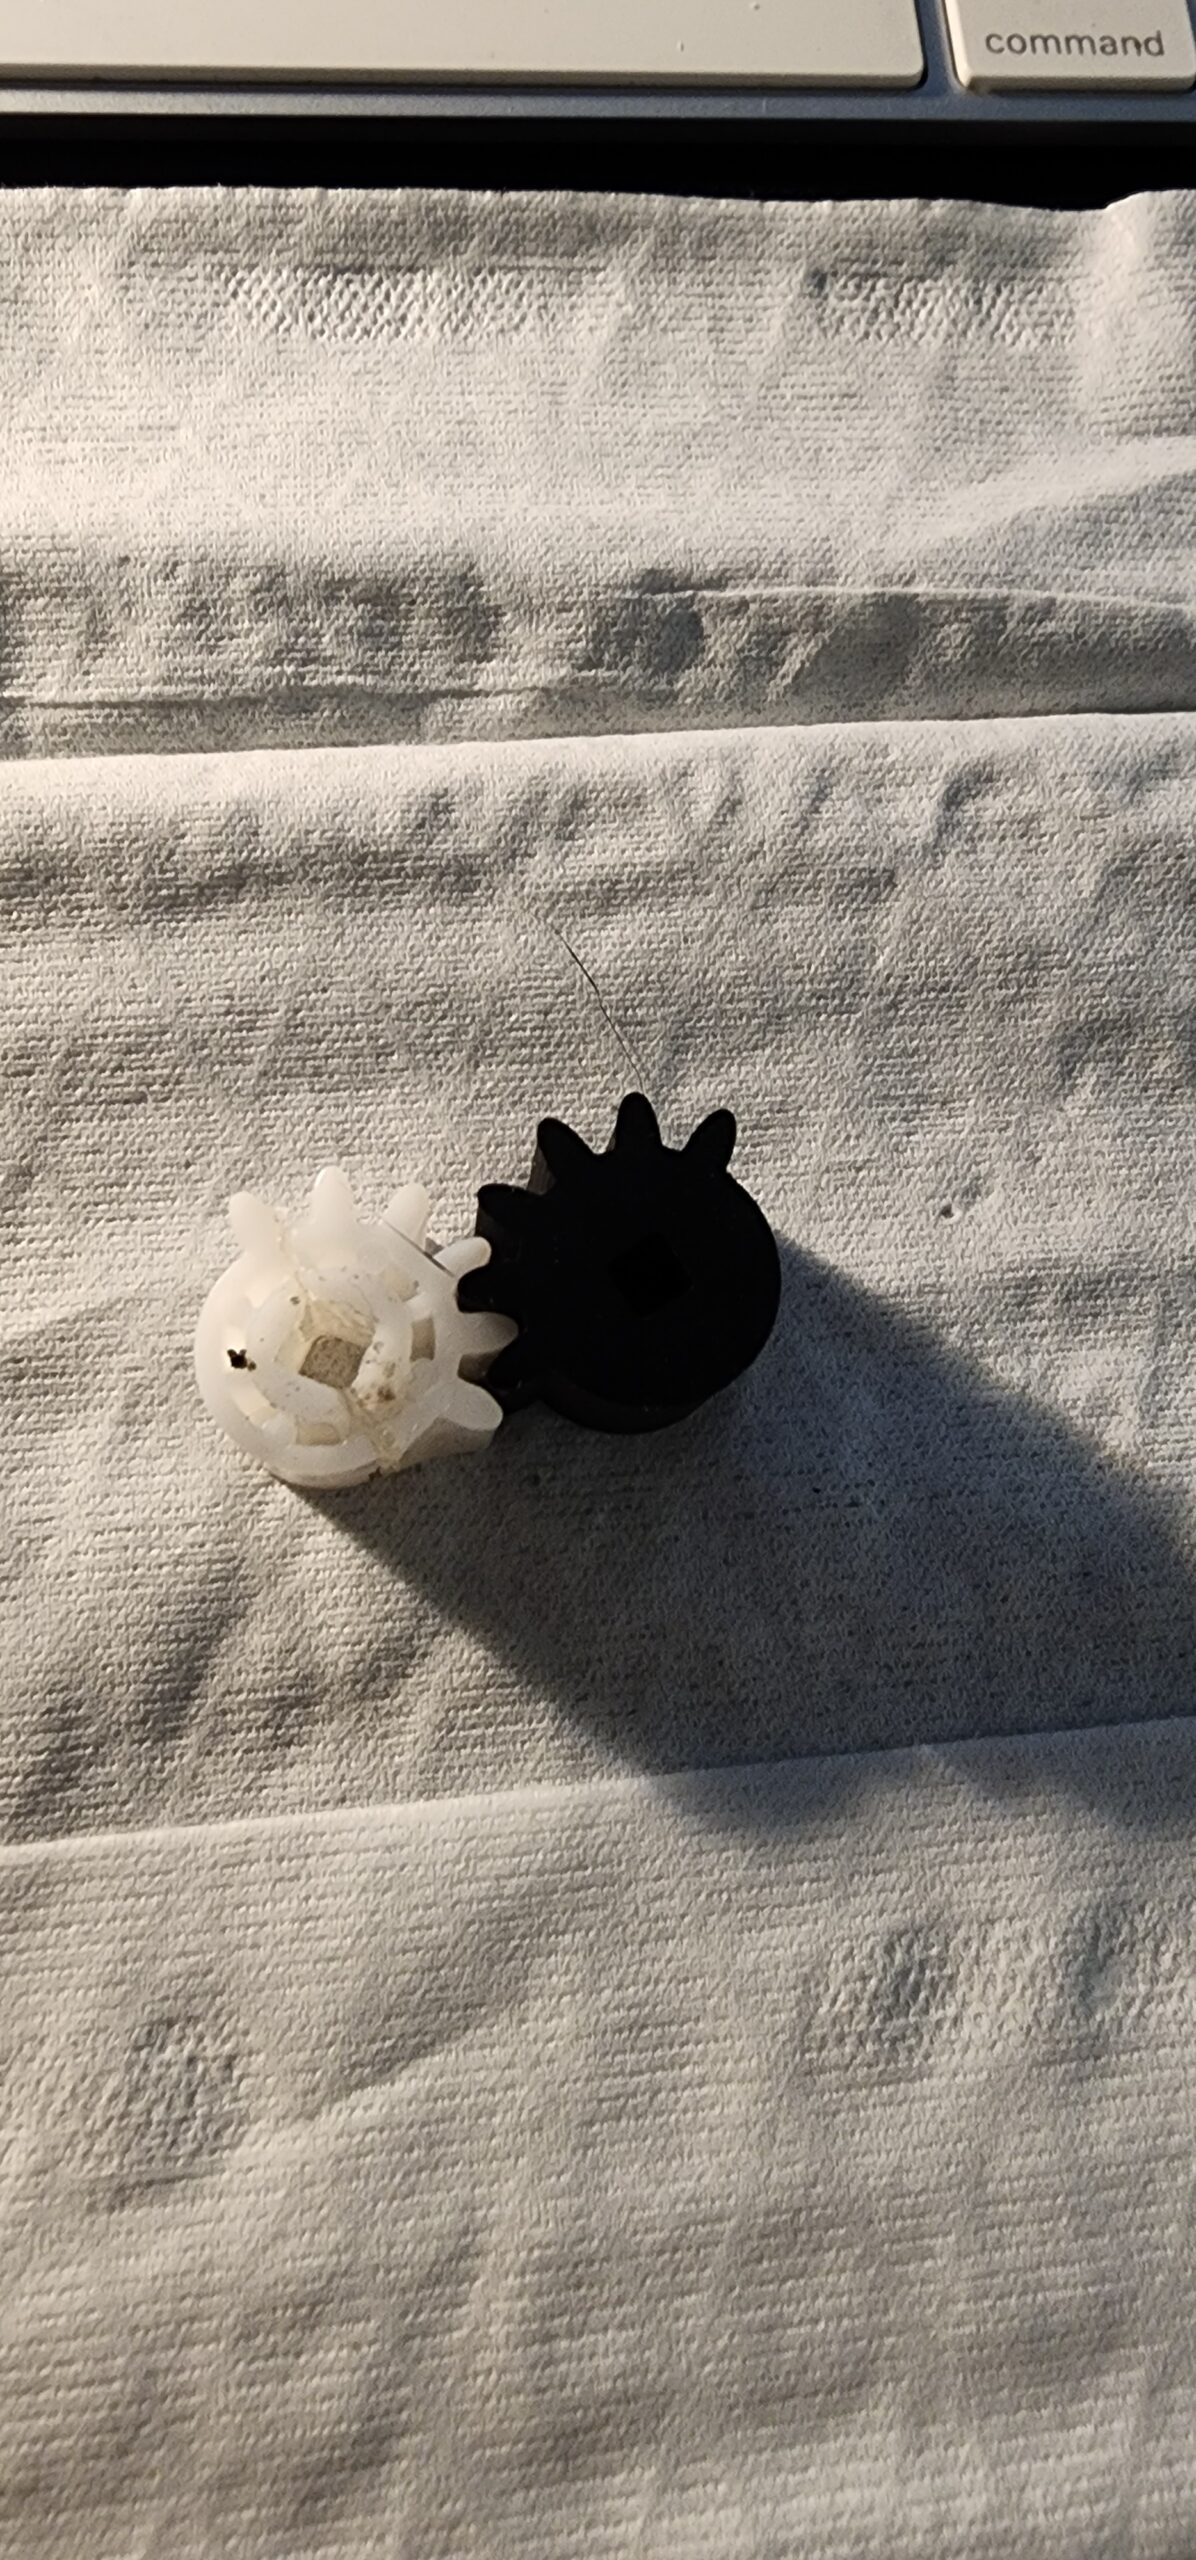
The photographs in this guide show my own work on a Halloween mechanism component. You can see the white original, its damaged body, and printed versions made to recreate the part.
The gear teeth occupy only part of the circumference, making this a sector-shaped gear rather than a complete ring of teeth. Its square center opening is another important interface: the replacement needs to connect correctly to the mechanism, not just resemble the original from above.
A seasonal decoration is an assembly. The shell, frame, electronics, motor, linkage, and attachment points each have a job. One failed component does not tell you the condition of everything else.
That is what makes this an interesting replacement-part problem. The decision becomes more useful when you can point to a specific damaged piece and explain the movement or connection it controls.
- Gear: transfers movement through matching teeth.
- Cam: uses its profile to control the movement of another component.
- Bracket: holds parts in the position needed for the assembly to work.
- Clip or retainer: keeps a component attached or located.
A chipped tooth, split hub, or snapped tab gives you a starting point. It does not prove that the motor, controller, or rest of the mechanism is healthy.

Before You Take It Apart, Save the Evidence
Disconnect power and remove batteries before inspecting an accessible mechanism. Follow the manufacturer’s instructions. If inspection requires opening a mains-powered electrical enclosure or defeating a guard, use qualified repair help.
With the assembly safely accessible, photograph it before removing anything. A close-up of the broken part matters; a wider view showing its location matters just as much.
- Capture the installed position. Show which side faces outward and what connects to the part.
- Keep every fragment. A detached tab can preserve an attachment feature that the main piece no longer shows.
- Label the hardware. Keep screws, washers, pins, and spacers organized by location.
- Photograph the mating component. Include the shaft, neighboring gear, housing, or linkage.
- Record the symptom. Describe what worked and what stopped during normal use; do not repeatedly power a jammed mechanism to demonstrate the failure.
A photograph with a ruler helps communicate approximate size. For a precise replacement, the physical sample and measured interfaces are usually more useful than a single picture.
A Stronger Replacement Is Not Always the Fix
Imagine a small gear with missing teeth. Recreating it may restore the missing geometry, but what happens if the arm linkage is still jammed?
The new gear could face the same problem. Changing the material or making the hub thicker does not remove an obstruction elsewhere in the assembly.
Look for visible interference, bent linkage, loose mounting points, or damage on the neighboring component. If the cause is unclear, say so in the project request. That uncertainty belongs in the evaluation.
For a moving part, avoid assuming the original’s flexibility or weak feature was accidental. A redesign needs to consider the surrounding mechanism, not simply make one component harder to break.
Buy a Spare, Print a Replacement, or Replace the Decoration?
| Option | Worth considering when | Check first |
|---|---|---|
| Manufacturer spare | The correct part is available. | Model compatibility, price, and delivery. |
| Custom printed part | A suitable plastic part is unavailable and its function can be established. | Design work, material, mating parts, testing, and deadline. |
| Replace the decoration | Several systems are damaged or repair is impractical. | Total repair cost and uncertainty versus replacement value. |
A small part is not automatically a cheap custom job. Recreating its geometry, preparing a prototype, checking fit, and revising the design may account for more work than printing the plastic.
What Makes a Printed Gear or Cam More Demanding?
A decorative model can look convincing while being slightly out of proportion. A mechanical replacement must interact correctly with another part.
For a gear, the tooth geometry, shaft fit, thickness, and position relative to its neighbor all matter. For a cam, the working profile and its relationship to the shaft determine how the follower moves. Copying a damaged outline without reconstructing the missing information can reproduce the damage.
FDM design also requires attention to clearances, material behavior, and print orientation. Prusa’s modeling guidance explains that fit allowances vary with the geometry, setup, orientation, and material, and that printed strength depends on direction.
That is why there is no universal filament or single clearance setting for every animatronic repair. Tiny teeth, repeated motion, environmental exposure, and the consequences of failure can change the manufacturing decision.
Use the P.R.I.N.T. Method™ to Plan the Repair
Make a short project note before buying material or requesting a quote. Use these five prompts as a repair planner:
- P — Problem: What stopped working, and what damage can you actually see?
- R — Requirements: What movement, load, temperature, exposure, and deadline must the replacement handle?
- I — Interfaces: Where does it attach, rotate, mesh, slide, or contact another surface?
- N — Next-Best Materials & Methods: Is an original spare, FDM replacement, or another process the sensible option?
- T — Test & Tune: What checks will establish fit and intended operation before regular use?
For a structured beginner reference, explore P.R.I.N.T. It: Practical 3D Printing for Beginners. Use your notes alongside it to connect the printing workflow with the problem in front of you.
Test the Replacement in Stages
Begin by inspecting the printed component and checking its measured features. Then check its fit with the power disconnected, following the manufacturer’s assembly instructions and avoiding force.
If the part binds, rocks, or needs excessive pressure to install, pause and find the cause. A fit check should reveal problems rather than hide them.
Functional testing comes after correct assembly, restored guards, and appropriate review. Keep hands clear of moving mechanisms and stop if movement is abnormal. One successful cycle is useful evidence, but it does not establish long-term durability.
Continue with the replacement-part test-fit guide, then use the durability-testing guide to think through the remaining performance questions.
Four-Question Repair Check
Choose your answer, then tap each question to reveal the explanation.
1. What should you save: A) Only the biggest piece, or B) All fragments and hardware?
Answer: B. Small fragments and associated hardware can preserve missing dimensions and attachment details.
2. Does a broken tooth prove the rest works: A) Yes, or B) No?
Answer: B. The damaged gear identifies one problem. Other mechanical or electrical issues may still need investigation.
3. If a replacement binds, should you: A) Force it, or B) Investigate the fit?
Answer: B. Binding is a reason to check alignment, geometry, and clearance before proceeding.
4. Does one working cycle prove durability: A) Yes, or B) No?
Answer: B. Initial operation and performance over repeated use are different questions.
Frequently Asked Questions
Can you review a part if I do not have an STL file?
Yes. A review can start with a physical sample, photos, measurements, or a sketch. Whether enough information exists to model a useful replacement is determined during evaluation.
Can a missing gear be recreated?
Possibly, but a missing original makes the job more uncertain. The shaft, mating gear, available space, and movement requirements may help establish the design. A single exterior photo usually cannot supply all that information.
Will PETG or nylon automatically make it last longer?
No. Material choice must work with the geometry, manufacturing process, environment, and mechanism. A different polymer cannot correct an unresolved jam or inaccurate tooth geometry.
Can I get a replacement before Halloween?
Share the date you need it when requesting a review. Feasibility, design time, prototype revisions, production scheduling, and shipping determine the actual timeline. A request does not guarantee holiday delivery.
Give the Small Part a Chance to Be Evaluated
You do not have to diagnose every detail before asking for help. Start with the broken component, clear photographs, the decoration’s make and model, the symptoms, and your deadline.
Request a replacement-part review from 3D Printing by Kevin →
Based in Independence, Kentucky, Kevin reviews suitable custom replacement projects for local customers and suitable shipped work. Project acceptance and the manufacturing route depend on the actual requirements.
When replacement parts disappear, we make the next one.
What Stopped Moving in Your Halloween Display?
Was it an arm, a turning head, a moving jaw, or a mounting clip that finally gave way? Share the symptom and what you found in the comments. Your experience may help another reader know what to preserve before taking a decoration apart.
Fact-checked editorial note: Technical design principles checked against Prusa’s published modeling guidance on October 13, 2026. Repair feasibility and final suitability require evaluation of the specific assembly. The photographs document Kevin’s own replacement-part work; the inspection and testing advice is general guidance, not a promise of performance for every repair.
