
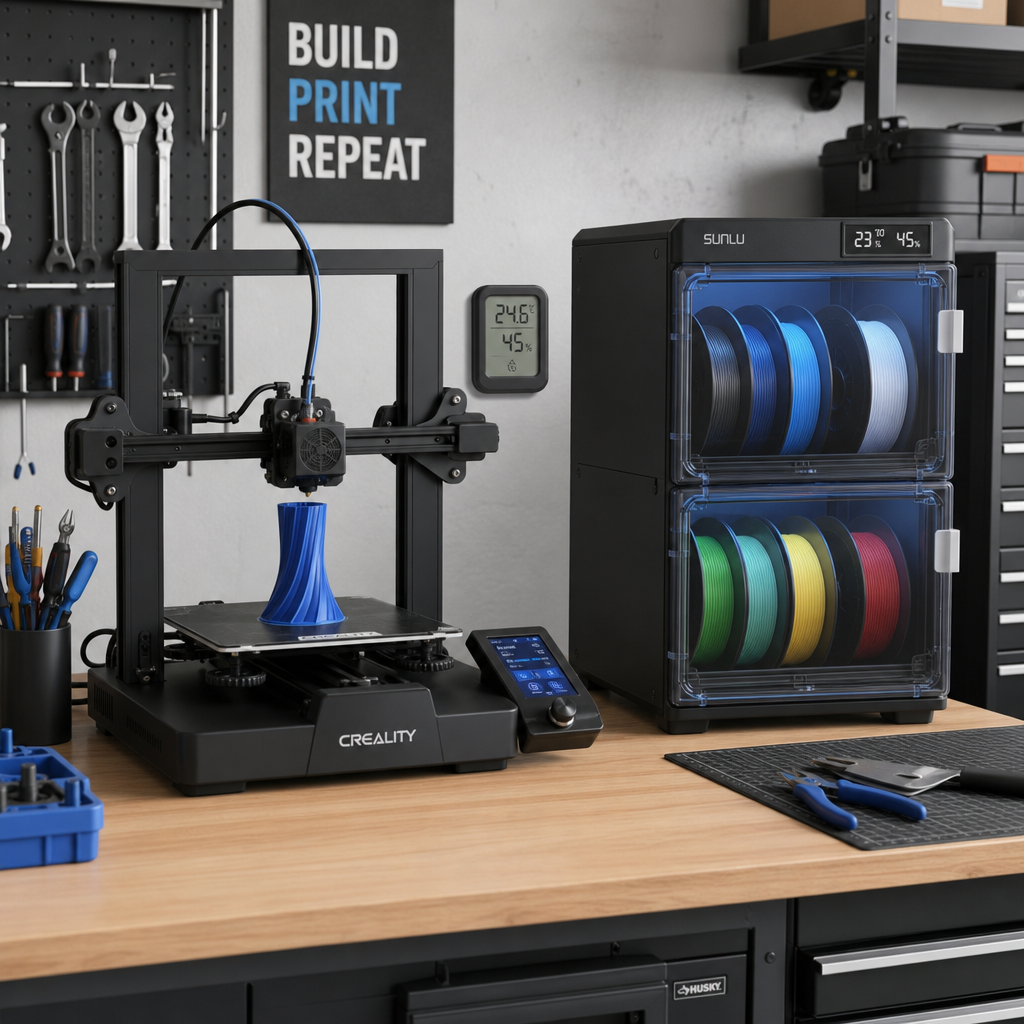
A garage is a convenient place to print brackets, replacement parts, mower fixes, shop organizers, clips, jigs, and outdoor accessories. But summer adds variables that are easy to overlook: rising room temperature, humidity, direct sunlight, dust, changing airflow, and filament that has been sitting exposed between jobs.
The goal is not to chase a magic garage temperature. It is to make the printing environment predictable enough that you can tell whether a problem comes from the machine, material, slicer, design, or room.
Updated September 2026
Can you 3D print in a hot garage?
Yes. Plenty of FDM printing can be done successfully in a garage or workshop, but success depends on more than the number on a thermometer.
Watch the actual conditions around the printer. Keep filament dry, protect the machine from direct sunlight and shop debris, follow the printer manufacturer’s operating limits, use appropriate ventilation, and match the filament to the temperature and environment the finished part will experience.
Before committing to a 10-hour functional print, run the smallest useful test that can expose an adhesion, cooling, fit, material, or dimensional problem.
The garage is convenient—but it is not a controlled environment
I understand why the garage becomes the natural home for a 3D printer. Mine is a working tool, not a museum piece. A garage gives you room for printers, filament, calipers, tools, spare hardware, failed prototypes, and the other bits that seem to multiply around practical 3D printing.
The catch is that a garage can change considerably between morning and late afternoon. Temperature rises. Sunlight moves. Relative humidity changes. Doors open and close. Lawn equipment, sanding, grinding, and normal workshop activity add dust and debris.
That matters when you are trying to make functional pieces such as brackets, covers, clips, mounts, spacers, adapters, and replacement parts. Repeatability matters more than simply getting plastic onto the bed.
My rule: Before changing a pile of slicer settings, ask whether something outside the slicer changed first.
The four-variable garage check
This is the order I would investigate before assuming the printer suddenly forgot how to print.
Environment
Did room temperature, sunlight, drafts, dust, or humidity change?
Filament
Was the spool left exposed? Are you seeing popping, stringing, bubbling, or rough surfaces?
Machine
Is the bed clean? Are fans, vents, rails, and filament paths free from debris?
Part
Is the material actually suitable for the heat, UV exposure, load, and service conditions after printing?
Heat and moisture are two different problems
This distinction is worth making because they are often lumped together.
Ambient heat
Hot surrounding air changes the conditions in which the printer is trying to cool the hotend, electronics, motors, and freshly extruded plastic. Depending on the printer and filament, excessive ambient heat can contribute to inconsistent cooling, heat-creep symptoms, softer small details, or an operating environment outside the machine manufacturer’s recommendations.
Filament moisture
Moisture is a material-storage problem. Many FFF filaments absorb water from the surrounding air to varying degrees. When moisture becomes significant, symptoms can include poor surface finish, stringing, bubbling or popping during extrusion, blobs, and degraded print consistency.
That is why simply adding more air conditioning does not rescue a spool that already needs drying—and why drying the filament does not solve a printer sitting in direct afternoon sun.
Useful distinction: A sealed container with desiccant helps keep dry filament dry. It is not necessarily a substitute for a proper filament dryer when a spool has already absorbed too much moisture.
Do not overlook ventilation just because the printer is in a garage
A garage may feel ventilated because it is larger than a bedroom or office, but that does not automatically make every printing setup well controlled.
NIOSH continues to identify airborne particles and volatile compounds as considerations in fused-filament 3D printing. Their guidance emphasizes controlling hazards through material choice and engineering controls such as appropriate ventilation and filtration.
Read the current NIOSH additive-manufacturing safety guidance.
For higher-temperature materials such as ABS or ASA, ventilation deserves particular attention. At the same time, blasting an open printer with a strong draft can create its own warping and layer-adhesion problems.
The practical answer is controlled airflow—not random airflow. Follow the printer and filament manufacturer’s safety instructions, use an appropriate enclosure or source-control approach where required, and avoid treating an open garage door as a universal emissions-control system.
Use the P.R.I.N.T. Method™ before blaming the printer
A changing garage environment is exactly the kind of problem the P.R.I.N.T. Method™ helps untangle.
Problem
What actually failed—adhesion, warping, dimensions, stringing, weak layers, rough walls, or fit?
Requirements
What heat, load, weather, flexibility, accuracy, and lifespan must the finished part handle?
Interfaces
Which holes, tabs, clips, screws, shafts, slots, bearings, or mating surfaces control whether the part works?
Next-Best
Choose the simplest sensible material, orientation, setup, and test—not automatically the fanciest filament.
Test & Tune
Change one meaningful variable, print a controlled sample, inspect it, and use the result to guide the next decision.
The garage mistakes that create the most confusion
| Garage mistake | What you may notice | Better approach |
|---|---|---|
| Leaving filament exposed | Stringing, rough surfaces, popping, blobs, inconsistent extrusion | Store filament sealed with desiccant and dry moisture-affected spools correctly before an important print. |
| Printer sitting in direct sun | Changing local temperatures and unnecessary heat load on the machine and printed part | Shade the printer and follow its documented environmental limits. |
| Ignoring workshop dust | Dirty build surfaces, contaminated filament paths, clogged vents, dirty fans, or rough movement | Separate printing from sanding, grinding, sawdust, and lawn-equipment debris. Cover the printer when appropriate and idle. |
| Changing several slicer settings at once | You may fix the symptom without learning the cause—or create a second problem | Change one important variable and compare the result. |
| Assuming a successful print means a successful part | The part prints beautifully but deforms, creeps, cracks, fades, or loosens during service | Choose the material around the finished part’s actual heat, UV, moisture, load, and movement. |
| Starting with a full-size final print | Hours of lost time when one hole, clip, tolerance, or first-layer problem was wrong | Print the smallest useful fit or process test first. |
How I would prepare a garage printer before a serious job
- Check the temperature where the printer actually sits—not just the weather app.
- Keep the printer away from direct sunlight and radiant heat sources.
- Check that air intakes, cooling fans, and vents are clean.
- Store filament sealed with fresh or regenerated desiccant.
- Dry a spool properly if its behavior suggests moisture exposure.
- Clean the build surface before diagnosing adhesion.
- Keep sawdust, grinding dust, lawn debris, and aerosols away from the printer.
- Review ventilation and emissions control for the material being printed.
- Confirm the finished material suits the part’s real service environment.
- Run a short test before committing to an expensive or overnight print.
The five-minute garage print planner
Before pressing Print on a long functional job, walk through these five questions. You are trying to eliminate uncertainty before you spend hours making the complete part.
What changed since the last good print?
Weather, spool, material, nozzle, bed surface, firmware, slicer profile, printer location, maintenance, or part geometry?
Is the filament condition known?
If the spool has been sitting open in humid air, do not assume it is still behaving exactly like a freshly opened spool.
What environment will the finished part see?
Indoor room temperature, hot garage, vehicle interior, direct sunlight, rain, repeated flexing, vibration, chemicals, or mechanical load?
What feature is most likely to make the part fail?
A screw hole? Snap fit? Thin wall? Overhang? Large flat base? Heat exposure? Tight tolerance? Start testing there.
Can you prove the setup with a smaller print?
If a 20-minute coupon or partial test can answer the important question, print that before the eight-hour final piece.
PLA, PETG, ABS, and ASA are not interchangeable summer materials
Material choice is where garage printing and real-world part performance meet.
PLA
PLA remains one of the easiest materials for prototypes, visual pieces, fit checks, jigs, and many indoor parts. Its limitation is elevated-temperature service. A PLA part that performs perfectly indoors may not be a good choice for a hot vehicle, sun-heated enclosure, or some garage applications.
PETG
PETG is a useful option for many functional brackets, holders, covers, and utility parts because it generally offers more temperature tolerance and toughness than conventional PLA while remaining comparatively approachable to print. That does not make every PETG formulation suitable for every hot environment.
ABS
ABS can provide higher-temperature capability for functional applications, but successful printing usually demands more attention to enclosure conditions, warping, emissions control, and the printer’s capability.
ASA
ASA is particularly interesting when the finished part must deal with outdoor exposure. It combines useful temperature resistance with better UV/weather suitability than many common hobby filaments, but it also benefits from controlled printing conditions and appropriate ventilation.
Engineering materials
Nylon, polycarbonate, fiber-filled materials, and specialty blends can solve requirements that ordinary PLA or PETG cannot—but they bring their own drying, hardware, nozzle, enclosure, temperature, and process requirements. “Stronger” is not automatically “better for this part.”
For another practical heat example, read Will Your 3D Print Survive a Hot Car? PLA vs. PETG vs. ABS in Summer Heat.
Filament storage deserves more attention in summer
Most common FFF filaments are hygroscopic to some degree, although some are much more moisture-sensitive than others.
That does not mean every imperfect print is caused by “wet filament.” It means storage is one variable worth controlling so you can remove it from the troubleshooting equation.
For storage
Use a well-sealed container or bag with desiccant. A hygrometer can make the storage condition easier to monitor instead of guessing.
For an already wet spool
Follow the filament manufacturer’s recommended drying temperature and duration. Do not guess at dryer temperatures—excessive heat can deform filament or the spool itself.
Prusa’s current filament guidance also distinguishes between preventing moisture absorption and drying material that has already absorbed moisture.
When should you move the printer out of the garage?
You do not need a laboratory to make good FDM parts. What you need is enough control to understand what the machine is doing.
The garage may be perfectly workable when…
The machine is shaded, clean, operated within its documented conditions, filament is controlled, ventilation is appropriate, and print behavior remains consistent from job to job.
A different location or better environmental control deserves consideration when…
Long prints repeatedly fail during hotter periods, the printer receives direct sun, dust contamination is difficult to control, the manufacturer temperature limits are being exceeded, filament storage is constantly compromised, or you cannot provide appropriate emissions control for the materials you need.
Do not confuse print success with part success
This is one of the most important lessons in practical 3D printing.
A bracket can come off the printer looking fantastic and still be the wrong bracket. A clip can have beautiful walls and still snap because its flex direction or layer orientation is wrong. A spacer can be dimensionally close and still bind because the mating interface was measured incorrectly.
For replacement parts, measure the features that control function first: holes, tabs, shoulders, snap features, mating faces, shafts, slots, thicknesses, screw locations, and clearances.
My guide to How to Measure a Part for 3D Printing walks through that process.
“It printed” is not the finish line. The part still needs to fit, hold, move, flex, survive its environment, and do the job it was created to do.
What if you only have the broken original?
You do not necessarily need an STL or STEP file before starting a replacement-part project.
A broken original, surviving fragments, photographs, measurements, a sketch, and the mating component can sometimes provide enough information to begin evaluating whether a replacement is practical.
For difficult-to-find components, see Discontinued Plastic Parts Replaced with 3D Printing and Broken Brackets and Clips Replaced with 3D Printing.
Need filament for practical parts?
I work with COEX 3D for filament. If you are comparing materials for your own practical projects, you can visit my COEX partner page and use coupon code 3DPRINTINGBYKEVIN for 15% off.
Visit the COEX 3D Partner Page
Affiliate/partner disclosure: If you purchase through a qualifying partner link, 3D Printing by Kevin may earn a commission at no additional cost to you. The material still needs to be chosen for the actual job rather than the commission.
Want to understand the whole workflow instead of chasing individual fixes?
That is why I created P.R.I.N.T. It: Practical 3D Printing for Beginners.
The guide ties together the decisions that are easy to treat as separate problems: setup, slicers, materials, calibration, measurements, replacement parts, maintenance, troubleshooting, and controlled test fitting.
Instead of memorizing another random “perfect setting,” you learn how to work from Problem → Requirements → Interfaces → Next-Best Materials & Methods → Test & Tune.
Helpful next reads
New to 3D printing?
Start with 3D Printing for Absolute Beginners for the bigger picture around setup, slicing, filament, and first prints.
Printing PETG?
Use my 3D Printing with PETG guide for material-specific setup and troubleshooting.
Moving into ABS?
Read 3D Printing with ABS: A Comprehensive Guide before treating ABS like hotter PLA.
External references used for this update
Good troubleshooting separates experience from facts that deserve an outside reference. These are useful current resources for the safety and filament-storage portions of this guide.
NIOSH: Additive Manufacturing Safety Prusa: Drying Filament Prusa: ASA Material Guide
Quick knowledge check
Open each question and see whether you would make the right call before starting a long summer print.
1. If a print suddenly looks worse on a humid summer day, should you immediately change five slicer settings?
No. First check what changed: filament condition, room environment, bed cleanliness, machine condition, material, or the model itself. Changing several slicer variables at once makes the real cause harder to identify.
2. Does putting filament in a dry box automatically dry a wet spool?
Not necessarily. A sealed dry box with desiccant is excellent for slowing moisture absorption and maintaining dry filament. Material that has already absorbed significant moisture may require proper drying according to the filament manufacturer’s instructions.
3. Why is a small test useful before a long functional print?
A small test can expose adhesion, tolerance, fit, cooling, orientation, dimensional, or material problems before hours of printer time and a large amount of filament are committed to the final part.
4. If PLA prints perfectly in your garage, does that prove it is suitable for a hot outdoor part?
No. Printability and final service performance are separate questions. The material must also tolerate the temperature, sunlight, moisture, load, movement, and lifespan required after the part leaves the printer.
Frequently asked questions
Is it safe to run a 3D printer in a garage?
A garage can be a workable location, but safe operation depends on the specific printer, filament, electrical setup, manufacturer instructions, ventilation, emissions control, dust, temperature, and surrounding activities. Do not assume that a large room or open garage door automatically addresses every hazard.
Can heat cause a 3D printer to clog?
Excessive surrounding heat can contribute to hotend cooling problems on some printer and material combinations, including symptoms associated with heat creep. A clog can also come from contamination, nozzle condition, filament diameter, temperature settings, debris, or other causes, so diagnose before assuming ambient heat is responsible.
Can humidity ruin filament?
Filaments absorb environmental moisture to different degrees. Significant moisture can hurt surface finish and extrusion consistency and may contribute to stringing, popping, bubbling, blobs, or reduced print quality. More hygroscopic materials require stricter storage and drying practices.
Should I put my 3D printer in an enclosure in the garage?
An enclosure can help control drafts, temperature, dust, and emissions when it is designed and used appropriately. But an enclosure also changes the thermal environment around the machine. Follow the printer manufacturer’s guidance regarding enclosure use, electronics cooling, ventilation, and approved materials.
Is PETG always better than PLA in a garage?
No. PETG can offer useful toughness and temperature advantages for many utility parts, but the correct material depends on the actual requirements. PLA may still be the simpler choice for prototypes and low-heat indoor parts, while higher-temperature or outdoor applications may call for ASA, ABS, polycarbonate, nylon, or another material.
What filament is best for an outdoor part?
There is no universal answer. Temperature, UV exposure, moisture, mechanical load, flexibility, chemicals, print orientation, and expected lifespan all matter. ASA is often worth considering when UV and weather exposure are important, but the entire application still needs to be evaluated.
Why do my prints seem worse in the afternoon?
If the garage becomes hotter or receives direct afternoon sun, the environment around the printer may be substantially different from the conditions during a morning print. Check the actual printer-area temperature, airflow, sunlight, filament condition, and machine cooling before changing slicer settings.
Can 3D Printing by Kevin help if I only have the broken part?
Potentially, yes. The physical part, fragments, clear photographs, measurements, sketches, drawings, mating hardware, and a description of how the part works can all help determine whether an FDM replacement is practical. Safety-critical or unsuitable applications may require another manufacturing method or an original replacement.
Need a replacement part that has to work in the real world?
Send the broken part, photographs, measurements, sketch, drawing, or digital file you have. I will look at the job the part needs to perform—not simply whether it can be turned into an STL.
The project review considers fit, material, operating environment, interfaces, print orientation, testing, and whether FDM 3D printing is actually the sensible manufacturing method.
Practical-use note: 3D-print performance depends on the printer, filament formulation, slicer settings, ambient conditions, storage, part geometry, orientation, processing, and intended use. Printed parts should not automatically substitute for safety-critical, regulated, high-pressure, high-temperature, structural, medical, protective, or other components where failure could cause injury or serious property damage.

What does summer do to your 3D-printing setup?
Does your printer live in a garage, basement, shed, office, or dedicated workshop? Have you noticed a filament or printer that behaves differently when the weather changes?
Tell me what you are seeing in the comments. Include the printer, filament, symptom, and where the machine is located. Those real troubleshooting examples often make the most useful discussions for other makers.