
That broken plastic bracket may look insignificant—right up until it makes an otherwise perfectly useful appliance, tool, machine, piece of furniture, or hobby project unusable.
Before you replace the whole product, take a closer look at what actually failed. A discontinued clip, cracked mount, stripped knob, missing spacer, or oddly shaped plastic support can sometimes be recreated with 3D printing.
But a dependable replacement is not simply a copy of the broken shape. It has to fit the surviving equipment, handle its real environment, transfer forces correctly, and survive the job you expect it to do.
Quick Answer
Can You 3D Print a Replacement for a Broken Plastic Part?
Often, yes—especially for non-safety-critical clips, brackets, knobs, covers, spacers, holders, adapters, guides, and mounts.
The best candidates have recoverable geometry, understandable operating conditions, and a job that can reasonably be handled by an appropriate printable material. The important questions are not simply “Can I model it?” and “Can my printer make it?” They are what does the part do, what does it connect to, and what happens if it fails?
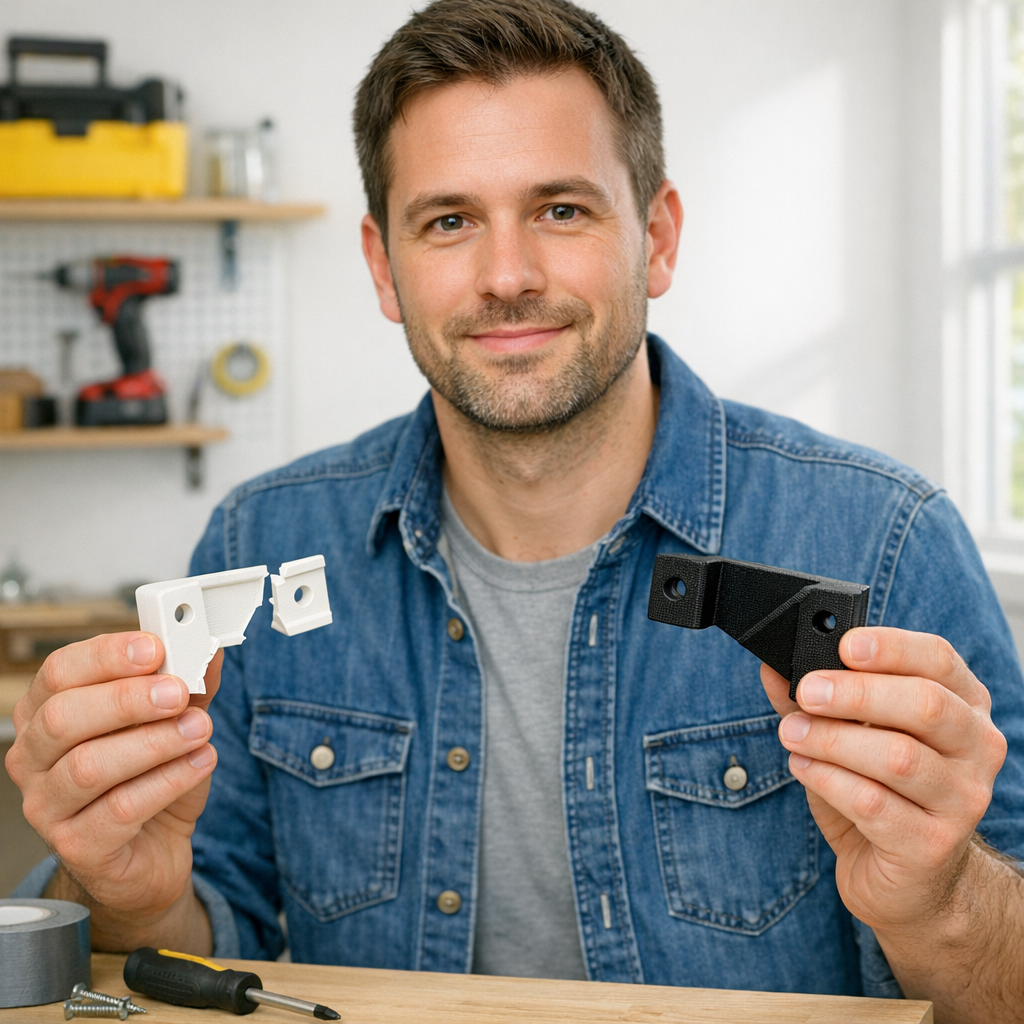
One Broken Part Does Not Always Mean a Broken Product
This is where 3D printing becomes genuinely useful.
A manufacturer may stop stocking a ten-dollar plastic component even though the machine around it still has years of useful life. Sometimes the replacement is sold only as part of a much larger assembly. Other times the part is so specialized that there simply is not an off-the-shelf alternative.
That does not automatically mean you should print it. It means you now have another option worth evaluating.
| Option | Best When | Main Advantage | Main Limitation |
|---|---|---|---|
| Buy the original part | The correct component is still available and reasonably priced | Known fit and manufacturer intent | May be discontinued or sold only with a larger assembly |
| Print it yourself | You can measure, model, print, and test the part | Maximum control and an excellent learning project | Requires time, equipment, design work, and testing |
| Have a custom replacement made | You have the broken part or useful references but do not want to develop it yourself | Design, material, printing, and testing can be handled as one project | Development can cost more than an available OEM component |
My rule is simple: start with the cheapest sensible solution. If the correct factory part is still available for a reasonable price, buy it. Custom 3D printing becomes especially valuable when that normal replacement path has disappeared.
If you are still deciding, my guide to whether you should 3D print or replace a broken plastic part walks through that decision in more detail.
The First Question Is Not “Which Filament?”
When people see a snapped component, they often jump straight to PLA versus PETG versus ABS.
I start somewhere else: Why did the original part fail?
Suppose a mounting tab cracked beside a screw hole. Making the replacement thicker might help—but it might also miss the actual cause. Perhaps the screw was acting like a wedge. Maybe the hole was undersized, the load was concentrated in one corner, or the original geometry simply did not have enough material around the fastener.
A replacement gives you an opportunity to reproduce the function without blindly reproducing the weakness.
Look at the evidence the broken part left behind
- Where did the crack begin?
- Was the part bending, twisting, pulling, or being compressed?
- Did a screw hole split?
- Did a thin tab repeatedly flex?
- Was the part exposed to heat, sunlight, moisture, vibration, or chemicals?
- Did it break after years of use—or almost immediately?
If the damage occurred around a fastener, read why 3D-printed parts crack around screws. Hole fit, boss geometry, orientation, fastener choice, and tightening can matter more than simply increasing infill.
Use the P.R.I.N.T. Method™ Before You Open the Slicer
I use the P.R.I.N.T. Method™ because replacement-part projects get expensive and frustrating when we start changing settings before understanding the job.
Problem
What broke, and what function needs to be restored?
Requirements
Identify load, heat, flex, weather, vibration, lifespan, and risk.
Interfaces
Measure everything that fits, locates, screws, slides, snaps, or touches.
Next-Best
Choose a practical material, geometry, orientation, hardware, and method.
Test & Tune
Print, fit, inspect, measure, revise, and verify before multiplying the result.
That sequence sounds simple. It is also what keeps a replacement project from turning into “make it thicker and hope.”
What Do You Actually Need to Measure?
A digital caliper is useful, but the goal is not to collect hundreds of dimensions. Measure the features that control fit and function first.
| Feature | Why It Matters |
|---|---|
| Overall envelope | The replacement must physically fit into the available space. |
| Hole diameter and spacing | Fasteners must align without forcing the part into position. |
| Mounting surfaces | These determine where the replacement actually seats. |
| Slots, shafts, clips, and tabs | Small errors here can prevent movement, retention, or assembly. |
| Wall thickness | Useful for reconstructing the original and identifying fragile regions. |
| Mating component | Sometimes the surviving equipment tells you more than the broken part. |
Do not throw away the fragments. Even a cracked or incomplete original can reveal hole locations, curves, wall thicknesses, mounting faces, and how the component interacted with the surrounding assembly.
And you do not necessarily need an STL file to begin a custom project. A broken original, photographs, measurements, sketches, and the mating equipment can all be useful starting information.
Which Filament Makes the Best Replacement Part?
There is no universal answer. Material choice should follow the job.
| Material | Where It Can Make Sense | Watch For |
|---|---|---|
| PLA | Indoor fixtures, prototypes, rigid low-heat parts | Heat exposure, impact, long-term loading, application-specific brittleness |
| PETG | Many holders, clamps, brackets, covers, and practical mechanical parts | Flex, dimensional tuning, stringing, actual service temperature |
| ASA | Outdoor parts and applications where UV and higher-temperature resistance matter | Warping, enclosure requirements, fumes, ventilation |
| ABS | Technical parts when its properties and printing requirements fit the project | Warping, enclosure needs, ventilation, dimensional tuning |
| Nylon / engineering polymers | Projects requiring properties that common materials cannot provide | Moisture control, machine capability, shrinkage, cost, application-specific validation |
PETG is popular for practical mechanical parts because of its toughness and layer adhesion. Prusa, for example, lists holders, clamps, and mechanical components among its typical uses. ASA is attractive when outdoor exposure and temperature resistance matter, although it brings more demanding printing and ventilation requirements.
The takeaway is more important than the brand name on the spool: material selection is part of the design, not a guarantee of performance.
For manufacturer material guidance, see the Prusa Knowledge Base resources on PETG and ASA.
A Strong Part Is More Than High Infill
One of the easiest mistakes in functional printing is assuming that 80% or 100% infill automatically creates a dependable part.
The outer walls, local geometry, layer direction, load path, fastener interfaces, material, and print quality can be just as important—or more important—than the amount of plastic hidden inside.
Prusa specifically recommends considering additional perimeters when trying to make PETG parts more solid, while current UltiMaker guidance also notes that wall count can contribute more useful strength than simply raising infill in many situations.
Before increasing infill, inspect these five things
- Layer orientation: Is the load trying to peel layers apart?
- Wall structure: Is enough material actually surrounding holes and loaded edges?
- Fillets and transitions: Are sharp corners concentrating stress?
- Fasteners: Are screws, inserts, or nuts loading the plastic correctly?
- Print quality: Are the layers bonding consistently without under-extrusion or other defects?
Do Not Skip the Test Fit
A model can look flawless on the monitor and still miss a screw hole by just enough to matter.
Printed holes may behave differently from the nominal CAD dimension. Clips may need slightly different clearance. A mating curve may touch somewhere you could not easily measure. First-layer effects, material behavior, orientation, and printer calibration can all influence the finished geometry.
That is why I prefer a controlled test over pretending that every first print should be the final part.
Final-First Approach
Model everything, print the entire component, install it, and discover several uncertainties at the same time.
Test-Fit Approach
Identify the uncertain interface, print the smallest useful test, fit it to the real assembly, measure the result, and revise deliberately.
My complete guide to why replacement parts need a test fit explains this workflow in detail.
A prototype that reveals a clearance problem is not automatically a failed print. If it answered the question you intended to test, it did useful work.
Replacement-Part Planner: Check This Before Printing
Run your part through these questions before committing to the finished print.
1. Problem: What exactly broke or stopped working?
2. Original: Is the correct OEM replacement still available?
3. Function: What forces, movement, or retention must the part handle?
4. Interfaces: What holes, shafts, mounting faces, tabs, slots, or neighboring parts control fit?
5. Environment: Will it encounter heat, sunlight, moisture, chemicals, vibration, or repeated flexing?
6. Failure consequence: What happens if the replacement cracks or comes loose?
7. Material: Why does your chosen filament fit those requirements?
8. Orientation: Which direction will the real load act relative to the printed layers?
9. Test: What is the smallest print that can verify the most uncertain feature?
10. Pass condition: What does the replacement have to do before you consider it finished?
Some Parts Should Not Be Casual DIY Replacements
This distinction matters.
A desktop FDM printer is incredibly useful, but the ability to reproduce the geometry does not prove that the resulting part is appropriate for every application.
Use extra caution—or choose an OEM component, another manufacturing process, or professional engineering evaluation—when dealing with:
- Safety guards and protective equipment
- Brake, steering, suspension, or other critical vehicle components
- High-pressure parts
- Fuel-system components
- Direct flame or extreme-temperature exposure
- Critical electrical insulation or certified electrical components
- Medical or life-supporting equipment
- Structural parts whose failure could cause injury or major property damage
There is nothing wrong with deciding that 3D printing is not the right manufacturing process. Good practical printing includes knowing when not to print something.
NIOSH also continues to recommend controlling potential exposure to particles, VOCs, heat, moving equipment, and other hazards associated with additive manufacturing. Good ventilation and a sensible workspace belong in the process—not as an afterthought.
Want to Build the Replacement Yourself?
If recreating this one broken component has convinced you that you want to become better at functional printing, the project itself can be an excellent teacher.
Start by learning measurement, CAD, material selection, slicer setup, calibration, and controlled testing rather than shopping for settings that promise universal strength.
P.R.I.N.T. It: Practical 3D Printing for Beginners brings those steps together into one structured workflow, including materials, calibration, troubleshooting, replacement-part planning, and the complete P.R.I.N.T. Method™.
Explore the P.R.I.N.T. It Ebook →
Tools and Materials for DIY Replacement Parts
Affiliate disclosure: Some links in this section are affiliate or partner links. If you make a qualifying purchase, 3D Printing by Kevin may earn a commission at no additional cost to you. I recommend products based on their relevance to the project—not simply because an affiliate relationship exists.
3D Scanning
A scanner can help capture complex visible surfaces, but scan data does not eliminate the need to verify dimensions, holes, interfaces, and hidden geometry.
3D Printers
If you want to produce replacement parts yourself, compare equipment based on the materials and part sizes you actually expect to print.
Filament
Material consistency helps make a successful test easier to reproduce. I use COEX filament for practical printing projects.
Partner code: 3DPRINTINGBYKEVIN for 15% off eligible purchases.
Or Let Me Evaluate the Part for You
You do not need to own a printer, know CAD, or arrive with a finished STL.
For suitable projects, you can start with:
- The broken original and its fragments
- Clear photographs from several directions
- A photo showing where the part installs
- Basic measurements
- The mating component when available
- A sketch or drawing
- An existing STL, STEP, OBJ, or other digital model
- A description of heat, movement, load, weather, or vibration
- The quantity you ultimately need
From there, the goal is to determine the simplest practical manufacturing path—not force every project onto an FDM printer.
Have a Broken or Discontinued Plastic Part?
Send the original, photographs, measurements, quantity, and what the part needs to accomplish. I can review whether custom 3D printing looks like a practical route.
Four-Question Replacement-Part Knowledge Check
1. If an original replacement is still inexpensive and readily available, should you automatically 3D print one?
No. The original component may be the fastest, least expensive, and best-supported solution. Custom printing becomes especially useful when conventional replacement options no longer make sense.
2. Does 100% infill guarantee a strong replacement part?
No. Material, wall structure, geometry, orientation, layer bonding, holes, fasteners, load direction, and print quality can all control how a functional part performs.
3. Does the first test print have to fit perfectly to be useful?
No. A controlled prototype can be successful when it reveals an alignment, clearance, movement, attachment, or dimensional issue that tells you exactly what to revise next.
4. Is matching the outside shape enough to recreate a replacement?
Usually not. The important features are often interfaces: mounting faces, holes, shafts, clips, tabs, clearances, fasteners, and the way the surrounding equipment transfers load into the part.
Frequently Asked Questions
Can a 3D-printed replacement part be as strong as the original?
Possibly, but there is no responsible blanket answer. Performance depends on the original material and geometry, the new material, orientation, processing, wall structure, fasteners, load direction, temperature, repeated stress, and the quality of the finished print. A redesigned part may improve a weak area, but that improvement should be demonstrated through appropriate testing rather than assumed.
How much does a small 3D-printed replacement cost?
The raw filament in a small component may cost very little. A custom replacement, however, can also require measurement, CAD work, scanning, material selection, slicer setup, prototyping, machine time, post-processing, inspection, and revision. That is why the price of a custom part should not be estimated from filament weight alone.
Is PETG always the best filament for replacement parts?
No. PETG is useful for many mechanical parts, holders, brackets, and clamps, but there is no universal best material. Temperature, stiffness, flex, UV exposure, chemicals, creep, moisture, impact, and load all need to be considered.
Can I recreate a replacement from a broken original?
Often, yes. Keep all the pieces. Broken fragments can still reveal hole locations, wall thickness, curves, mounting surfaces, fastener features, and important dimensions.
What if I no longer have the original part?
The project may still be possible if you have the mating equipment, photographs, dimensions, drawings, another matching product, or enough surviving geometry to reconstruct the necessary interfaces.
Do I need a 3D scanner?
Not always. Simple mechanical parts can often be reconstructed with measurements and CAD. A scanner becomes more useful for complex visible curves and irregular geometry, but scan data typically still needs cleanup, dimensional verification, and design judgment.
Can you make several copies once the design works?
Potentially. The sensible approach is to prove one part first. Printing ten copies of uncertain geometry only multiplies the uncertainty. Once the fit, material, orientation, assembly, and production process are verified, additional quantities can be evaluated much more confidently.
The Part May Be Broken. The Product May Not Be Finished.
That is the real value of replacement-part 3D printing.
It gives you an opportunity to look past the failed piece, understand what actually needs to happen, and decide whether a practical replacement can put useful equipment back into service.
Sometimes that means printing a new bracket. Sometimes it means redesigning the weak area. Sometimes an original part or another manufacturing process is smarter.
When replacement parts disappear, we make the next one—but we start by making sure 3D printing is actually the right answer.
Have you ever kept an appliance, tool, vehicle accessory, machine, or household item because one impossible-to-find plastic component broke? Tell me what failed in the comments. Those little parts often lead to the most interesting repair projects.
