
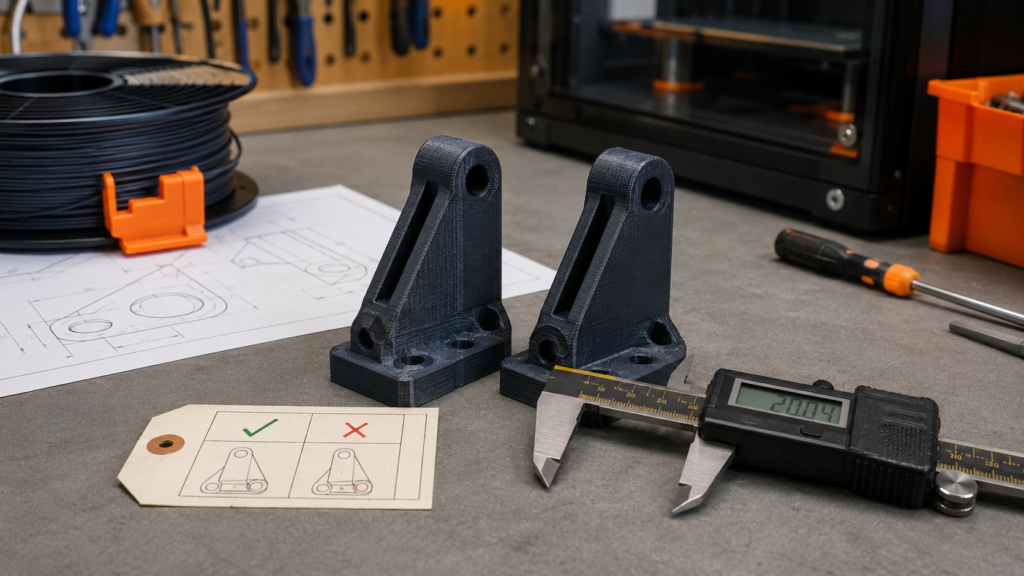
Repeatability starts before the printer moves
You can print the same file twice and still get two parts that do not fit, look, or perform exactly the same.
The file matters, but it is only one input. The spool may have changed. The nozzle may be worn. The build plate may be prepared differently. Room temperature, cooling, orientation, support removal, or even the slicer version can quietly move the result.
After more than eight years of practical FDM work, I have learned that repeatability does not come from trusting the filename. It comes from controlling the complete process and checking the features that actually matter.
Quick answer: If repeat 3D prints do not match, first confirm the exact file and slicer profile, then compare material condition, printer setup, build orientation, environment, and post-processing. Preserve an approved part as the reference, record the settings that made it, and inspect critical dimensions instead of relying on appearance alone.
Why the same 3D file does not guarantee the same part
A digital model describes geometry. It does not fully describe the thermal history, extrusion behavior, machine condition, cooling, support cleanup, or inspection method that created the physical part.
That distinction matters most when a print becomes a replacement component, an assembly, or a small batch. A decorative model may tolerate slight variation. A clip, sliding fit, hole pattern, or mating bracket may not.
Freeze the model, scale, orientation, supports, slicer, and profile.
Record type, brand, color, spool or lot, and moisture condition.
Control nozzle, plate, calibration, maintenance, and printer identity.
Watch drafts, enclosure conditions, room changes, and cooling.
Measure critical features, test the assembly, and record acceptance.
The file can stay identical while any of the other four controls drift.
This is not just a desktop-printing opinion. The National Institute of Standards and Technology notes that useful additive-manufacturing repeatability and reproducibility depend on a rigorous manufacturing plan and on understanding the variables that affect the final part. NIST also explains how repeatability studies support process qualification.
What changed? Start with the symptom
Do not change five settings at once. Use the failure pattern to choose the first check, then change one controlled variable and print the smallest useful test.
| What changed in the repeat part? | Likely variables to investigate first | Best first check |
|---|---|---|
| Hole or slot fits differently | File version, scale, extrusion, orientation, shrinkage, cooling, or measurement method | Compare the same critical dimensions on the approved part, new part, and digital model. |
| Walls look rougher or stringier | Material moisture, nozzle condition, temperature, retraction, speed, or cooling | Inspect the spool history and print a controlled material or retraction test before altering the model. |
| Part curls, lifts, or changes shape | Plate preparation, first layer, drafts, enclosure temperature, bed temperature, or part placement | Verify plate condition and repeat the approved orientation in the same build area. |
| Part fits but breaks sooner | Orientation, layer bonding, material condition, wall count, temperature, speed, geometry, or load direction | Confirm the load path and print orientation before adding infill or making broad setting changes. |
| Color or surface does not match | Different spool or lot, surface orientation, layer height, speed, temperature, cooling, or cleanup | Compare material identification and the exact visible-face orientation under the same lighting. |
| Only some parts in a batch vary | Bed position, shared-build failure, thermal variation, inconsistent cleanup, or measurement drift | Mark each build position and inspect parts by location instead of mixing them immediately. |
The six places repeat 3D prints drift
1. The “same file” may not be the same production file
An STL with the same name can be repaired, rescaled, resliced, or replaced without an obvious warning. A slicer update can also change defaults or behavior. Saving only the model is not enough for a controlled repeat order.
Freeze the approved model revision, units, orientation, support strategy, slicer version, printer profile, filament profile, layer height, walls, infill, temperatures, speeds, cooling, and any modifiers. If the job is important enough to repeat, it is important enough to version.
2. Material changes while it sits on the shelf
Two spools labeled with the same polymer and color are not automatically identical in printing history. One may be new, one may have absorbed moisture, and one may come from another production lot.
Moisture-sensitive filament can produce bubbles, uneven extrusion, rough surfaces, stringing, or weaker-looking layers. Prusa’s official filament drying guidance recommends closed storage with desiccant and emphasizes that more hygroscopic materials need tighter handling.
Disclosure: The next link is a material-partner link. Kevin may receive a benefit if you purchase through it, at no added cost to you. The recommendation remains based on project fit.
For repeat FDM work, document the product and color, then confirm current specifications and availability before promising a match. Kevin’s COEX material-partner page is one source to consider when the material suits the job; code 3DPRINTINGBYKEVIN provides 15% off when applicable.
3. Printers drift through wear, maintenance, and setup
A nozzle can wear. A belt can loosen. A build surface can become contaminated. A hotend or extruder can behave differently after maintenance. Moving the file to another printer introduces another complete machine system, even when both printers are the same model.
Run the site’s practical 3D-printer calibration workflow when the evidence points to the machine. Calibration should answer a specific question; it should not become a ritual that erases a known-good setup without documentation.
4. The room becomes part of the process
Drafts, seasonal temperature changes, an open enclosure, direct airflow, or a cold build surface can change how a part cools. Large flat parts, taller parts, and higher-shrink materials are especially sensitive to thermal differences.
Control what you reasonably can, and record the conditions when the job is demanding. Do not solve repeatability by sealing printers into an unsafe space. CDC/NIOSH recommends engineering controls, including appropriate ventilation and filtration, in its safe 3D-printing guidance.
5. Orientation and bed position change the physical result
Rotate a part and the layer direction, support contact, visible surface, cooling exposure, and load path can all change. Fill the entire plate and parts near one edge may experience different airflow or failure risk than parts near the center.
If the first article was approved in one orientation, do not casually rotate the production version to save time or fit more copies. Treat orientation as part of the specification, then validate any change.
6. Cleanup and assembly create their own variation
Support removal, sanding, drilling, heat-set inserts, bonding, painting, and force-fitting can change dimensions or damage features after the printer stops. A repeatable print can become a non-repeatable finished part if the handwork is undefined.
Write down the tool, sequence, fixture, adhesive or hardware, cure time, and acceptance check when those steps affect the result. The finished assembly—not the bare print—is the product the customer receives.
Appearance is not proof of equivalence. Two parts can look alike and fit differently. Two parts can fit alike and carry load differently. Define what “match” means before deciding whether the repeat print passed.
Build a golden setup—not just a golden sample
An approved sample is useful, but it cannot reproduce itself. Pair it with a controlled record that explains how it was made and how it was accepted.
Use a clear version number and preserve the approved source and export.
Record slicer version, printer profile, material profile, and project settings.
Save rotation, supports, modifiers, seam decisions, and bed position.
Record polymer, brand, product, color, spool or lot, and conditioning.
Record printer, nozzle type and size, build plate, and relevant maintenance.
Define support removal, sanding, inserts, bonding, finishing, and cure time.
List the dimensions, fits, functions, surfaces, and hardware that must pass.
Photograph and identify the approved sample, date, file, and decision.
NIST’s review of test artifacts for additive manufacturing explains why a standardized part can help compare machine or process performance. In a small FDM shop, the same principle can be scaled down: use a simple, relevant test feature to investigate the process instead of risking the entire product.
Use the P.R.I.N.T. Repeatability Planner
The P.R.I.N.T. Method™ keeps the real requirement in front of the settings. Choose what must match, what changed, and how many parts you need. The planner will give you a sensible first control sequence.
Find your first repeatability checks
This is a planning aid, not a guarantee of dimensional or mechanical performance.
How much inspection is enough?
Inspection should follow risk. A drawer label does not need the same control plan as a loaded bracket. The correct question is not “Did I measure everything?” It is “Did I verify the features that determine acceptance?”
- Before the run: Confirm the controlled file, material, machine, orientation, and written acceptance criteria.
- First part: Check every critical feature and complete the real assembly or fit test.
- During the run: Sample at a frequency that reflects quantity, drift risk, process changes, and the consequence of a bad part.
- After any change: Treat a new spool, nozzle, printer, profile, orientation, repair, or post-processing method as a reason to recheck.
- At the end: Verify the last part and preserve production notes, rejects, rework, and approved records.
The site’s first-article guide for small-batch 3D printing explains how to approve one representative part before releasing a larger quantity. For replacement work, pair that process with a controlled 3D-printed replacement-part test fit.
A failed repeat part is useful evidence when you preserve the comparison. Label it, record the suspected change, measure the affected feature, and test one correction at a time. Random tuning destroys the trail that could reveal the cause.
When repeatability needs a different manufacturing route
FDM is valuable because it is flexible, accessible, and fast to revise. Those strengths do not make it the best route for every tolerance, surface, material, quantity, or consequence of failure.
If the required control cannot be demonstrated with the selected printer, material, geometry, and inspection method, compare another process. The site’s guide to when to stop 3D printing production parts can help frame that decision.
Parts involving personal safety, pressure, fuel, flame, high voltage, regulated medical use, certification, extreme environments, or unacceptable consequences of failure may require qualified engineering, traceability, specialized testing, another manufacturing process, or a decision not to proceed.
Need repeat parts to match an approved sample?
Send the file or broken original, the approved sample if available, quantity, material, critical dimensions, intended use, assembly details, finish, deadline, and what happens if the part does not match. I can evaluate whether the project fits my Northern Kentucky FDM workflow or needs another manufacturing route.
Start a Project Review Explore the P.R.I.N.T. It EbookQuick knowledge check
Frequently asked questions
Can two 3D prints from the same G-code still differ?
Yes. G-code controls the motion and process commands, but the material condition, machine state, build surface, environment, and post-processing can still change. The same G-code reduces one source of variation; it does not eliminate all of them.
How do I make 3D-printed parts more dimensionally consistent?
Freeze the file and slicer package, keep the material conditioned, use the same orientation and machine setup, maintain the printer, control cooling and drafts, and inspect defined critical dimensions. Validate changes with a small relevant test before releasing the full part.
Does more infill make repeat parts match better?
Not automatically. Infill can affect stiffness, time, material use, and thermal behavior, but it does not correct a wrong file, wet filament, worn nozzle, poor first layer, changed orientation, or uncontrolled cleanup. Diagnose the actual mismatch first.
Should every part in a small batch be measured?
That depends on the requirement and risk. Critical or high-consequence features may justify complete inspection. Lower-risk work may use an approved first part plus documented sampling. Define the plan before production rather than after a mismatch appears.
Can a different printer make an equivalent part?
Possibly, but equivalence must be demonstrated. Revalidate critical dimensions, fit, surface, strength-related features, and assembly after changing printers—even when the machines are the same model.
What should I send with a repeat-order request?
Send the controlled file, approved sample or photos, previous order details, material and color, quantity, critical dimensions, intended use, hardware, finish, packaging, deadline, and any changes since the earlier run. Do not assume the old filename identifies the full approved process.
What changed between your two prints?
Was it the fit, surface, strength, color, or assembly? Share the symptom and the one variable you suspect in the comments. Your example may help another maker stop guessing and start testing.
Keep the file controlled, keep the process visible, and measure what makes the part useful.
