
Small-batch 3D printing • first-article approval
The model opens. The first print looks clean. The quantity is 25, 50, or perhaps 100. It is tempting to fill every build plate and call the design finished.
That is exactly when a small uncertainty can become a full box of unusable parts. A hole may be slightly tight. A clip may work once but fatigue after repeated flexing. A support scar may land on a mating surface. An insert may sit too close to an edge. A part that looks perfect on the bench may still fail during installation.
Before releasing a small 3D-printed batch, approve one representative production part against a written list of requirements. That part is often called a first article. It is not a magic guarantee, but it creates a deliberate checkpoint between “the printer made it” and “make the rest.”
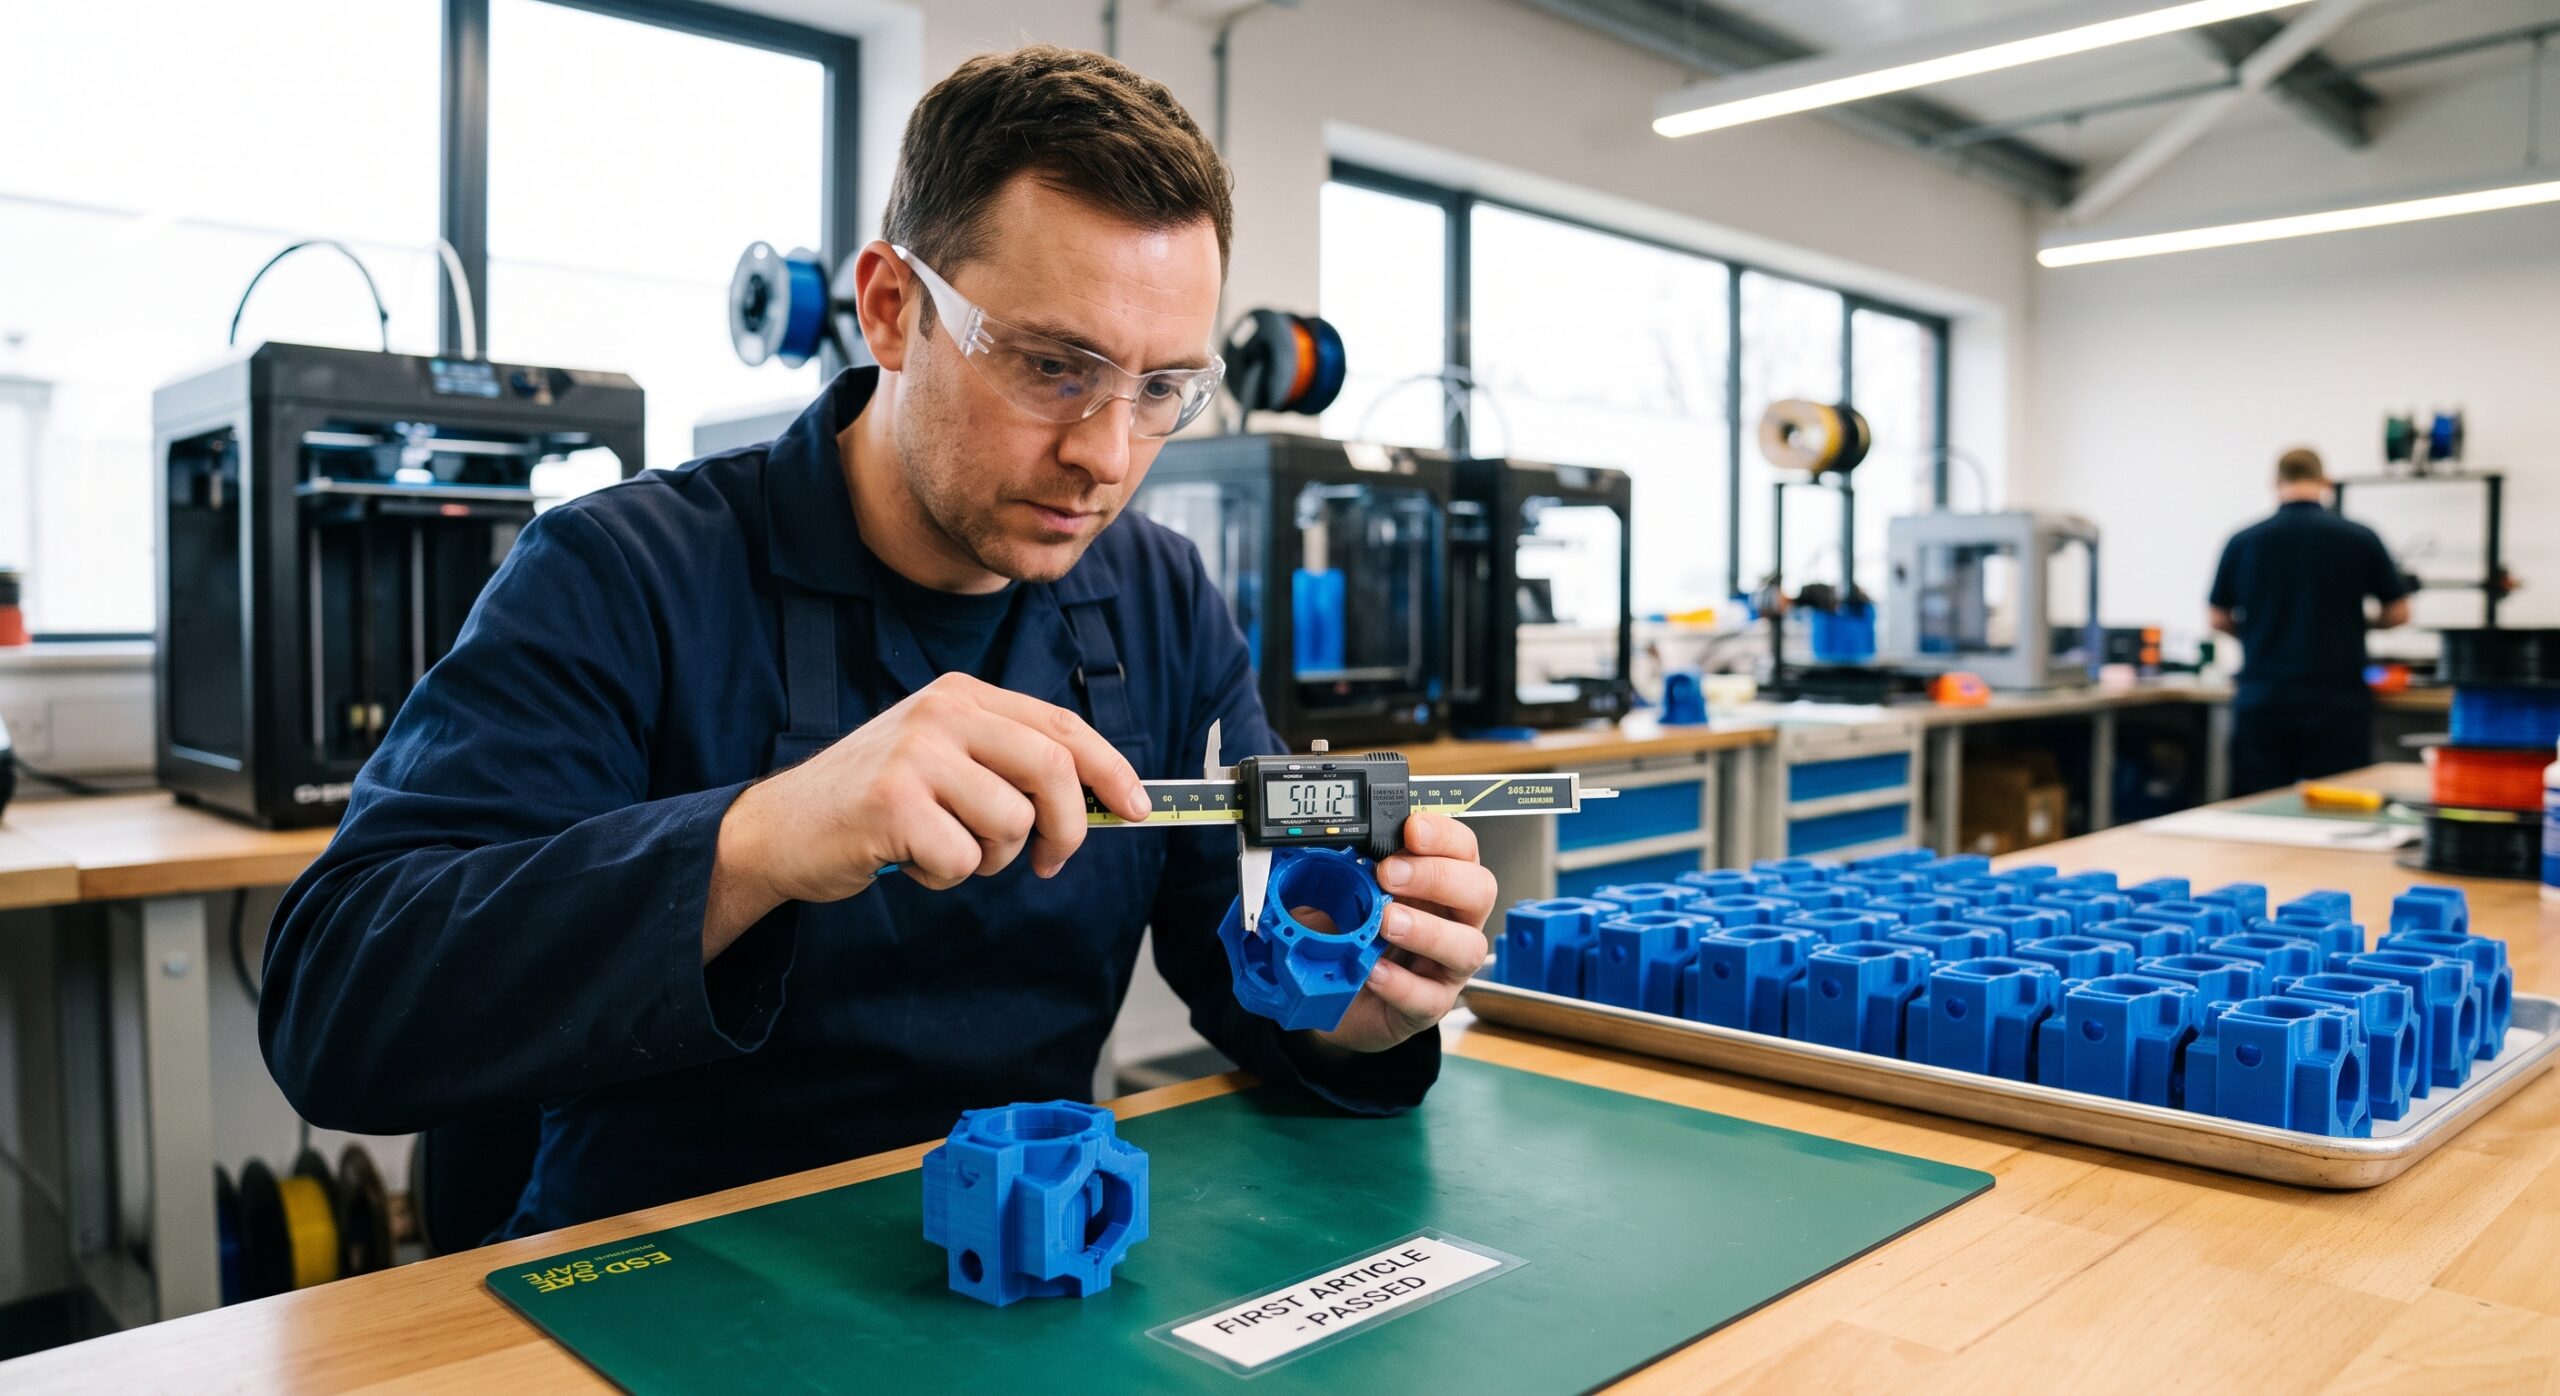
Quick answer: approve one representative part before the batch
Print the first article with the intended file revision, material, orientation, layer height, wall strategy, hardware, and finishing steps. Then check the features that decide whether the part succeeds: fit, critical dimensions, movement, fastener behavior, surface requirements, assembly, labeling, and the real operating environment.
If it passes, record what was approved and lock the production inputs. If it does not, revise the design or process and make a new first article. Do not knowingly multiply an unresolved problem.
Prototype, first article, pilot batch, or production batch?
These terms are easy to blur together. A prototype can answer one narrow question. A first article should represent the intended production method. A pilot batch tests repetition and handling. A production batch delivers the approved quantity.
| Stage | Question it should answer | What may still change | Do not assume |
|---|---|---|---|
| Feature test | Does this hole, clip, thread, hinge, or fit allowance work? | The rest of the geometry, appearance, material, or orientation | That a small coupon proves the entire part |
| Prototype | Does the overall design solve the problem? | Geometry, material, settings, finish, and assembly method | That a prototype is automatically production-ready |
| First article | Does one representative production part meet the agreed requirements? | Only controlled corrections that trigger a new review | That one pass guarantees every later unit |
| Pilot batch | Can the approved process repeat across several parts, build positions, and handling steps? | Inspection frequency, layout, packaging, and minor documented process controls | That every machine or build plate behaves identically |
| Production batch | Can the required quantity be produced and verified to the released specification? | Nothing material without approval and traceability | That visual similarity alone proves acceptance |

If you are still deciding whether the geometry itself is correct, begin with a controlled replacement-part test fit. A first article comes later, when the file and production route are close enough to be evaluated as the intended deliverable.
Why one clean print does not automatically prove the batch
FDM 3D printing combines a digital file, slicer settings, a machine, a build surface, a nozzle, filament, temperature control, cooling, orientation, and human handling. A change in any one of those inputs can affect the output. Even without an intentional change, wear, contamination, moisture, build position, or a support-removal step can introduce variation.
The National Institute of Standards and Technology’s additive-manufacturing measurement program identifies process variability, part accuracy, surface quality, material consistency, machine maintenance, measurement, and inspection as important manufacturing challenges. NIST’s program is broader than desktop FDM and concentrates heavily on industrial metal additive manufacturing, but the central lesson still applies: repeatable production requires defined inputs and meaningful measurements.
One important distinction
This article uses first article as a practical description for the first representative production sample. It does not claim that a desktop-FDM check satisfies a contractual First Article Inspection requirement, a regulated quality system, or formal qualification for aerospace, medical, automotive, defense, or other high-consequence work.
If a drawing, purchase order, industry standard, certification, or customer quality agreement controls the project, follow that requirement. Parts whose failure could injure someone, damage critical equipment, or violate a regulation need appropriately qualified engineering, manufacturing, inspection, and documentation.
What should the first article prove?
Start with the part’s job. A decorative cover, a snap-fit cable guide, a bracket with threaded inserts, and a repeated assembly all need different evidence. The approval list should emphasize the few characteristics that decide success.
Correct revision: The sample came from the named, dated, and approved model—not a similarly named earlier export.
Critical dimensions: Hole spacing, overall envelope, wall thickness, slot width, and other agreed features are within the practical acceptance range.
Real fit and motion: The part installs, aligns, clears neighboring components, and moves or flexes as intended.
Material and process: The sample uses the intended material, orientation, layer strategy, walls, infill approach, and post-processing.
Hardware and assembly: Screws, nuts, inserts, adhesive joints, pins, labels, and mating components work in the real sequence.
Appearance and handling: Color, visible surfaces, support marks, sharp edges, cleanliness, and packaging meet the stated expectation.
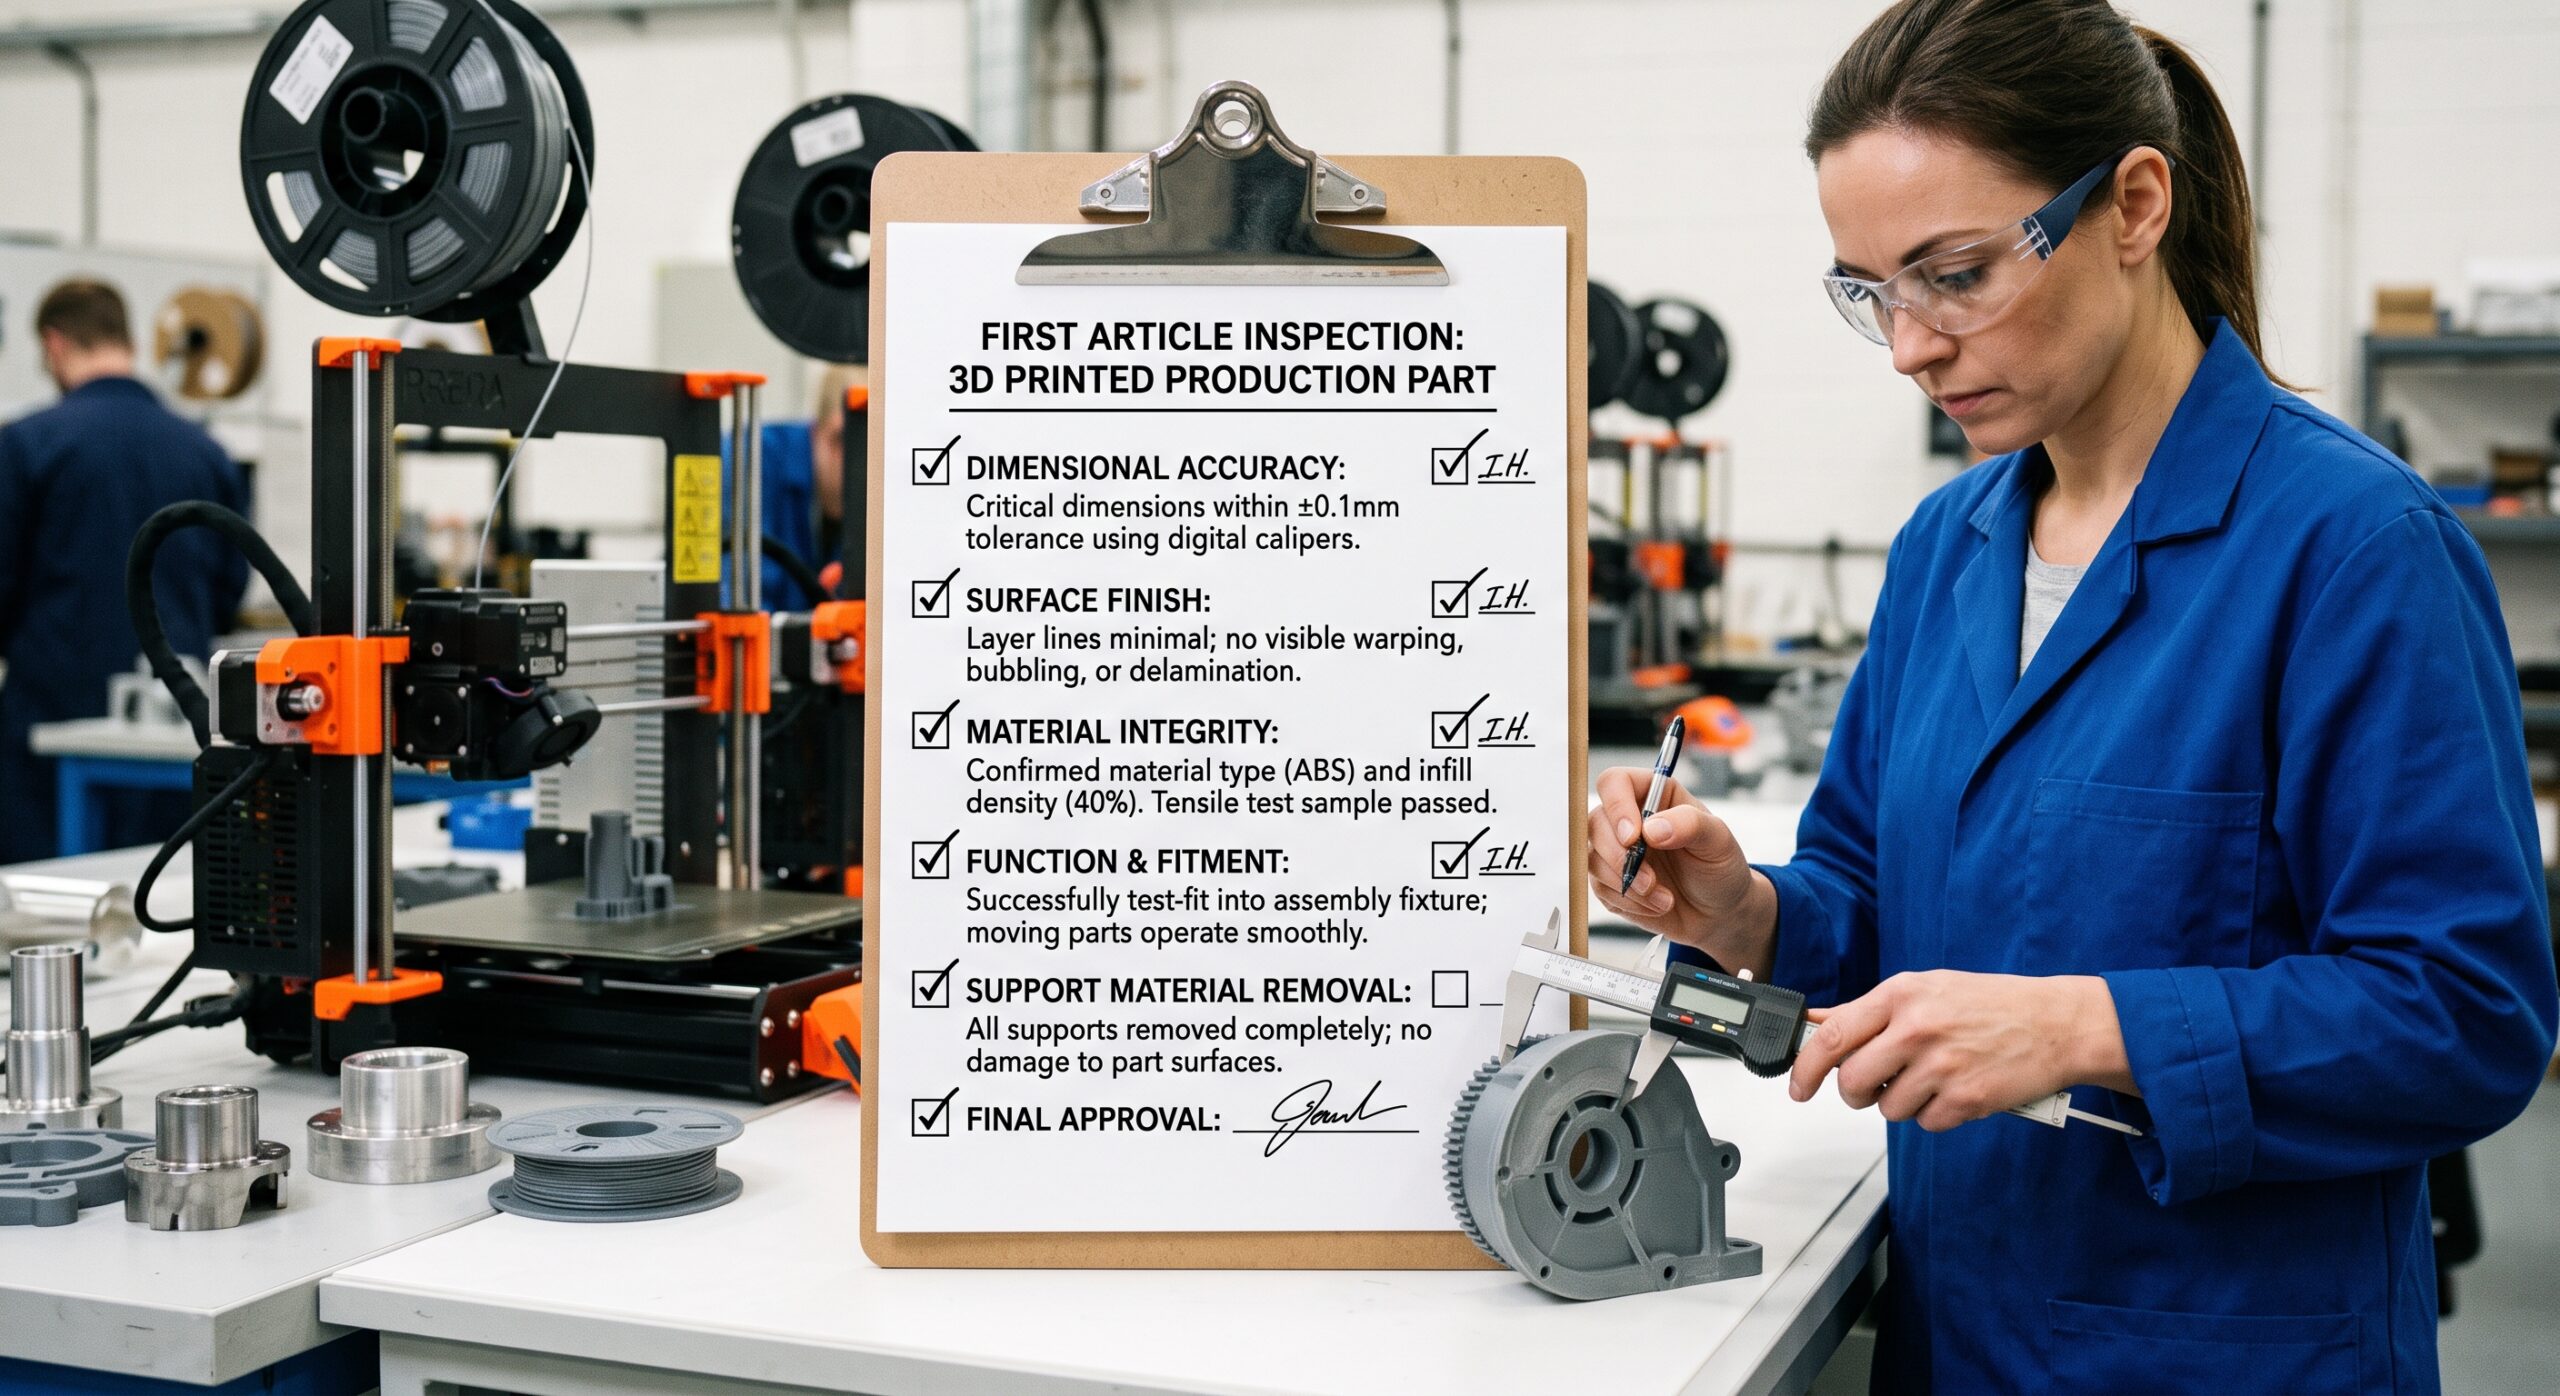
A critical dimension should have an acceptance range or a functional test—not merely a target number with no context. If a slot must slide over a 20 mm rail, the useful question is whether the assembled part moves correctly under the expected conditions. The measurement supports that decision; it does not replace it.
Need a better measurement packet? Use the site’s practical guide to measuring a replacement part before the first article is produced.
Freeze the production recipe after approval
An approved sample has limited value if the batch is printed from a different export, a casually altered slicer profile, another material, or a new orientation. Record enough information to identify what produced the accepted result.
- File identity: filename, revision, date, and—when useful—a checksum or controlled storage location;
- Quantity and grouping: total units, left/right variants, colors, sets, or assembly combinations;
- Material: polymer type, product line, color, and lot or spool tracking when the project warrants it;
- Machine context: printer, nozzle type and diameter, build plate, and relevant maintenance status;
- Slicer context: software version, orientation, layer height, walls, infill approach, supports, brim, and any intentionally changed parameters;
- Finishing: support removal, drilling or reaming, insert installation, bonding, deburring, cleaning, labeling, and packaging;
- Acceptance plan: what is checked, how it is checked, how often it is checked, and what happens when a part fails.
The objective is not paperwork for its own sake. The objective is to make “same part” mean something specific.
Material consistency begins before the batch
Buy enough of the intended material before approving the production route, especially when color matching or repeat orders matter. Drying, storage, and supplier guidance should be treated as controlled parts of the workflow.
Affiliate disclosure: The following link is an affiliate relationship. If you purchase through it, 3D Printing by Kevin may earn a commission at no additional cost to you.
Explore COEX 3D filament and use code 3DPRINTINGBYKEVIN for 15% off. Confirm the code and current terms at checkout. Choose material from the part’s requirements and test results—not from the discount alone.
Do not inspect only the first part
A first article proves that one representative part met the approval checks. It does not prove that the nozzle will remain clean, the build plate will stay consistent, every support will be removed correctly, or the final part in the queue will match the first.
A practical small-batch plan can include:
Beginning
Verify the released file and process. Inspect the first production units closely before the queue grows.
During
Check selected parts across build plates, spool changes, machine changes, and assembly steps.
End
Confirm the last units and the finished count. Watch for drift, wear, damage, missing hardware, and labeling errors.
Every unit
Use 100% inspection for characteristics where a simple visual, go/no-go, assembly, or count check is practical and important.
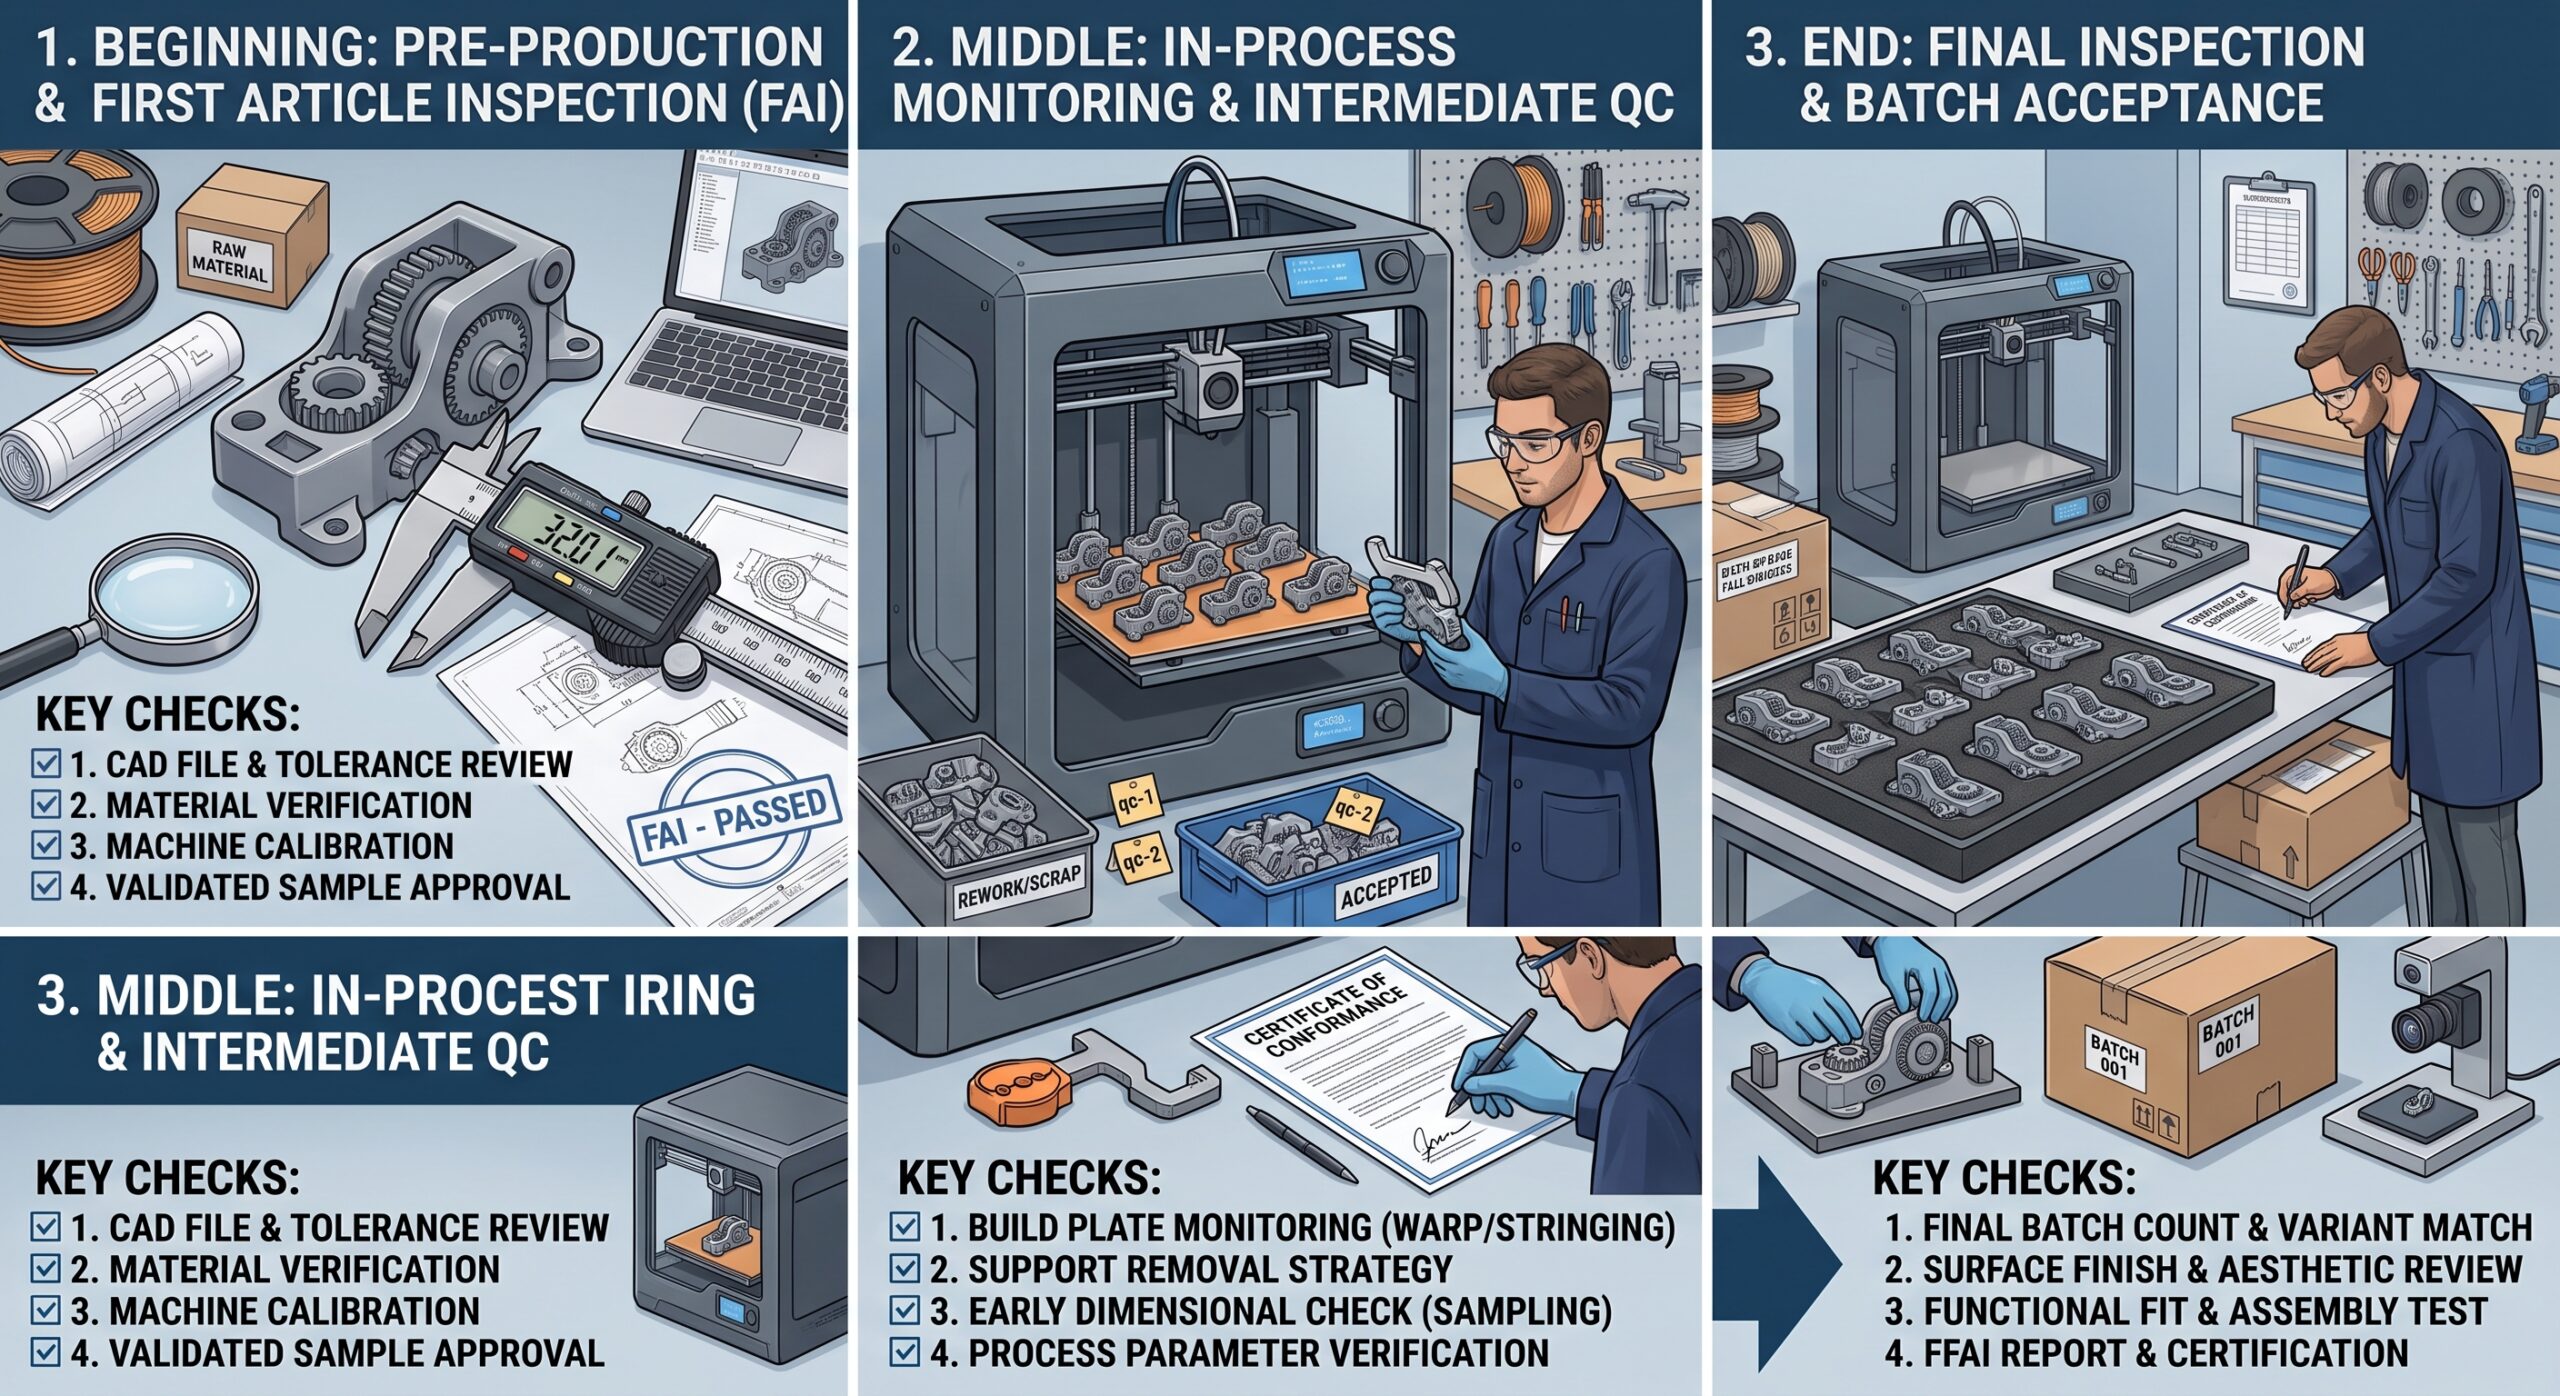
There is no universal sampling percentage that is correct for every project. Quantity, process history, feature risk, measurement effort, customer requirements, and the consequences of a defect all matter. A low-risk organizer can use a different plan than a part that positions expensive equipment. If the consequence of failure is high, a desktop small-batch workflow may be the wrong route entirely.
Use this small-batch release planner
Build a practical approval path
Choose the answers that best match your project. This planner does not save or transmit your selections, and it does not replace engineering or contract requirements.
Put the first article inside the P.R.I.N.T. Method™
P — Problem
State what the batch must solve and who will use it. “Make 100” is a quantity, not a problem definition.
R — Requirements
Record quantity, fit, environment, load, appearance, hardware, packaging, deadline, and failure consequences.
I — Interfaces
Identify the holes, clips, slots, mating faces, fasteners, movement paths, and reference dimensions that control acceptance.
N — Next-Best Materials & Methods
Choose the material, process, orientation, batch layout, finishing method, and inspection tools that fit the job.
T — Test & Tune
Approve a representative part, pilot the repeat process when warranted, inspect through production, and document any controlled change.
Three batches—and three different approval plans
Ten simple drawer labels
Risk is low and fit may be generous. One representative print can confirm size, text legibility, color, and attachment. Visual inspection and a final count may be sufficient if the customer has no tighter requirement.
One hundred thirty-five matching brackets
Quantity magnifies a small mistake. Confirm the model revision, mounting dimensions, orientation, material, color, and fastener fit. A short pilot batch can show whether the arrangement, cleanup time, and inspection method remain practical before the full queue is released.
A recurring multi-part assembly
The approved unit should include the real pins, screws, adhesive, alignment method, labels, packaging, and assembly order. Track revisions and matched components carefully. A change that seems minor—such as a new guide pin or split color body—can affect several downstream parts and should trigger a controlled review.
When can you skip a separate first article?
For a very small quantity of low-risk, familiar parts, the first production unit may also serve as the approval sample. That can be reasonable when the requirements are simple, the process is proven, and the customer understands the plan.
What should not disappear is the checkpoint. Someone still needs to compare the first acceptable unit with the requirement before the rest of the batch gets too far ahead. The higher the quantity, complexity, assembly work, or failure consequence, the less sensible it is to rely on an informal glance.
Quick knowledge check
Can you release the batch?
Choose one answer for each question, then check your score.
Frequently asked questions
What is a first article in small-batch 3D printing?
It is the first representative part made with the intended production file, material, orientation, process, and finishing steps, then checked against agreed requirements before the rest of the batch is released. Formal industries may define First Article Inspection differently and require specific documentation.
Is a prototype the same as a first article?
Not necessarily. A prototype may test fit, appearance, or one design idea using temporary settings or material. A first article should represent the intended production route closely enough to support an approval decision.
Should I approve an STL file or the physical part?
Both matter. The released file identifies the geometry, but the physical sample reveals how the selected machine, material, orientation, settings, and finishing steps actually produced the part. Approval should connect the physical result to the exact digital revision and process.
Does one approved part guarantee the full batch?
No. It proves that one representative part met the checks. Production still needs process control and an inspection plan that can detect drift, damage, missing hardware, incorrect counts, or changes introduced later.
How many parts should be inspected?
There is no universal number. The plan depends on quantity, feature risk, process history, measurement effort, customer requirements, and failure consequences. Some quick checks can be performed on every part; more involved measurements may use a documented risk-based schedule.
Will a first article increase the quote?
It adds deliberate preparation, printing, inspection, and communication, but it can prevent a geometry or process problem from being repeated across the batch. See what determines a custom 3D-printing quote for the broader cost picture.
Can Kevin manage production that is not suitable for in-house FDM?
Qualified projects may be evaluated for a managed outside manufacturing process when another technology is a better fit. The appropriate route depends on geometry, material, quantity, finish, documentation, budget, risk, and acceptance requirements.
Fact-check references and further learning
- NIST: Measurement Science for Additive Manufacturing Program
- NIST: Additive Manufacturing Part Qualification
- Maker’s Muse: 3D-printing education and project resources
References and destination links reviewed August 21, 2026. Formal quality, qualification, and inspection requirements vary by contract, industry, process, and consequence of failure.
If you want a structured foundation for files, materials, slicing, calibration, troubleshooting, maintenance, and the full P.R.I.N.T. Method™, continue with P.R.I.N.T. It: Practical 3D Printing for Beginners.
Have one part—or a quantity that makes mistakes expensive?
Send the file, planned quantity, intended use, critical dimensions, material or environment needs, hardware, finish expectations, and deadline. Kevin can review whether the practical next step is a feature test, one prototype, a representative first article, a pilot batch, in-house FDM production, or another managed manufacturing route.
Your turn: What would you inspect before approving 25, 50, or 100 copies of your part? Share the feature you would refuse to leave to chance in the comments. Your example may help another reader catch the expensive problem before the batch begins.
